
Lab 1: Getting Started with Copilot Cowork
Overview
In this lab you get oriented in Copilot Cowork, the agentic workspace inside Microsoft 365 Copilot. Copilot Chat answers one question at a time. Cowork works differently: it plans and carries out multi-step tasks for you, such as reading email, checking your calendar and working with files, and then delivers a finished result.
You will sign in, tour the Cowork home screen, see how task ideas pre-fill ready-to-run prompts, and review the Plugins page. Next you will seed your environment with sample emails, calendar events, OneDrive files and a Teams team. Finally, you will return to Cowork to explore work context, task history and scheduled tasks.
Note
Note: Tasks 2, 3 and 4 are prerequisite setup steps. Cowork acts on real data in your mailbox, calendar, files and Teams, so these tasks create the data that this lab and every later lab depend on. Complete them in order before Task 5.
Disclaimer: Cowork is AI-powered, so your output may differ from the screenshots. Follow the workflow and check the expected outcome.
Objectives
- Task 1: Sign in and explore the Cowork interface
- Task 2: Generate sample emails in Outlook
- Task 3: Generate sample calendar events in Outlook
- Task 4: Upload sample files to OneDrive and create a team in Microsoft Teams
- Task 5: Explore work context, task history and scheduled tasks
Task 1: Sign in and explore the Cowork interface
In this task, you sign in to Microsoft 365, compare Copilot Cowork with Copilot Chat, explore the Cowork home screen and see how task ideas pre-fill ready-to-run prompts. You also review the Plugins page, where plugins and skills extend what Cowork can do.
- Review how Copilot Cowork compares to Copilot Chat.
| Copilot Chat | Copilot Cowork |
|---|---|
| One question, one answer | Multi-step tasks from a single instruction |
| You guide each step | Cowork plans and executes the steps itself |
| Great for quick lookups | Great for complex, repeatable workflows |
| No task history | All tasks are saved and searchable |
- Open Edge, go to
www.office.comand click Sign in.
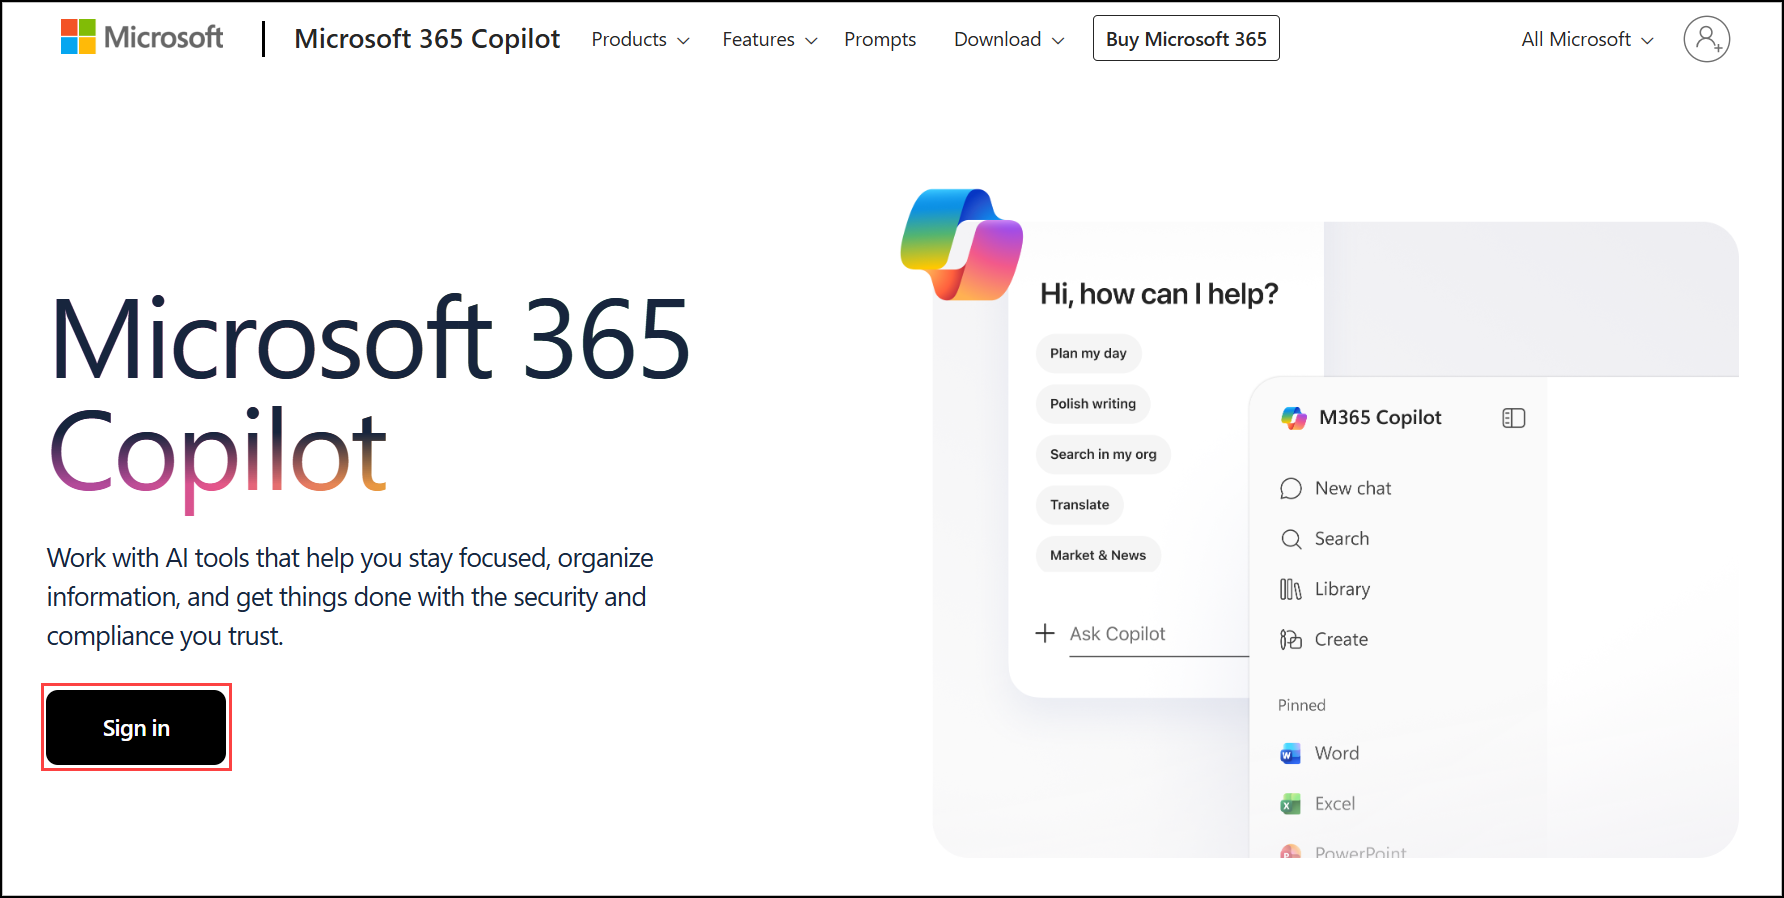
- On the sign-in page, enter your lab username and click Next.
- Username:
<your lab username>(from the lab environment details page)
- Username:
- Enter your Temporary Access Pass and click Sign in.
- Temporary Access Pass:
<your Temporary Access Pass>
- Temporary Access Pass:
- When the Stay signed in? dialog appears, select No.
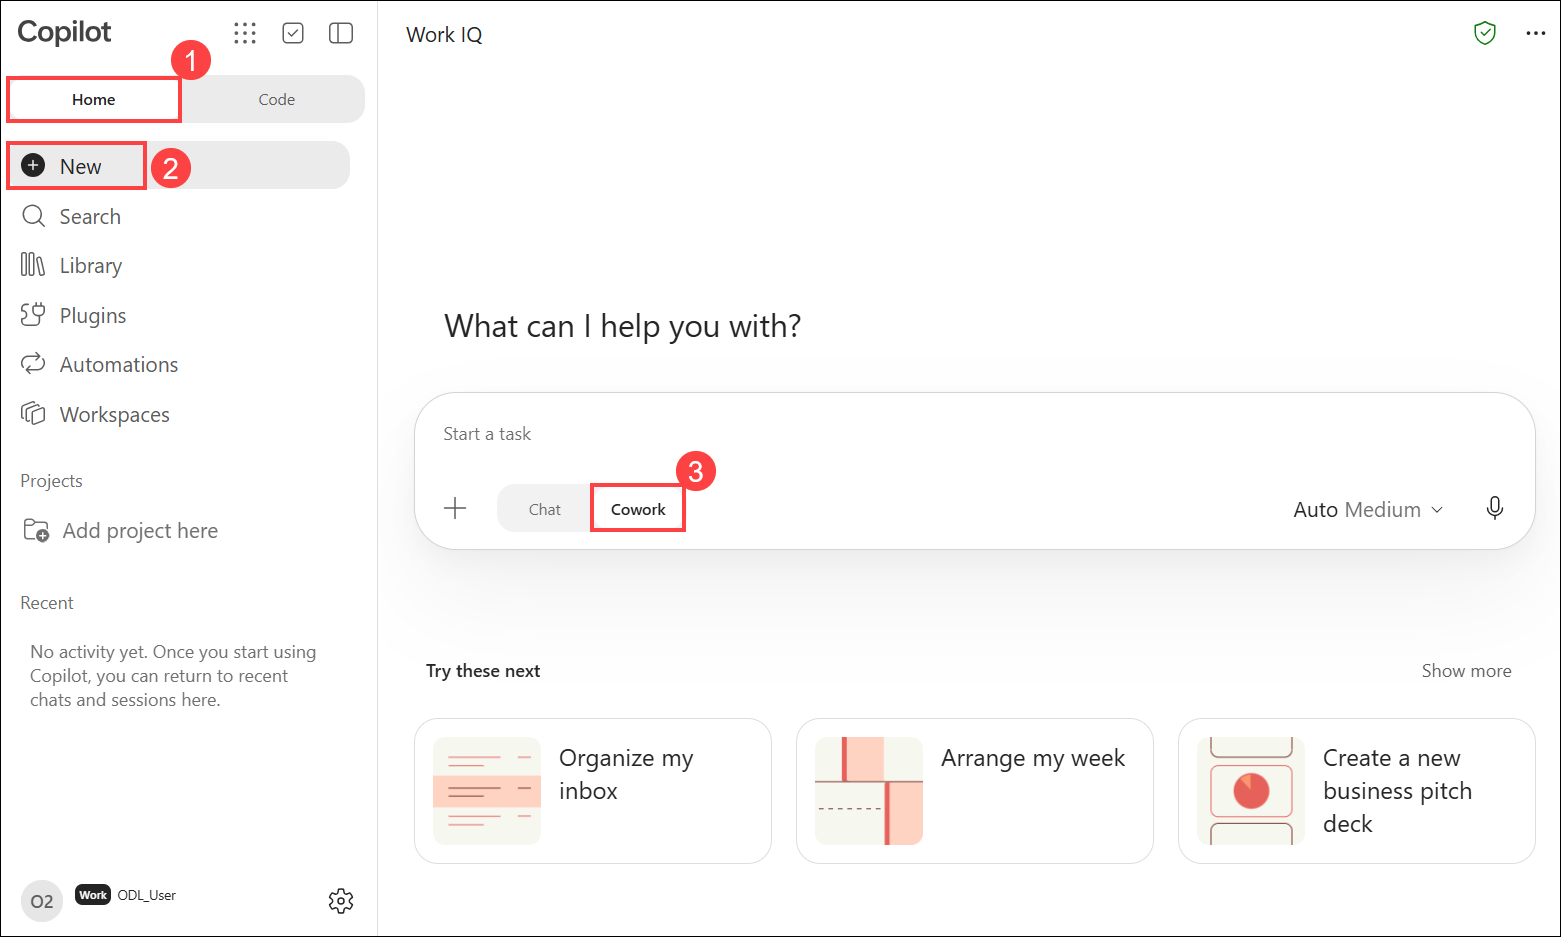
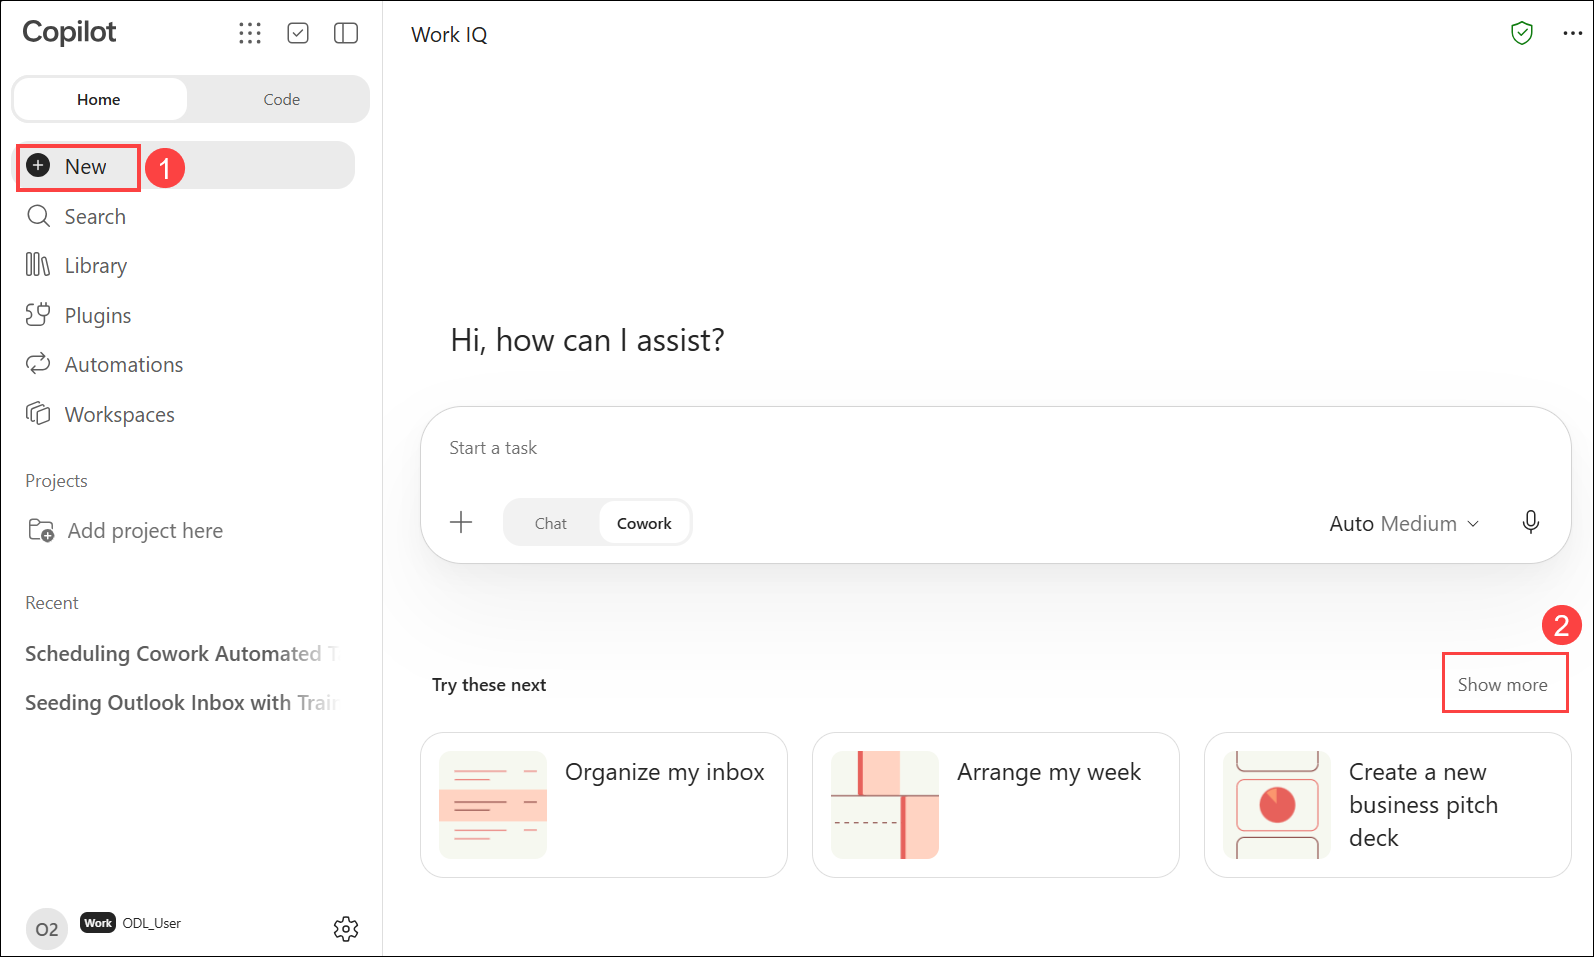
- To start a new Cowork session, on the Home (1) tab, select New (2), then select Cowork (3) in the task box.
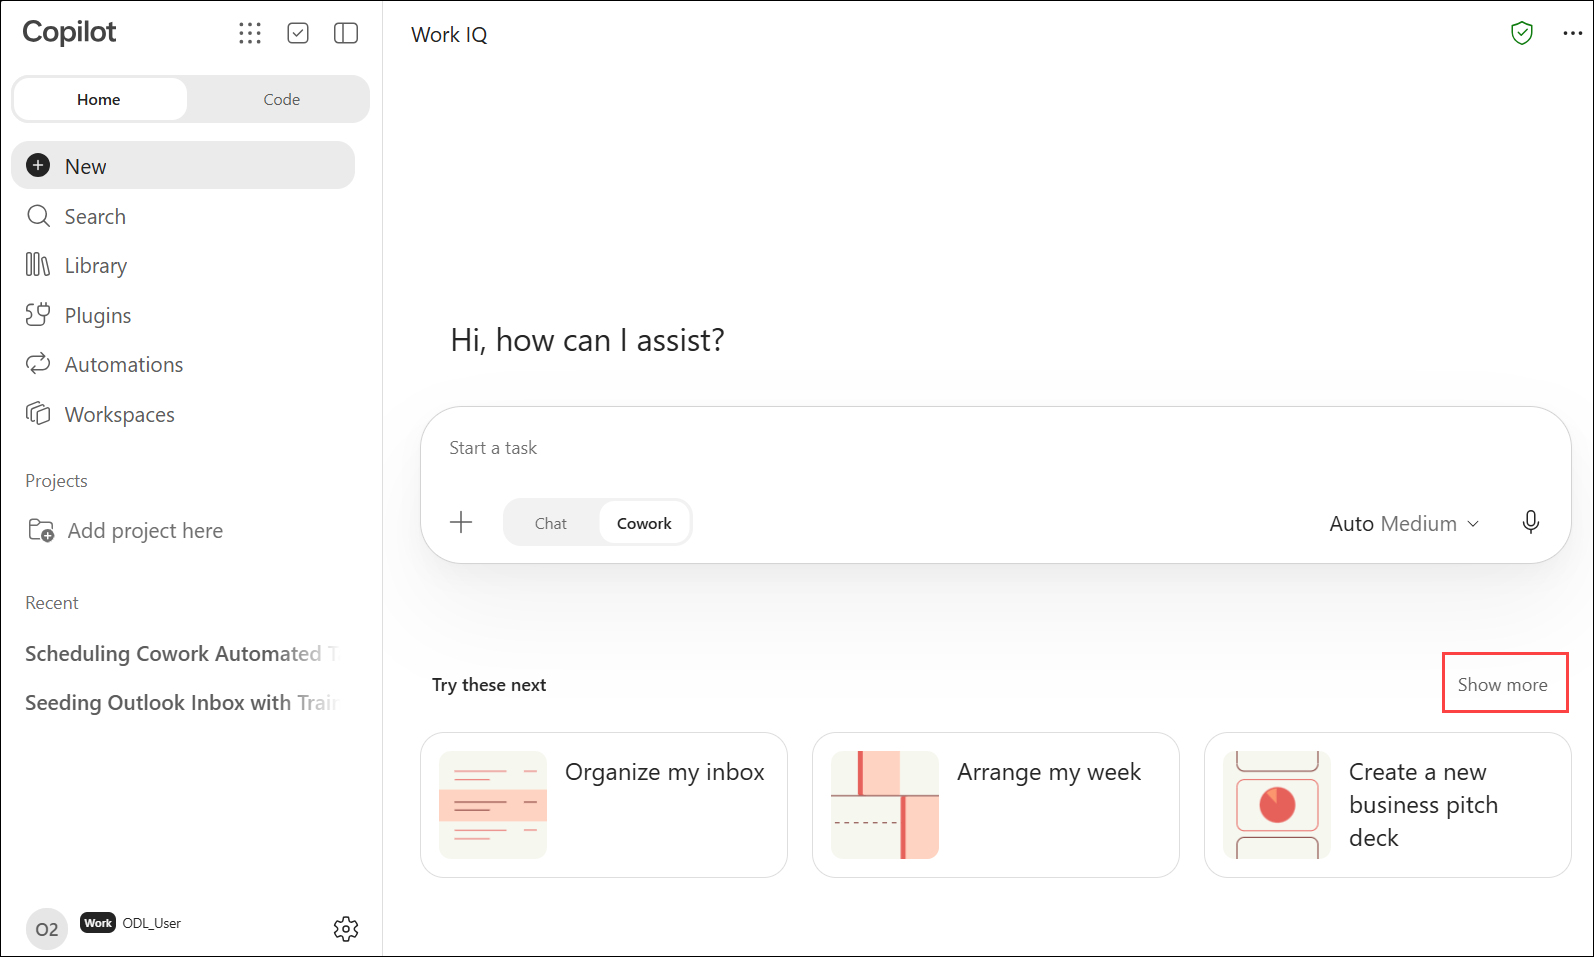
- To see more suggested tasks, select Show more next to Try these next.
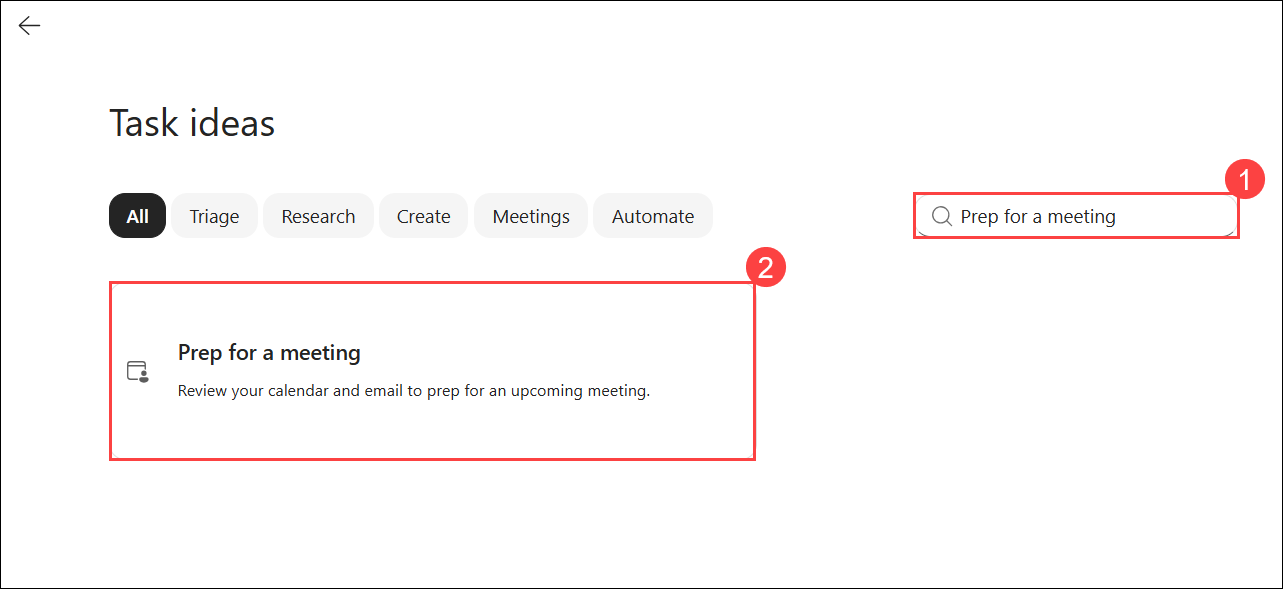
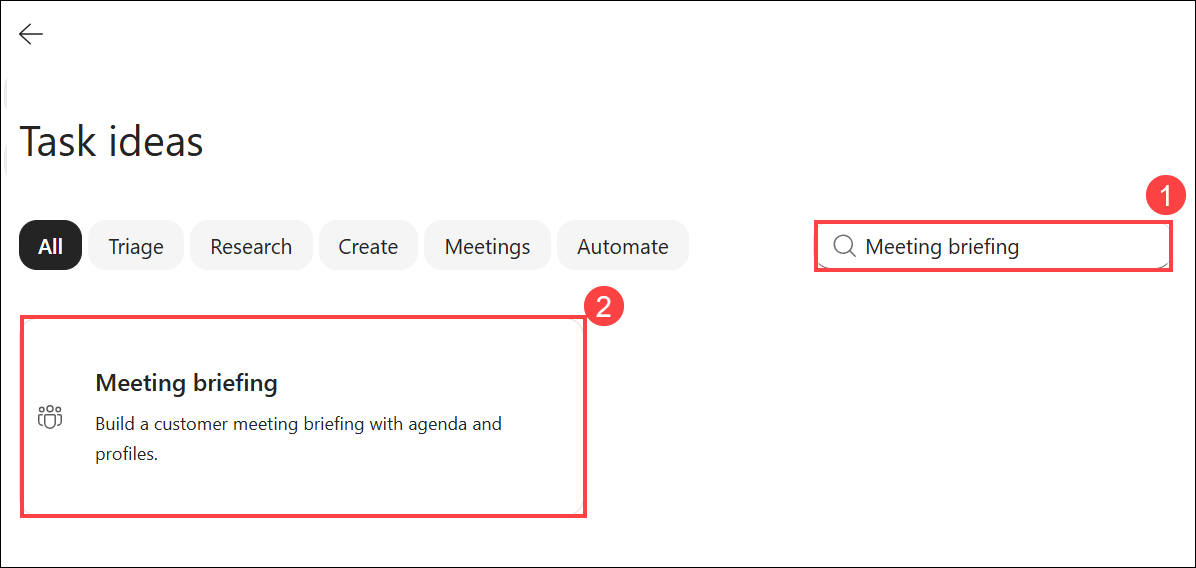
- On the Task ideas page, enter Prep for a meeting (1) in the search box, then select the Prep for a meeting (2) task.
Tip
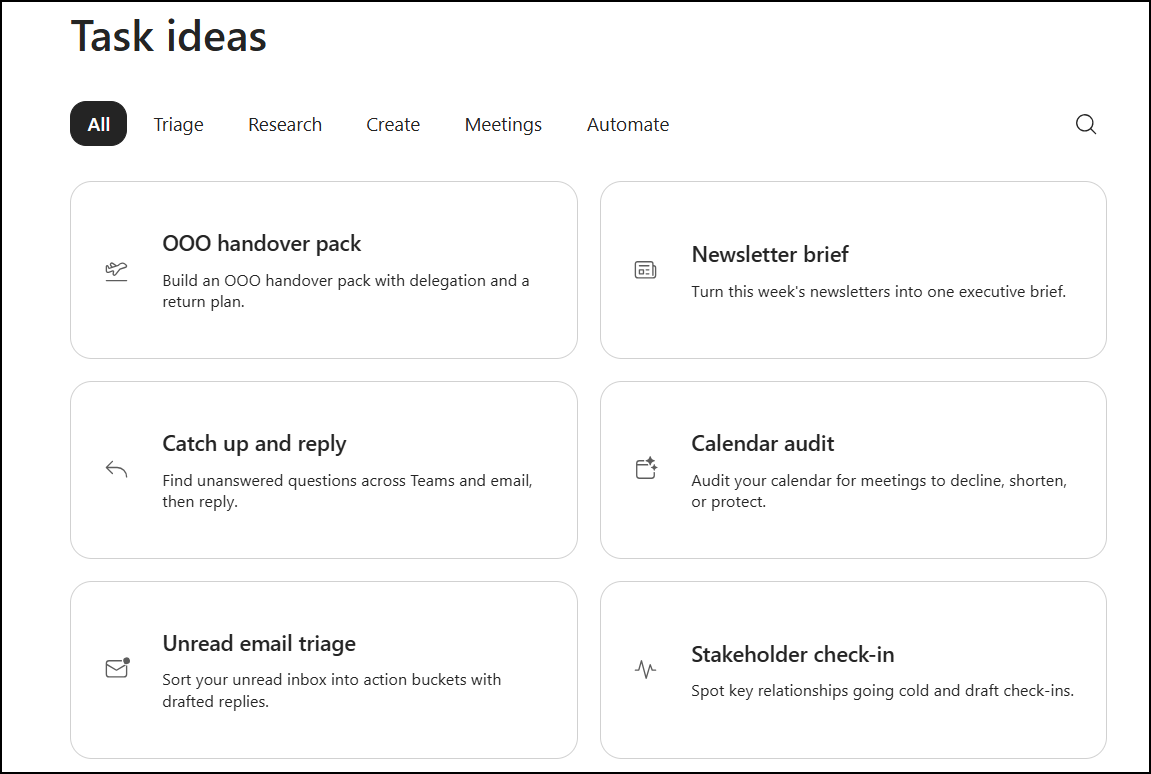
Tip: Task ideas are grouped into Triage, Research, Create, Meetings and Automate.
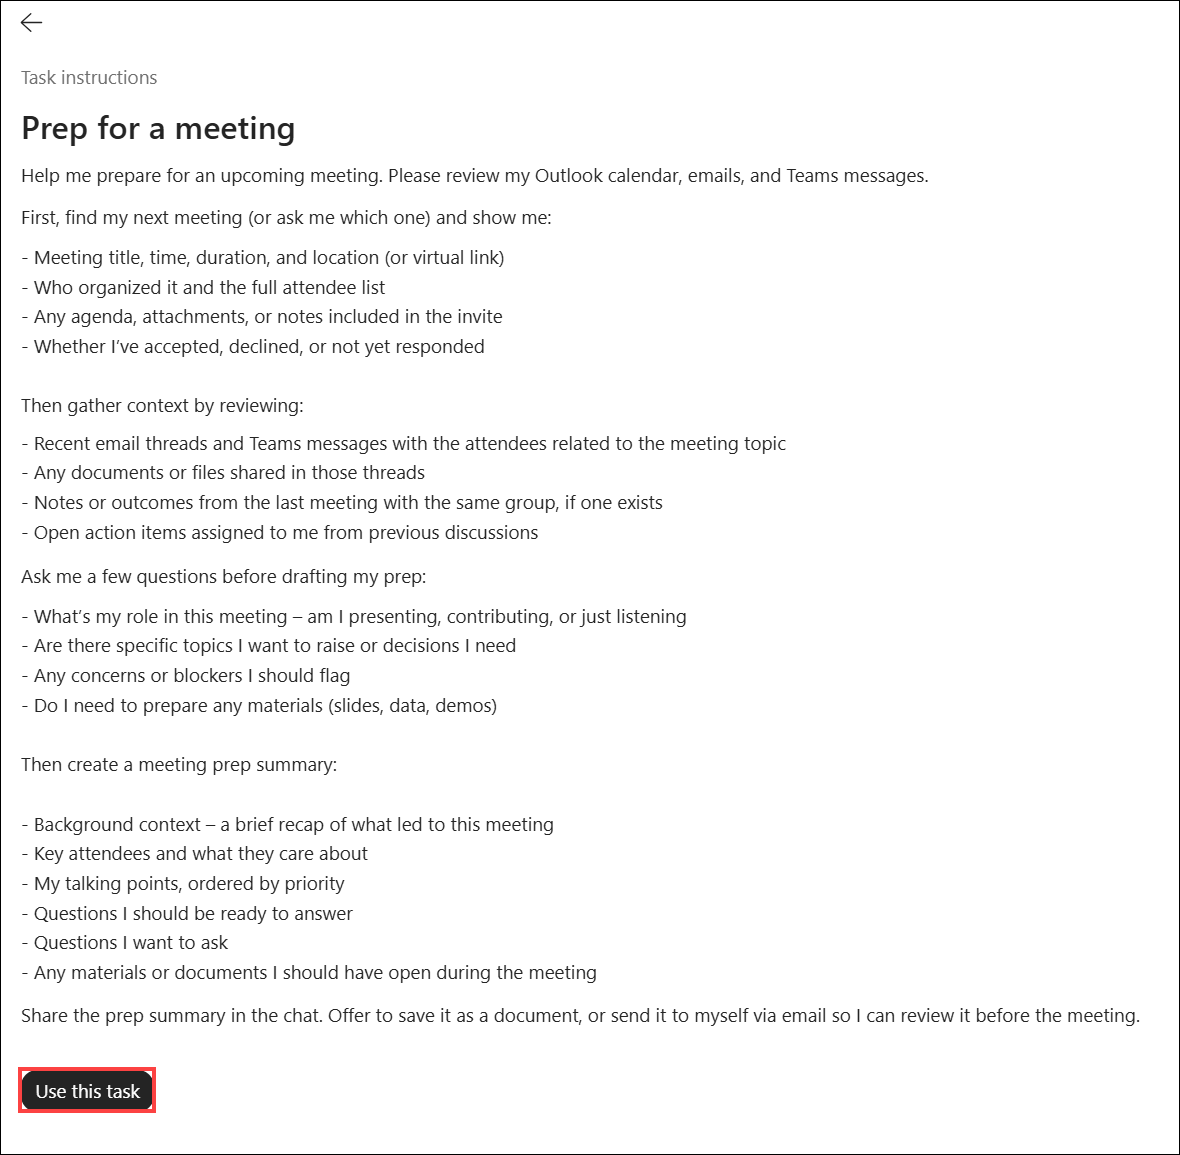
- Review the task instructions and click Use this task.
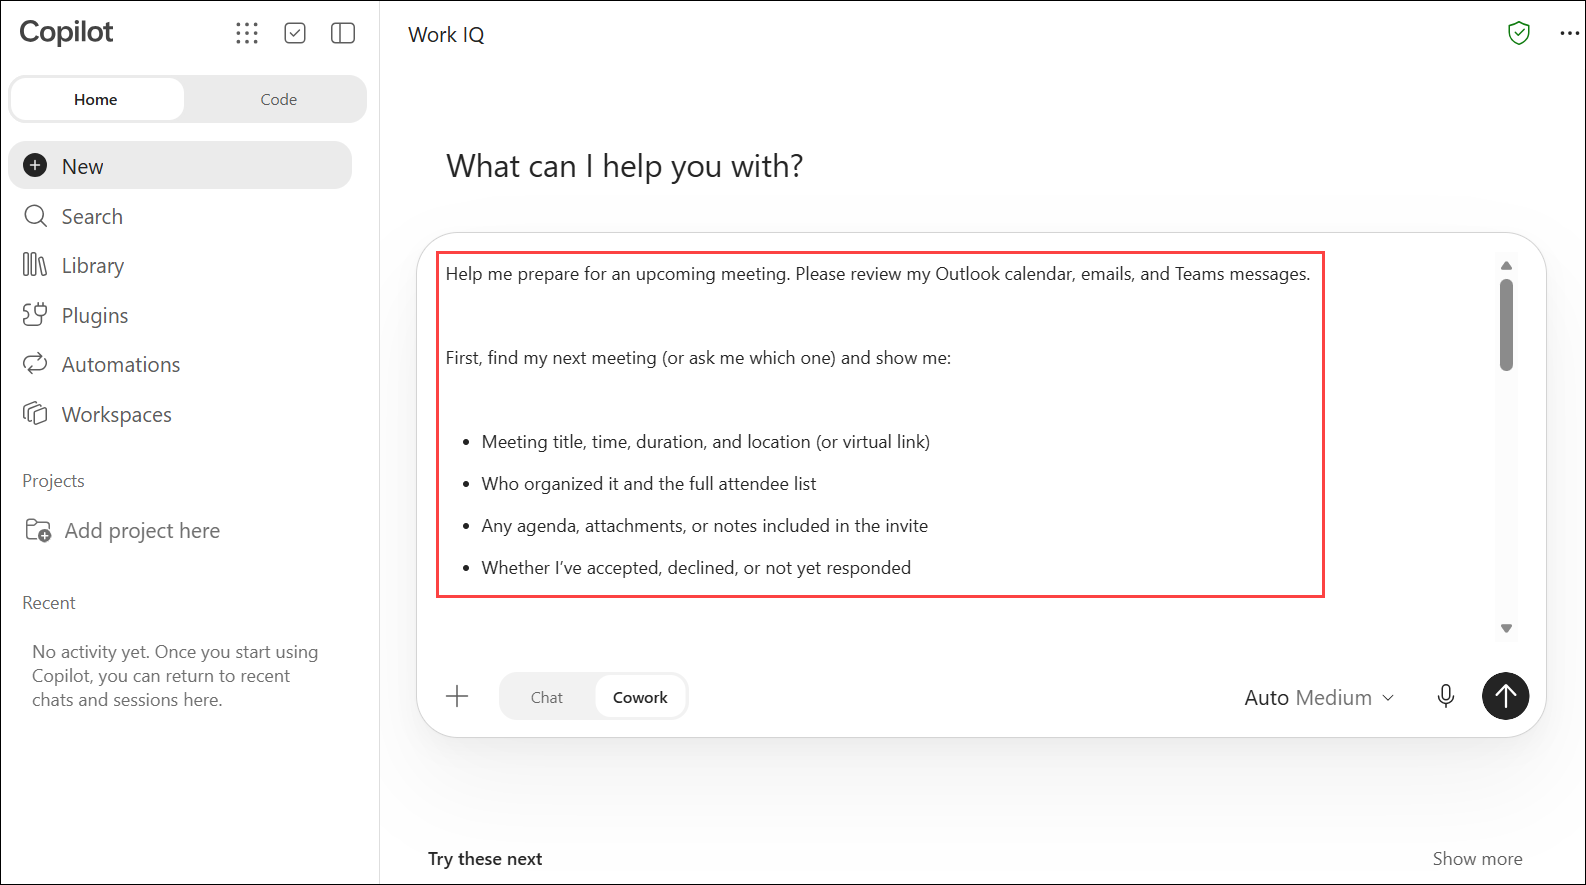
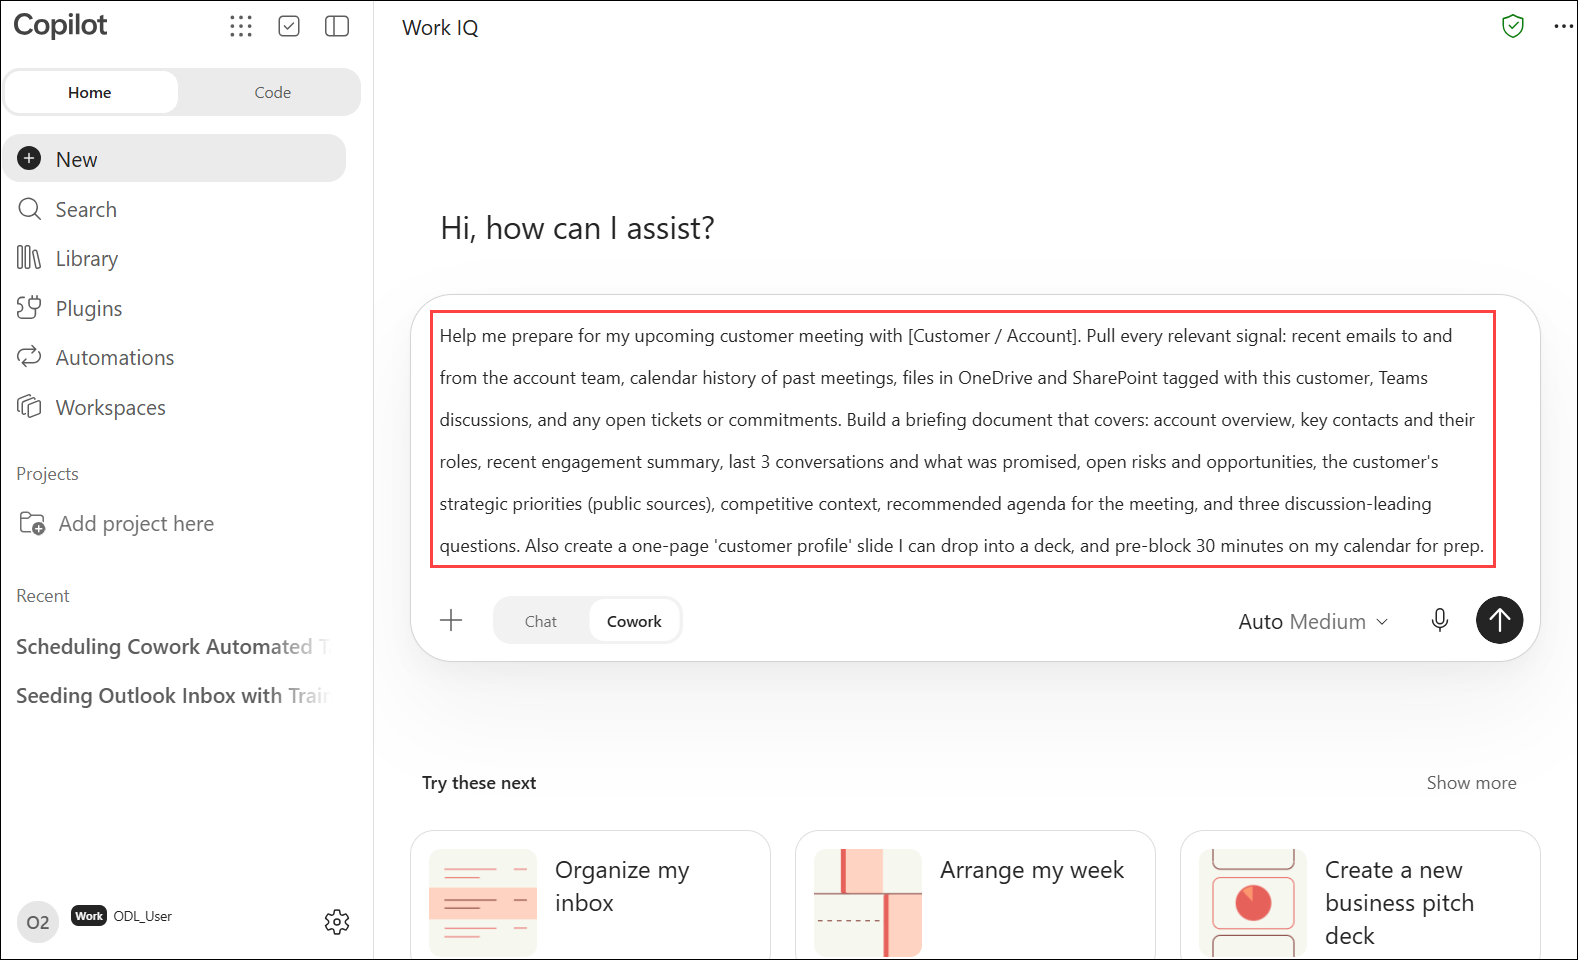
- Review the prompt that Cowork has pre-filled in the task box. In one instruction it gathers the meeting details, attendee context, related files and open action items. Clear the task box without sending it.
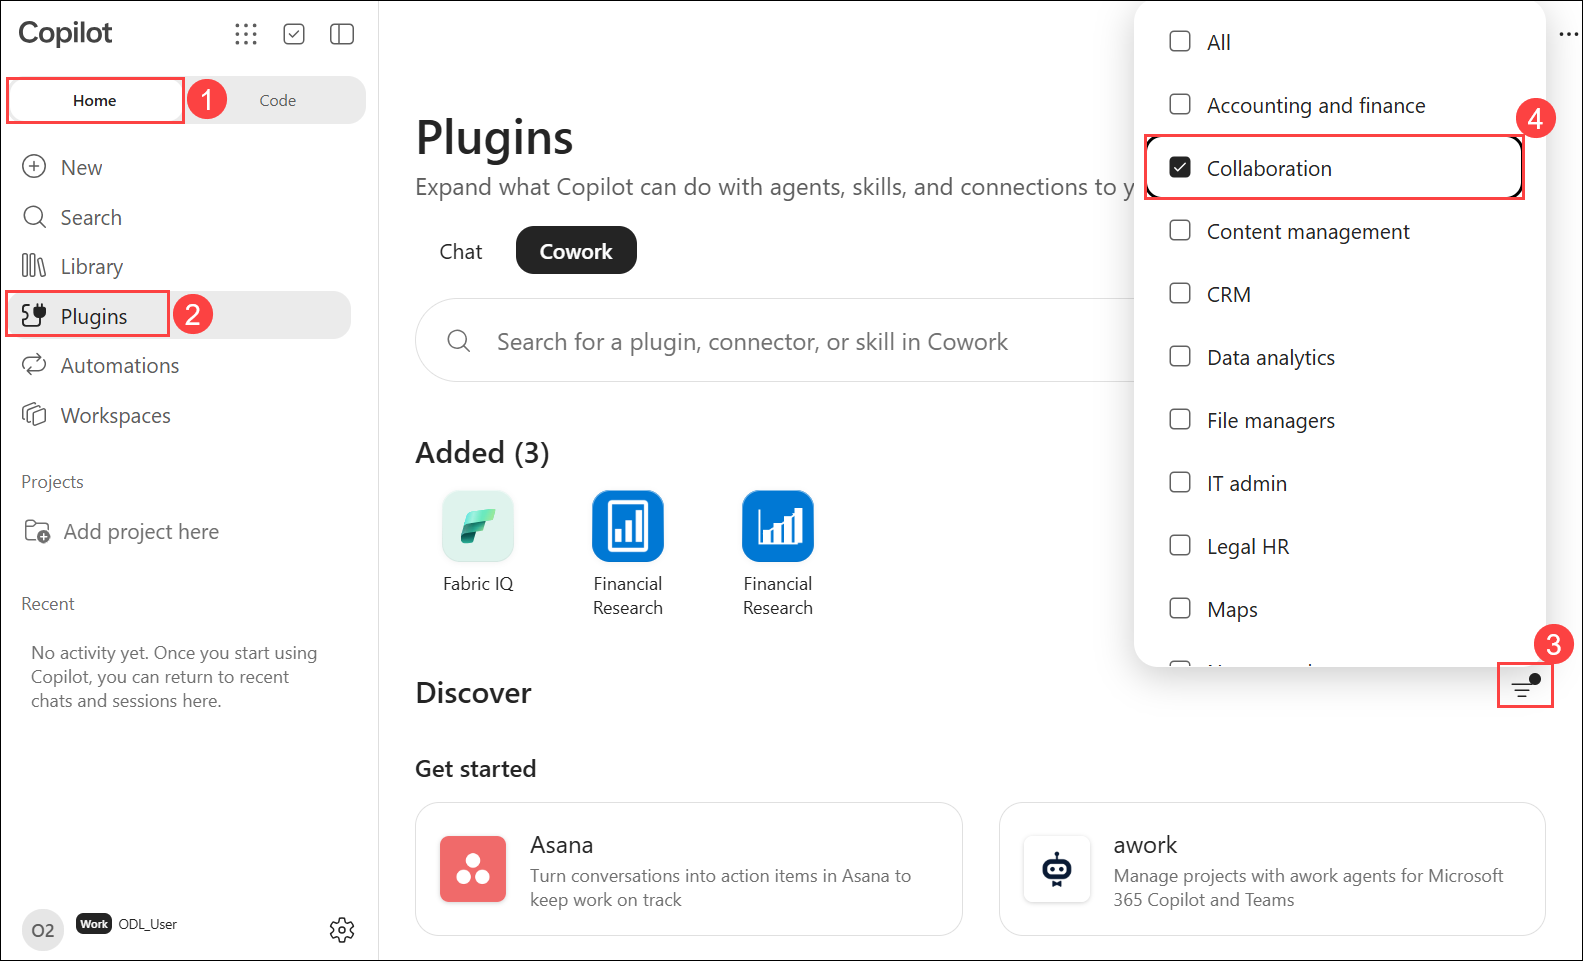
- To filter plugins by category, select Home (1) > Plugins (2), select the Filter (3) icon next to Discover, then select Collaboration (4).
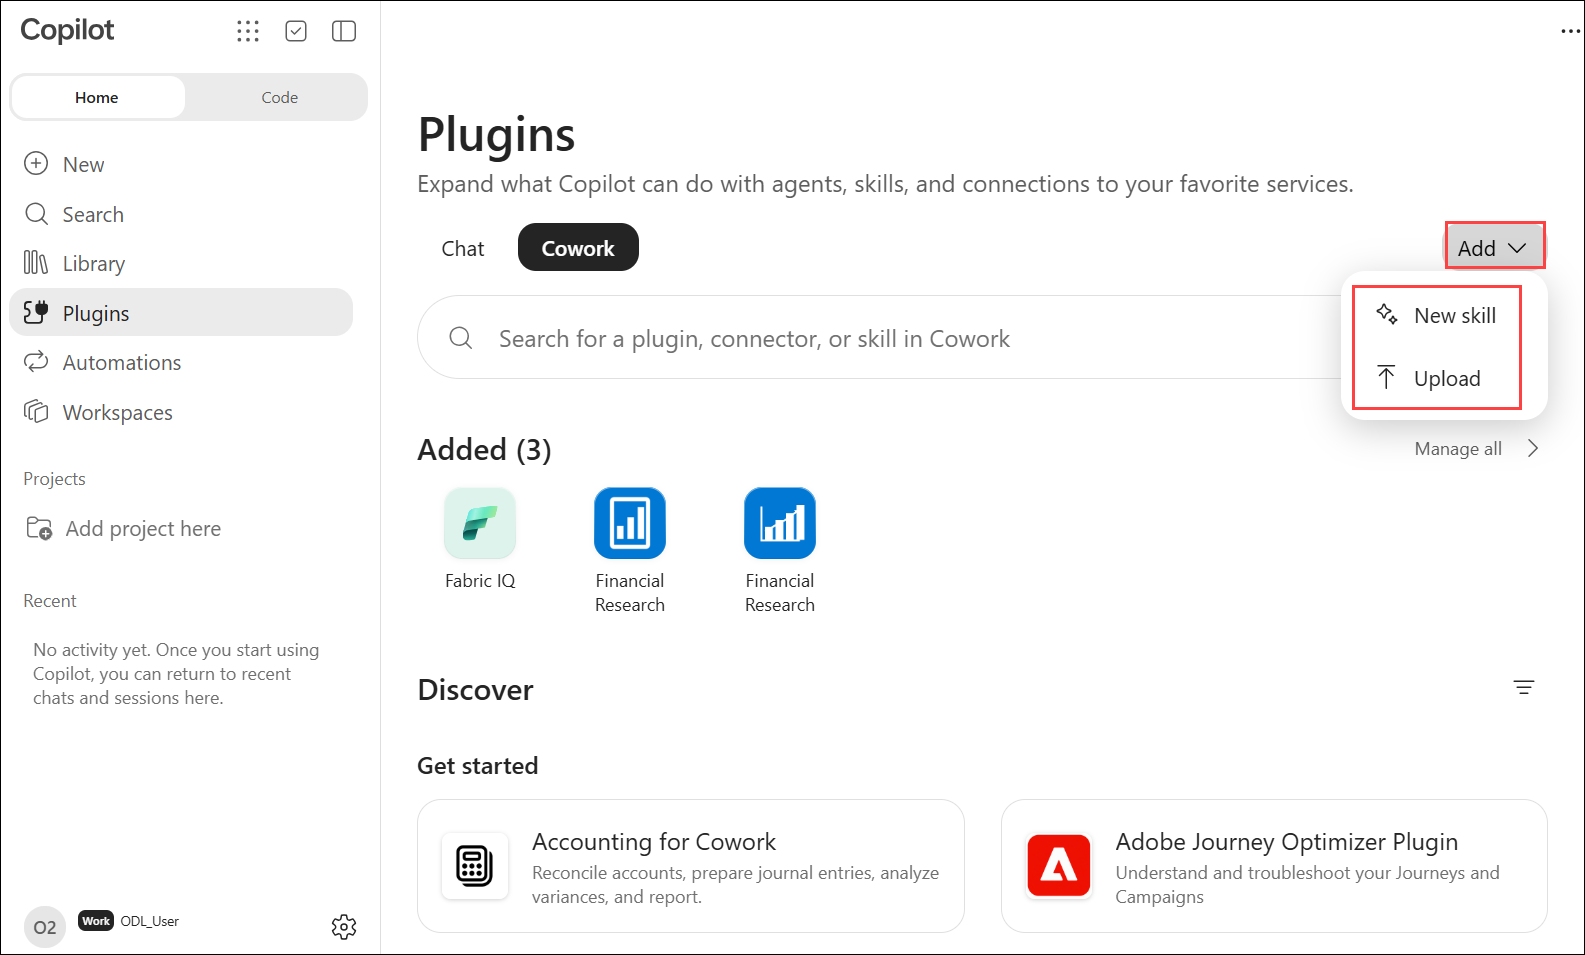
- On the Plugins page, select Add to see the two ways to add a skill: New skill creates a skill through a guided conversation, and Upload imports an existing skill file.
Task 2: Generate sample emails in Outlook
In this task, you use Cowork to send 5 sample training emails to your own inbox for use in later labs.
- Select New (1), make sure Cowork (2) is selected, paste the following prompt in the task box (3), then select Send (4).
I need you to seed my Outlook inbox with 5 sample training emails for a Copilot Cowork demo environment (Contoso Electronics / Project Orion ERP modernization scenario). Send each individually to my own email address so it lands as a received message in my Inbox. You have my approval to send all 5 without pausing for individual confirmation - send them one after another, then give me a final summary list (subject + time sent).

For every email: proper business email (greeting, 2–3 short paragraphs or bullets, professional sign-off with sender name/title/company). Prefix the Subject line with the source tag in brackets. Do not literally attach files - mention any referenced attachment in the body text only.

Send these 5, in order:

1. [Northwind Retail] Subject: "Final Contract Review - Payment Milestone Clarification." From: Priya Desai, Procurement Lead, Northwind Retail. Reviewing the ERP contract, needs clarification on the payment milestone schedule before signing. Polite, slightly urgent - wants this resolved this week.

2. [Fabrikam Industries] Subject: "Feature Request - Barcode Scanning & Warehouse Integration." From: Marcus Webb, IT Director, Fabrikam Industries. Requests barcode scanning and warehouse-management integration be added to the ERP build; needed for their distribution centers. Leave this request open/unresolved in tone.

3. [Tailspin Toys] Subject: "URGENT: Production Issue Affecting Order Processing." From: David Chen, IT Support Lead, Tailspin Toys. Urgent tone - a production issue is blocking order processing right now, needs immediate attention, asks for a callback ASAP. Leave this issue open/unresolved in tone.

4. [PMO] Subject: "Invitation – Steering Committee Meeting." Short agenda (3–4 bullet points covering Project Orion milestones, budget status, go/no-go checkpoints), a list of expected attendees (by role, not real people — e.g., Steering Committee members, Project Sponsor, PMO), a placeholder Teams link, and a note that a deck is attached.

5. [PMO – Risk Management] Subject: "Risk Review Meeting – Follow-Up Notes." Summarizes 3 decisions made in a recent risk review, each with an owner name and a due date.

Once all 5 are sent, reply with only the word "Done."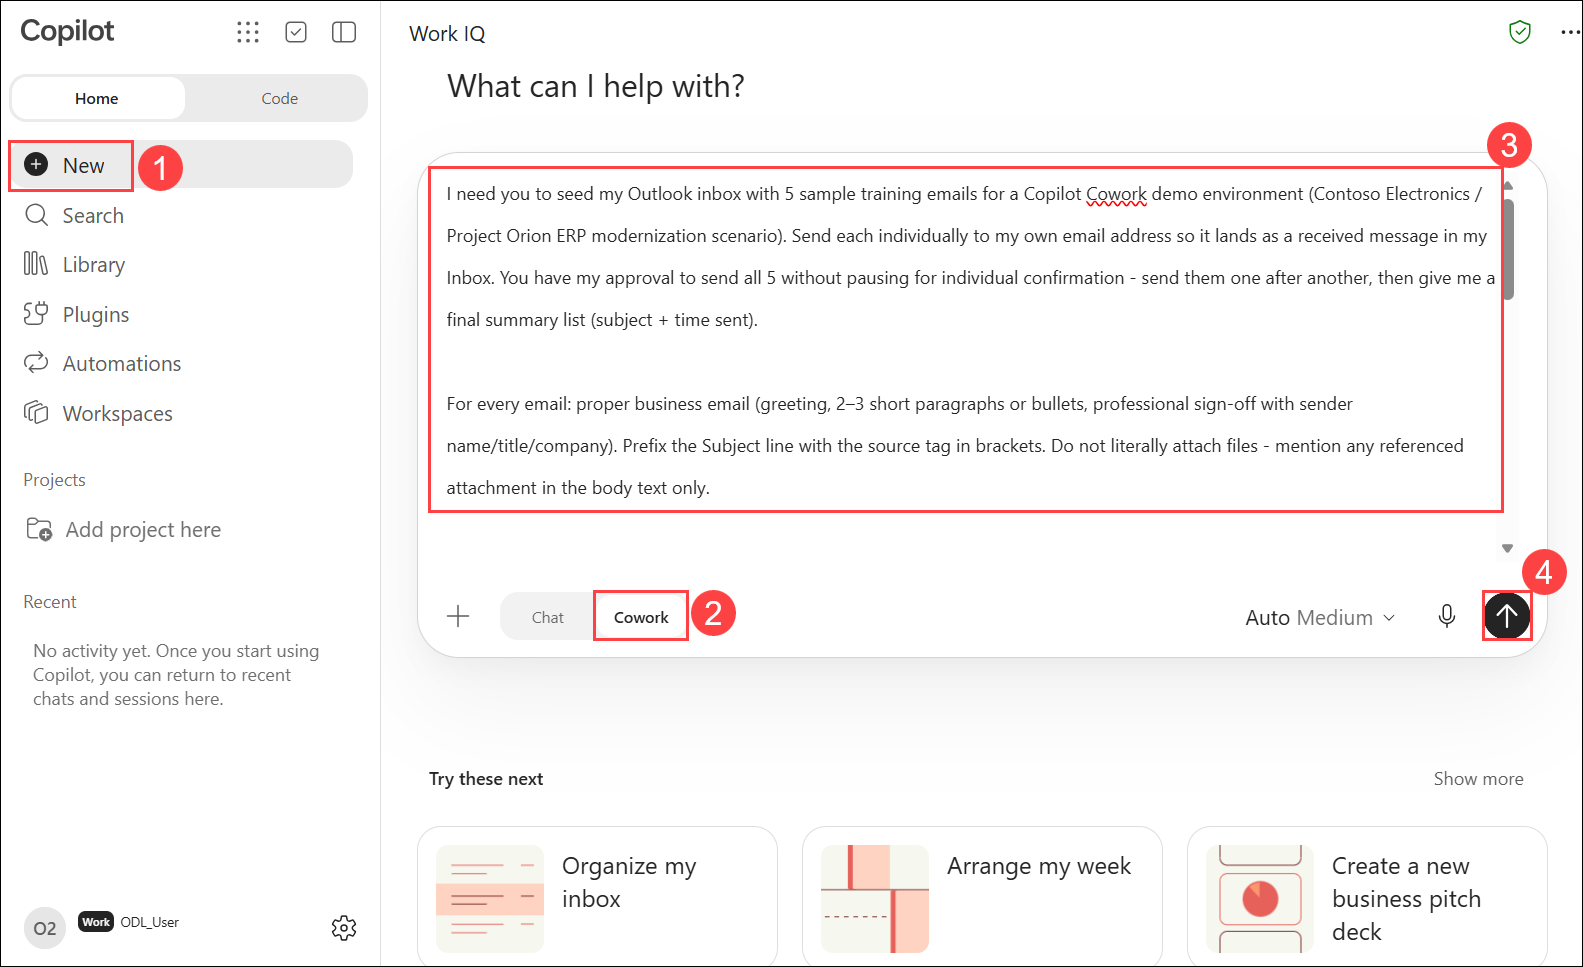
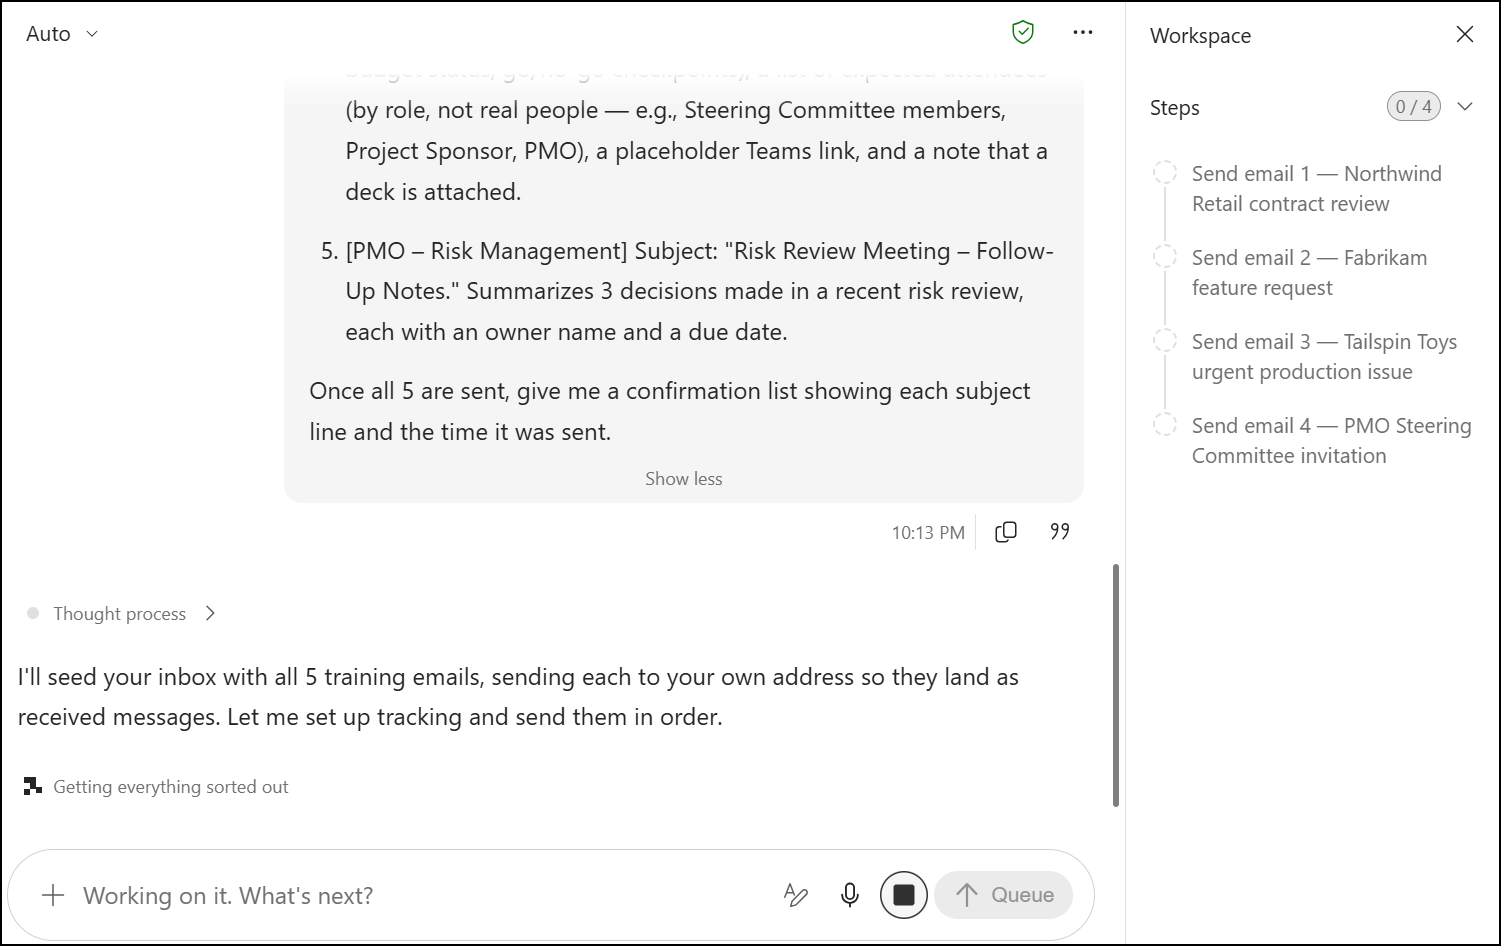
- Cowork starts processing the request. Its plan appears under Steps in the Workspace panel on the right.
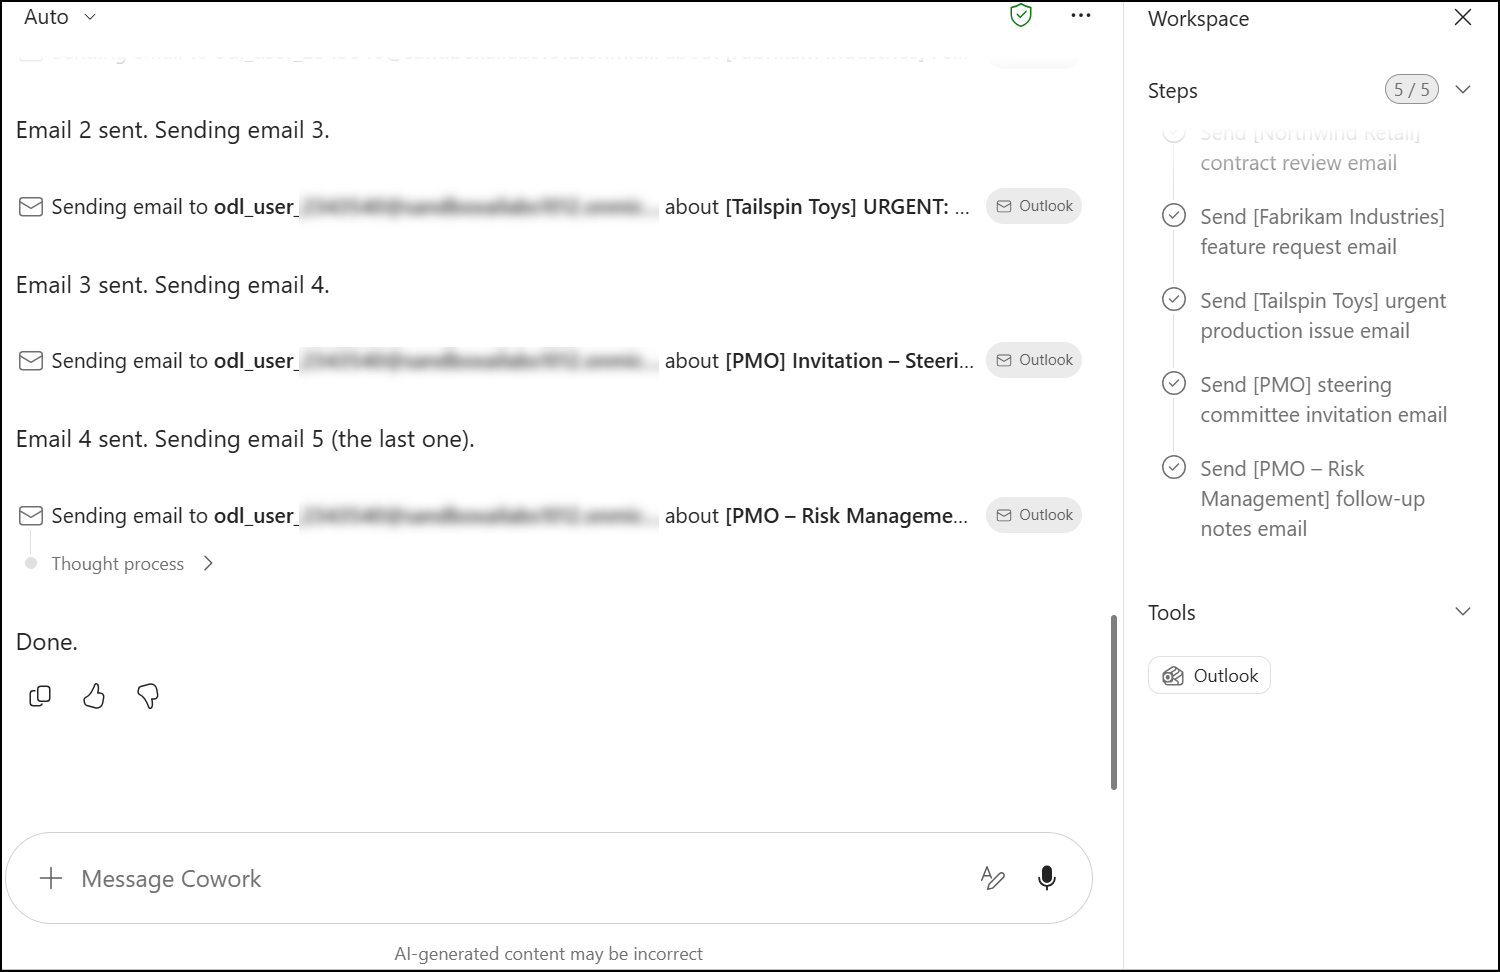
- Cowork may send all 5 emails without showing approval cards, because the prompt grants upfront approval. In that case it completes all steps (5/5) and replies Done. Go straight to step 5.
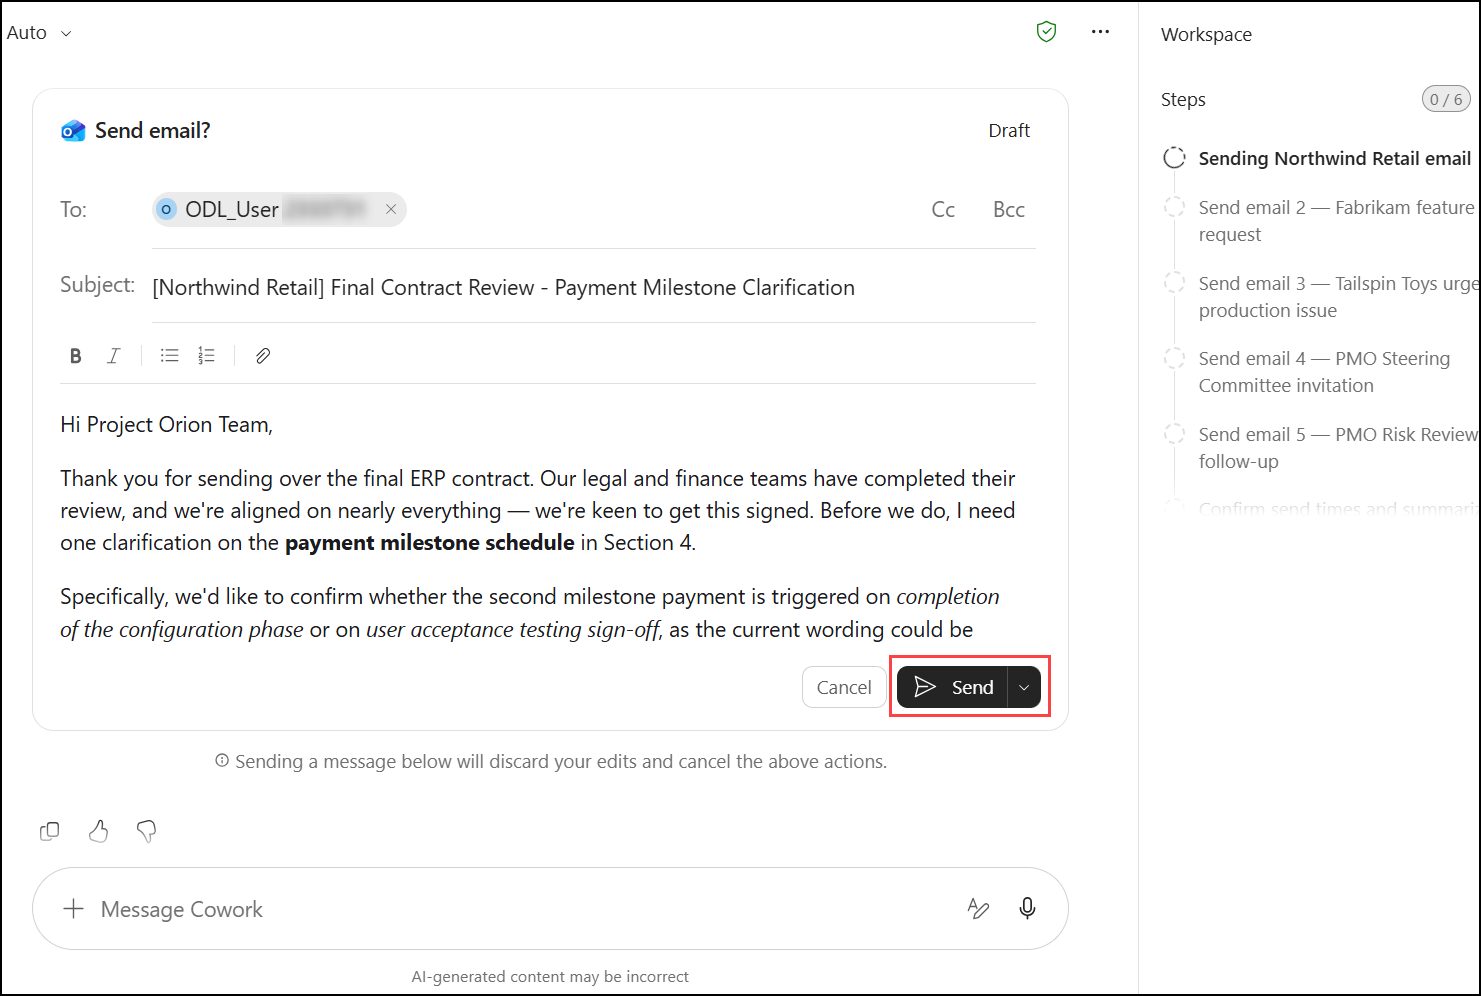
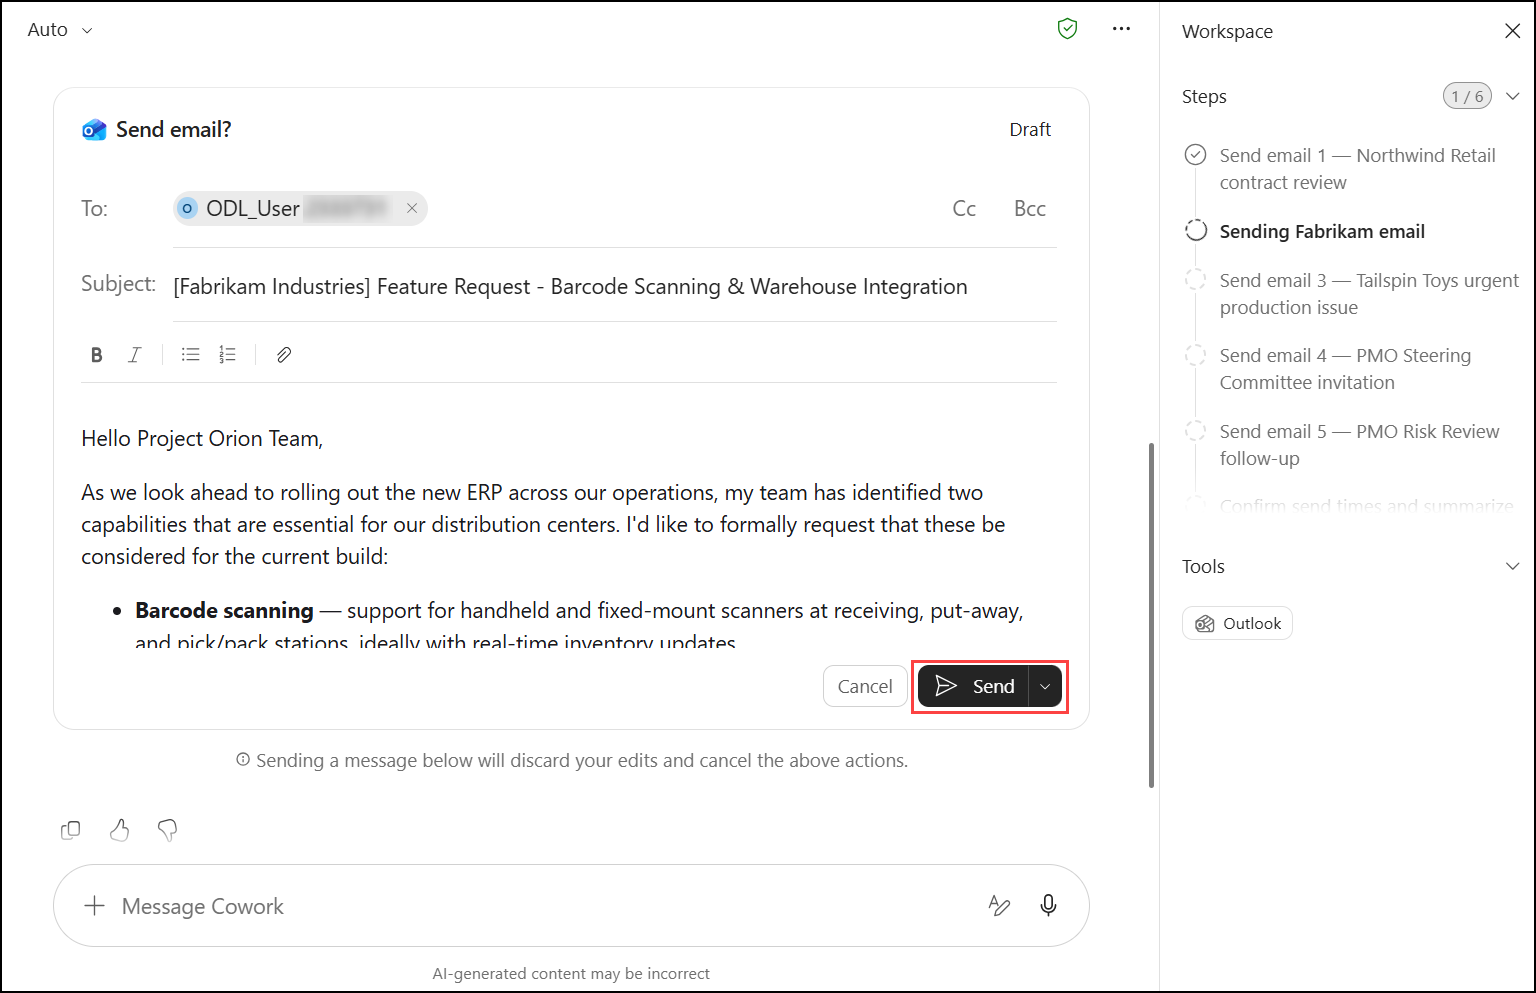
- Only if approval cards appear: review each Send email? card and click Send. Repeat for all 5 emails.
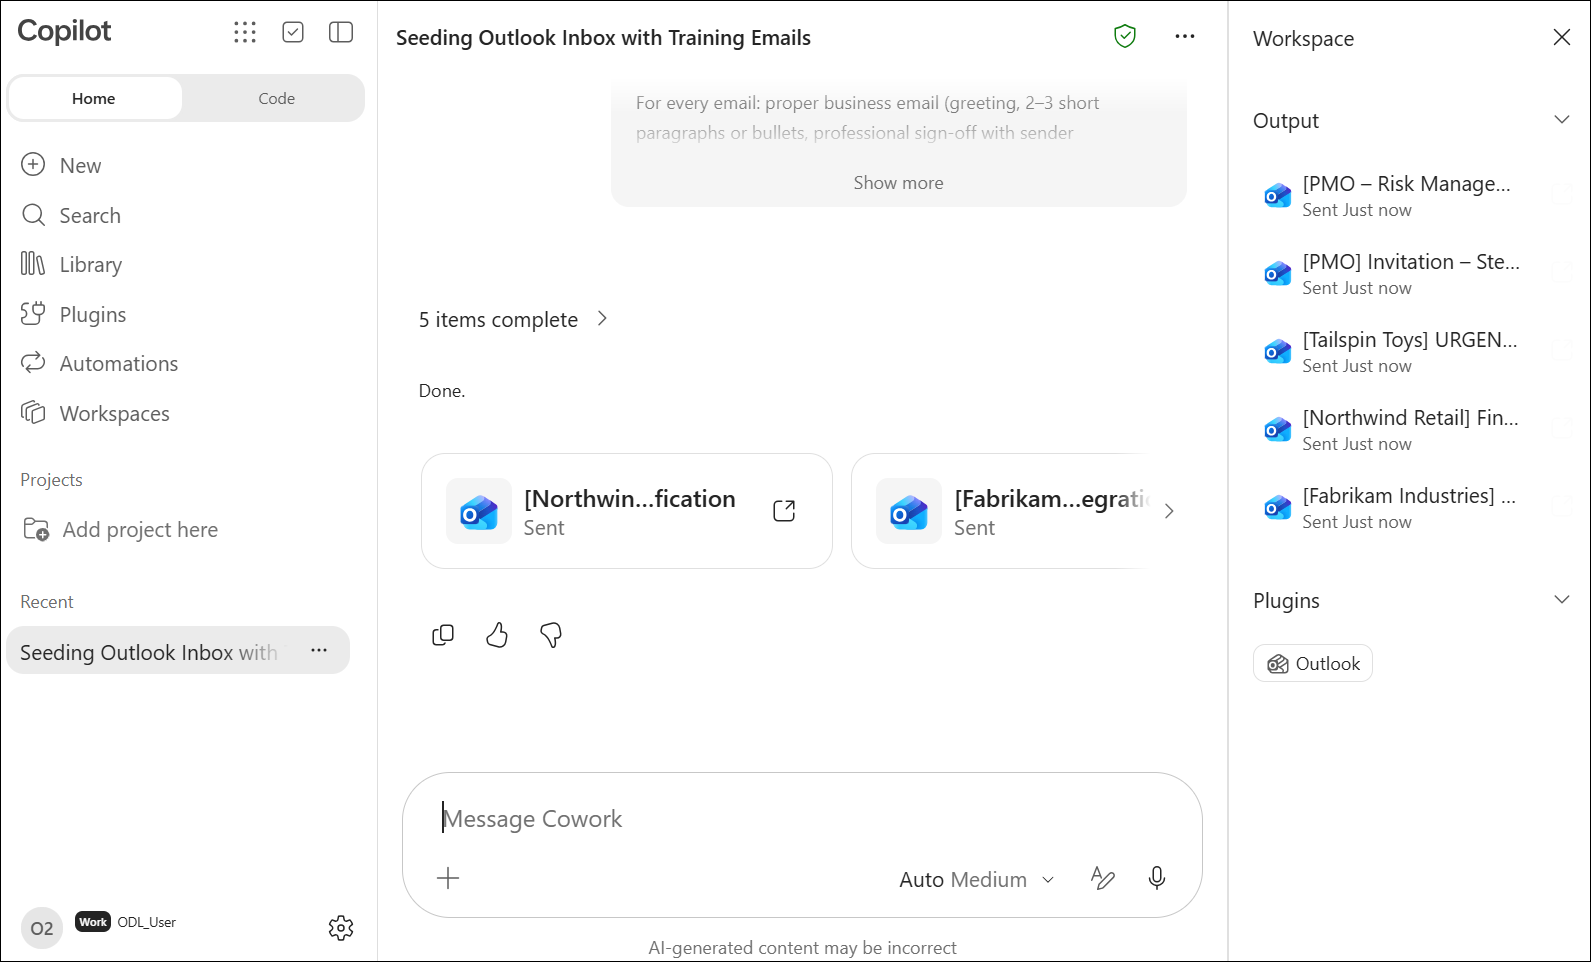
- Review the output. The Output section of the Workspace panel lists all 5 sent emails.
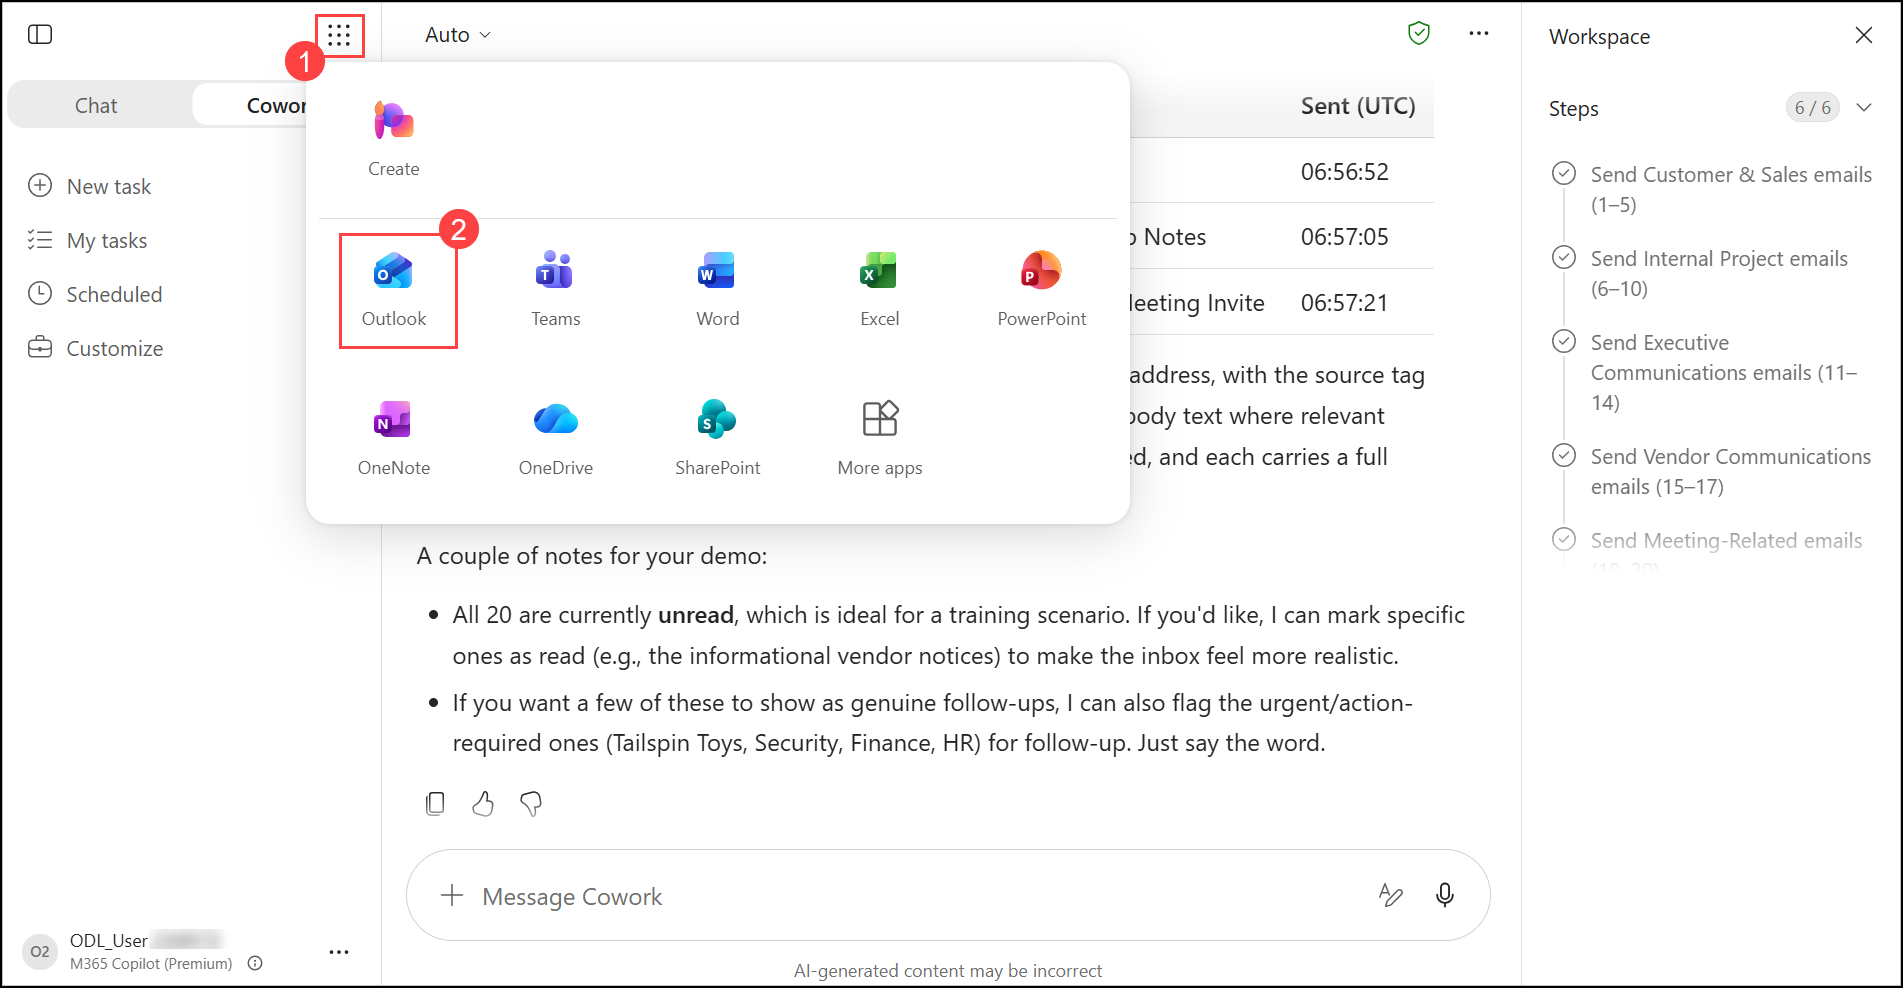
- To verify the emails, open the Microsoft 365 app launcher (1) and select Outlook (2).
- If the Your privacy matters dialog appears, click Continue.
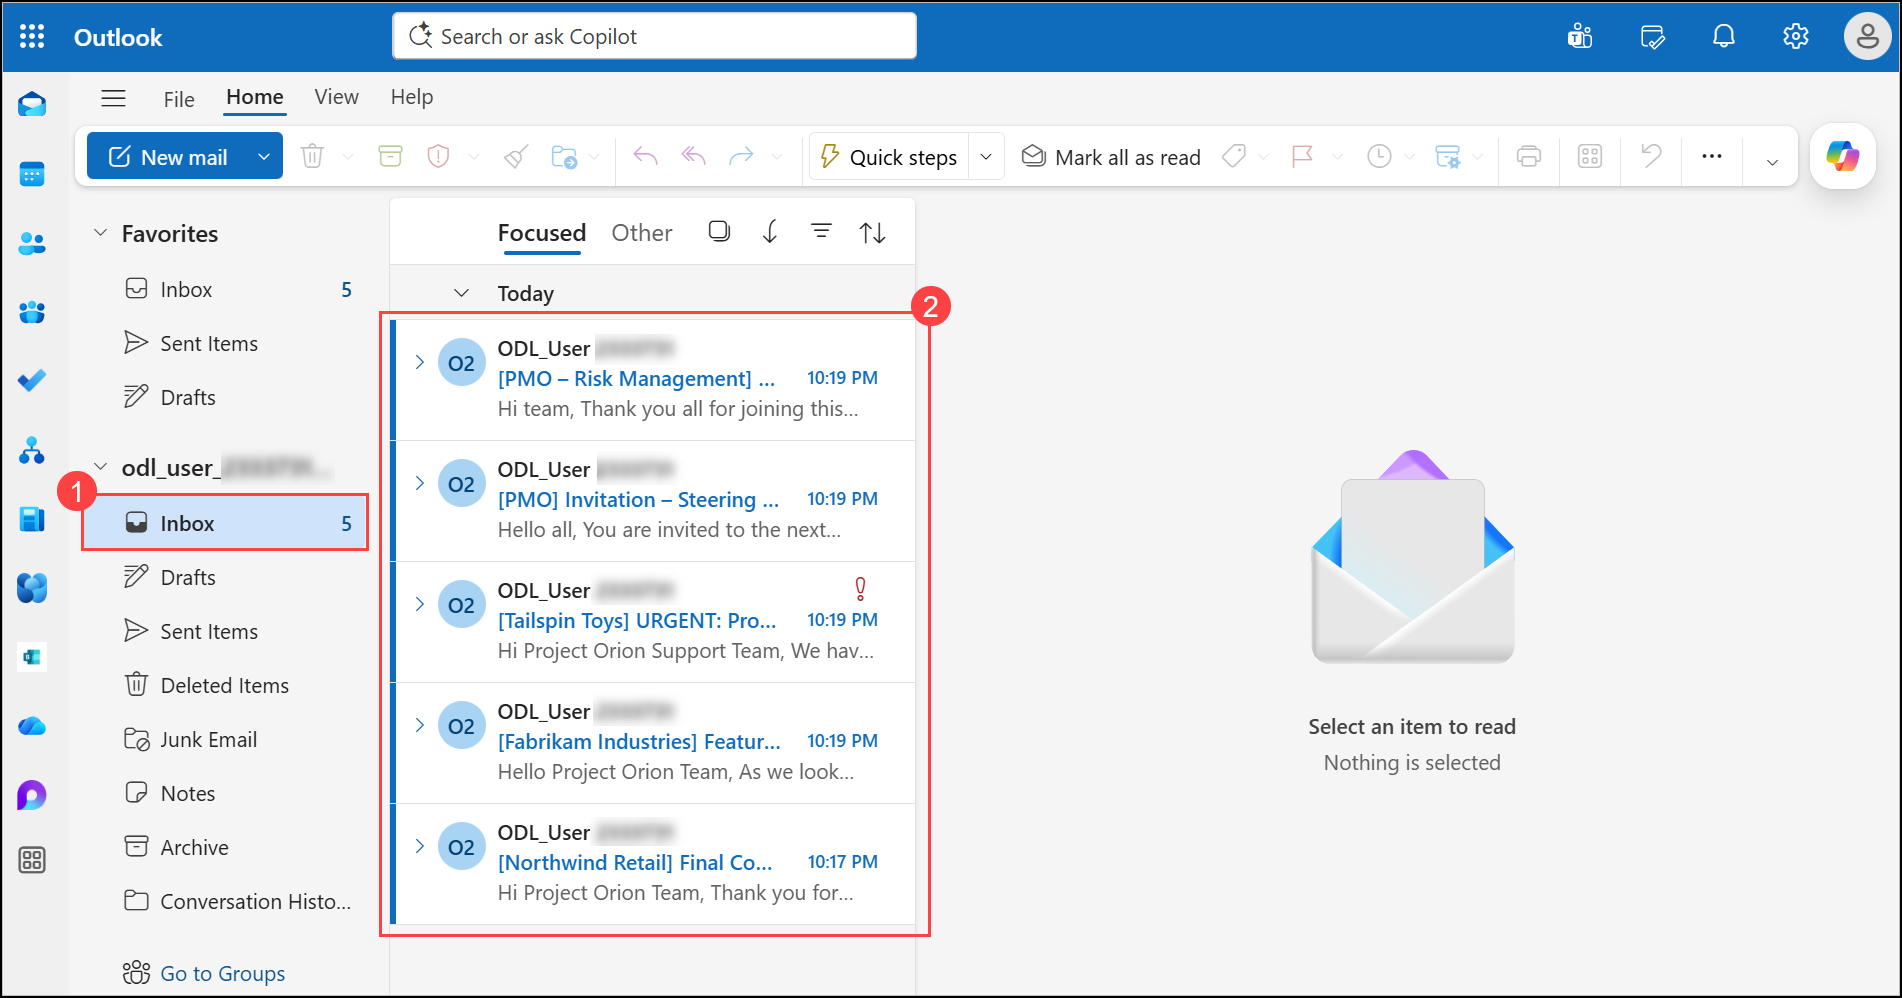
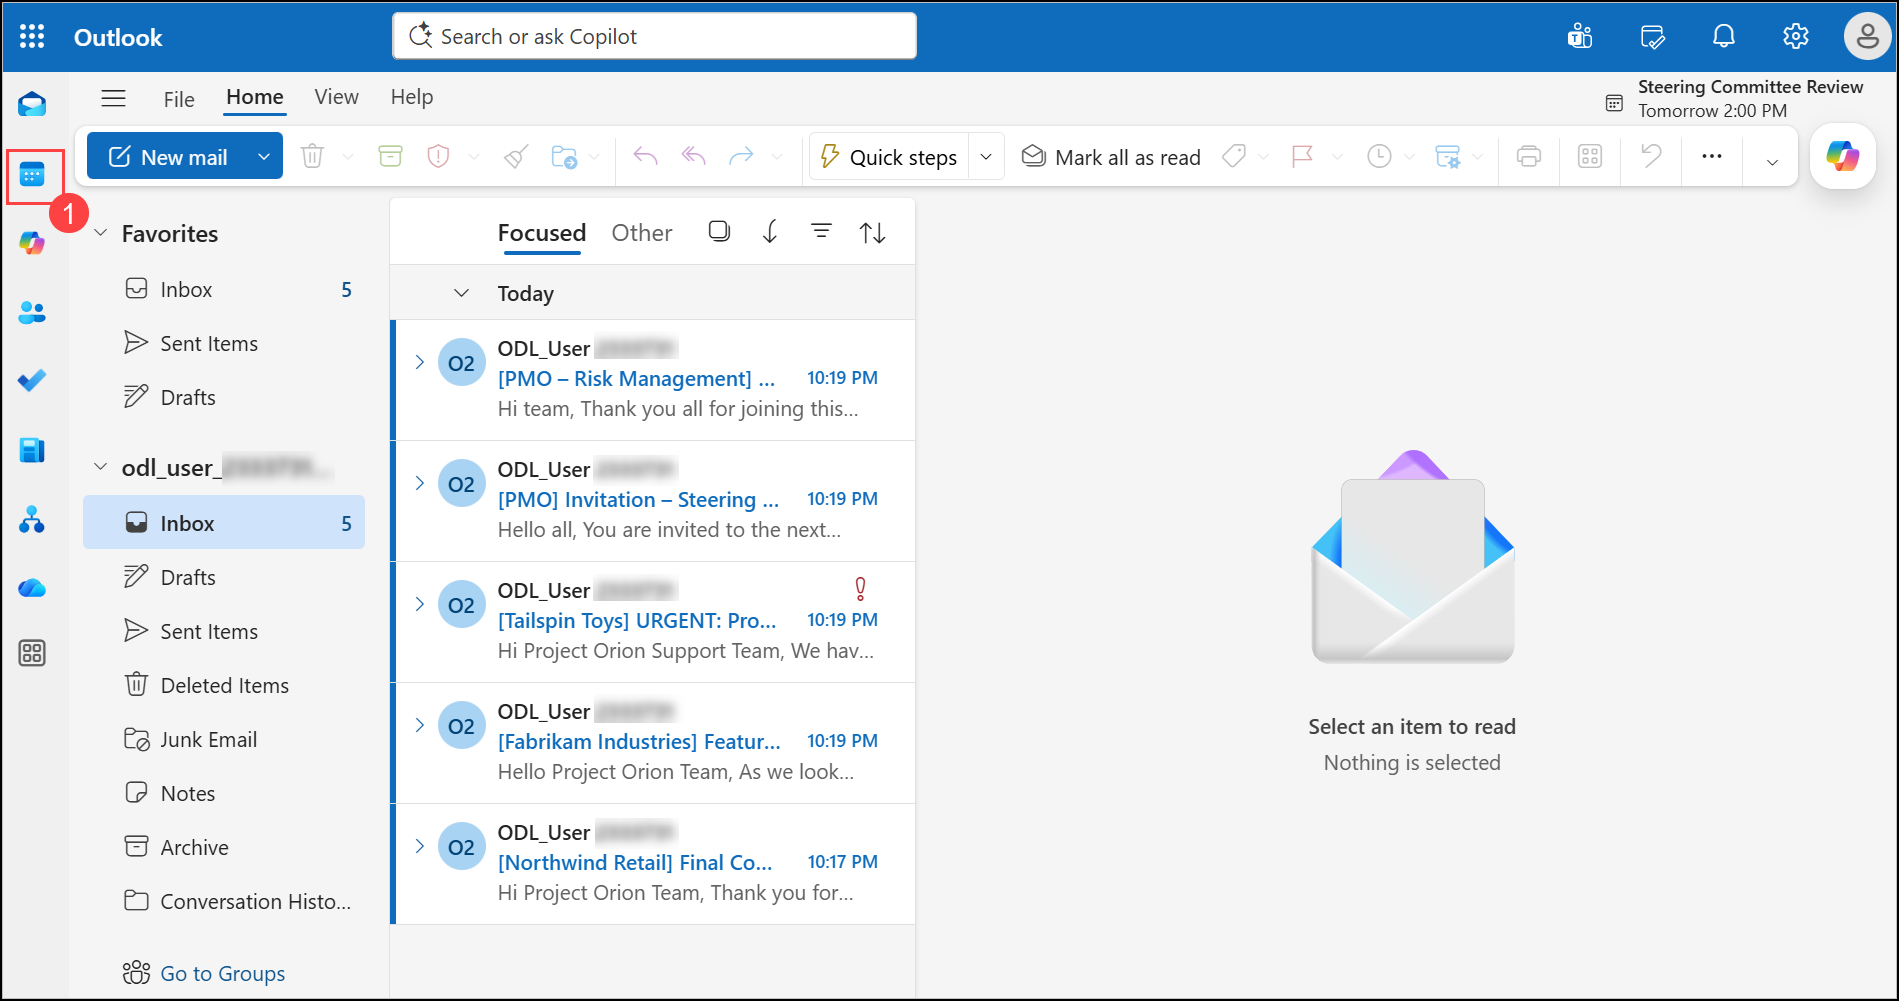
- Go to Inbox (1) and confirm that all 5 sample emails (2) are present: [Northwind Retail], [Fabrikam Industries], [Tailspin Toys] (marked high importance), [PMO] and [PMO – Risk Management].
Task 3: Generate sample calendar events in Outlook
In this task, you use Cowork to create 3 sample events that build out a realistic project calendar.
- Go back to the Microsoft 365 Copilot portal. In the same Cowork conversation, paste the following prompt (1) and click Send (2):
I need you to create 3 sample calendar events on my Outlook calendar for a Copilot Cowork demo environment (Contoso Electronics / Project Orion ERP modernization scenario). Create all 3 without pausing for individual confirmation, then give me a summary table at the end (event title, date, time) once done.

## Rules for every event

- I am the only attendee/organizer — do NOT invite or add any other person's email address, even if a name or company is mentioned. Any names/companies mentioned should appear as plain text in the description only.
- Add a Microsoft Teams meeting link to each event.
- Schedule them on the next 3 consecutive business days starting tomorrow (skip weekends), one per business day, in the order below.
- If any time conflicts with something already on my calendar, shift only that one event by 30 minutes and note it in your summary.

## The 3 events

Business day 1 — 2:00–3:00 PM
Title: Steering Committee Review
Description: Agenda: review of Project Orion milestones, budget status, and go/no-go checkpoints.
Attendees (for reference only, do not invite): Steering Committee members, Project Sponsor, PMO.

Business day 2 — 10:00–11:00 AM
Title: Security Assessment Meeting
Description: Agenda: review of vulnerability assessment findings (high-risk and medium findings) and required remediation plan.
Attendees (reference only): Security Team, Compliance Officer, IT Director.

Business day 3 — 10:00–11:30 AM
Title: Go-Live Readiness Review
Description: Agenda: walkthrough of the deployment readiness checklist (servers, backup, disaster recovery, monitoring), outstanding approval items, and the go-live decision.
Attendees (reference only): Executive Sponsor, Infrastructure Lead, PMO, QA Lead.

Once all 3 are created, reply with only the word "Done."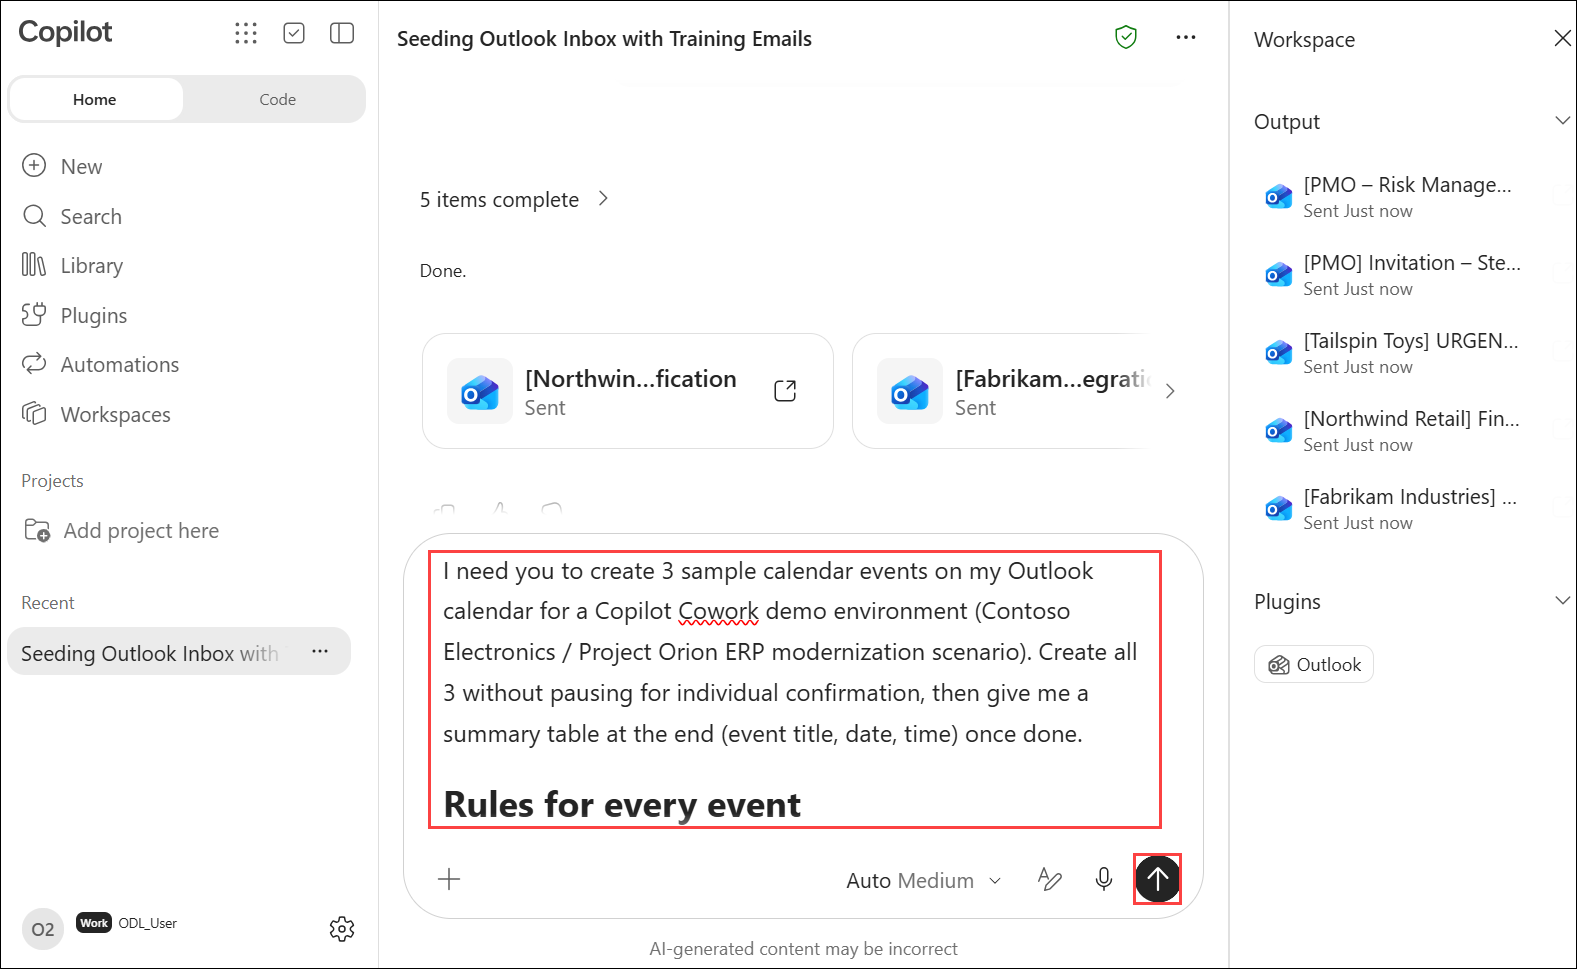
- Cowork checks your calendar for conflicts, then creates the events.
Note
Note: Because this runs in the same conversation as Task 2, the Steps counter continues from the earlier steps (for example, 7/11). This is expected.
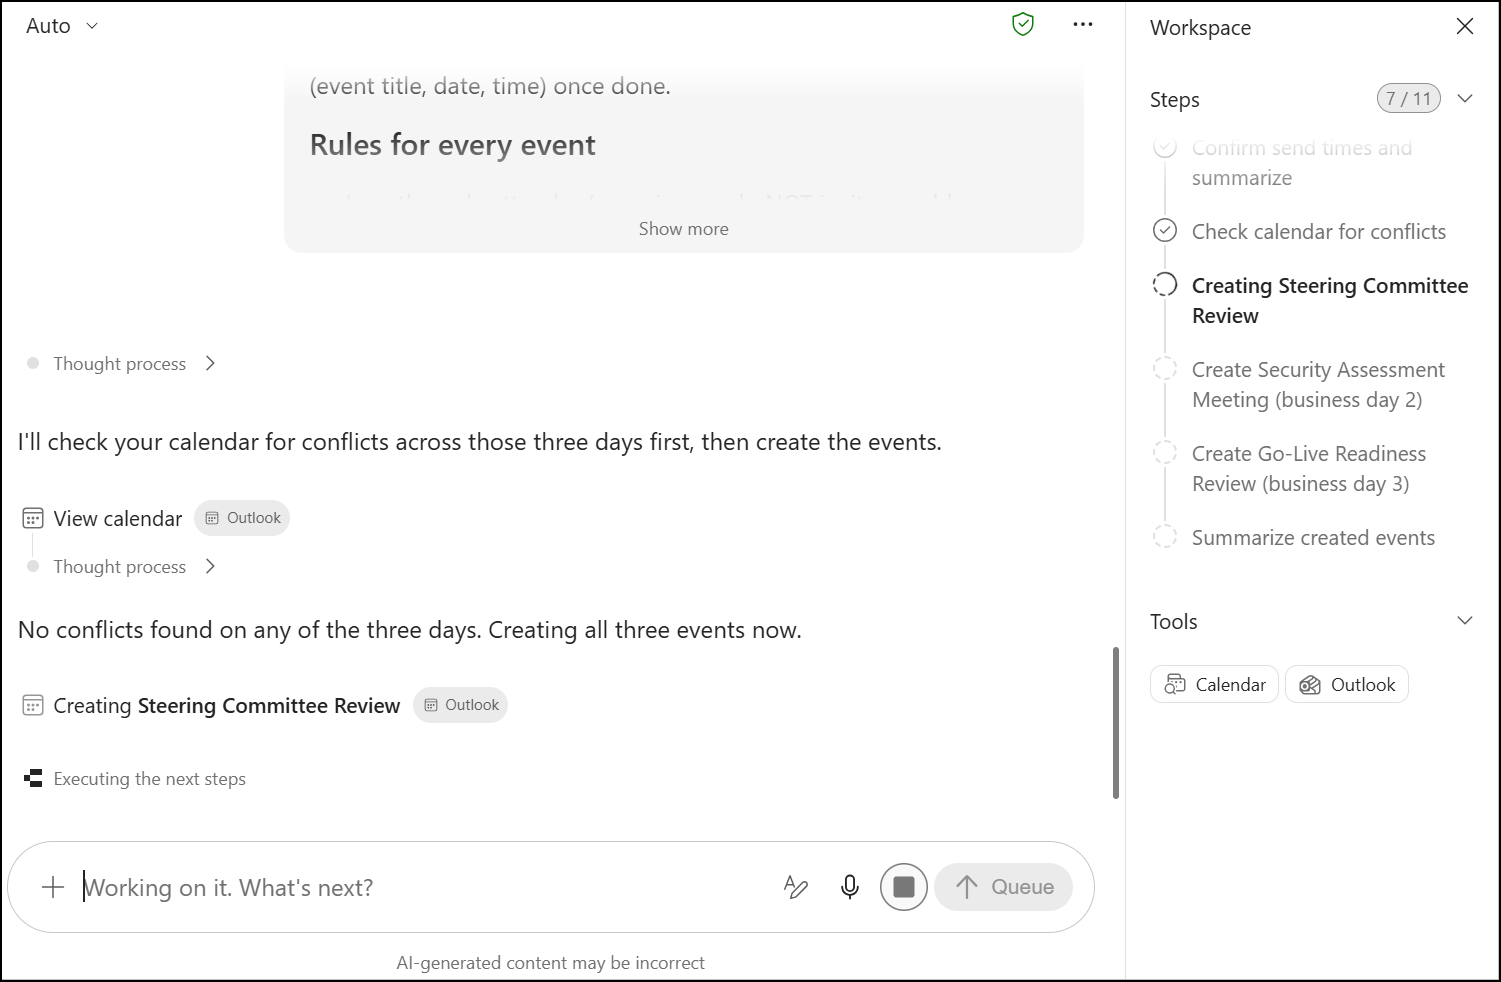
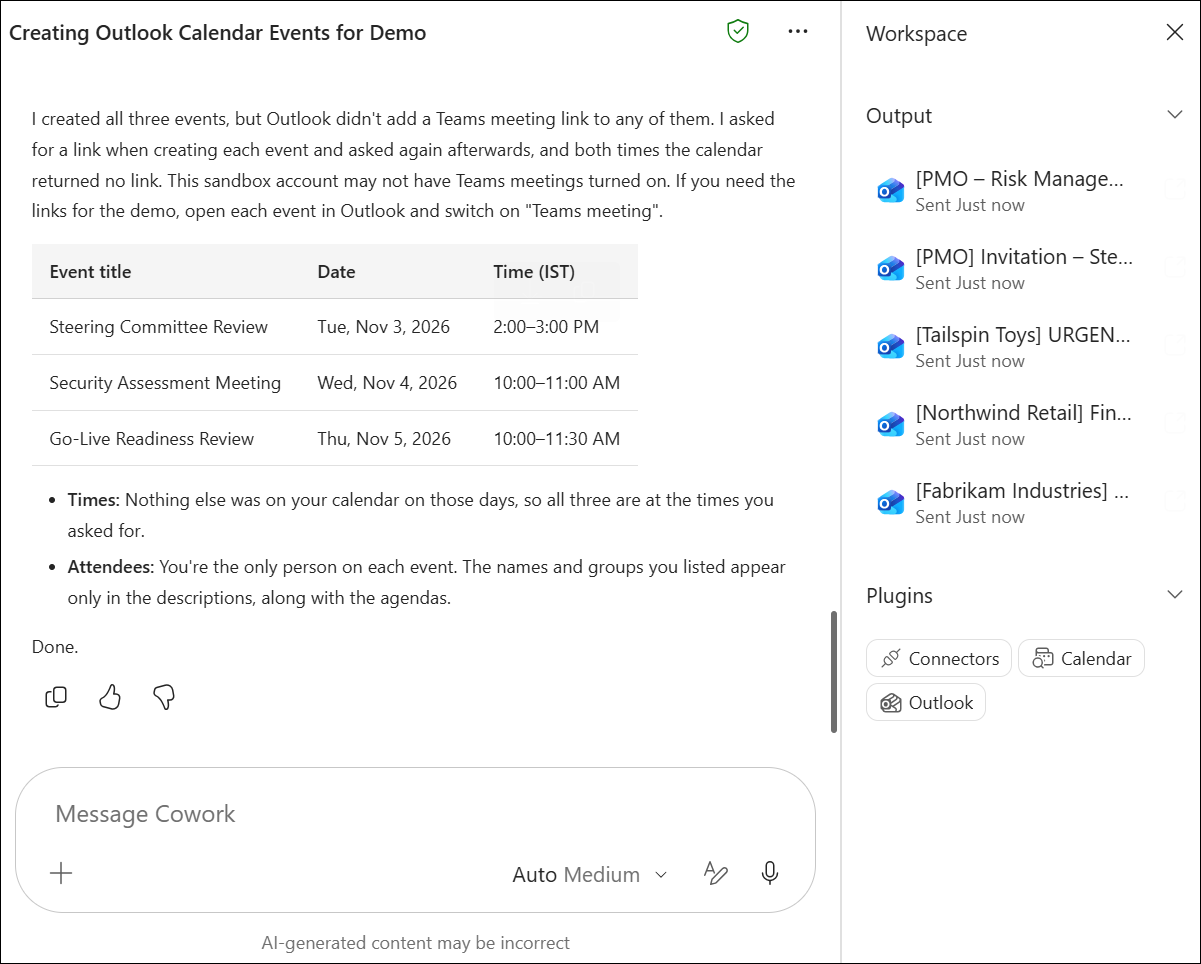
- Cowork may create all 3 events without showing approval cards. If no cards appear and Cowork replies Done., go straight to step 5.
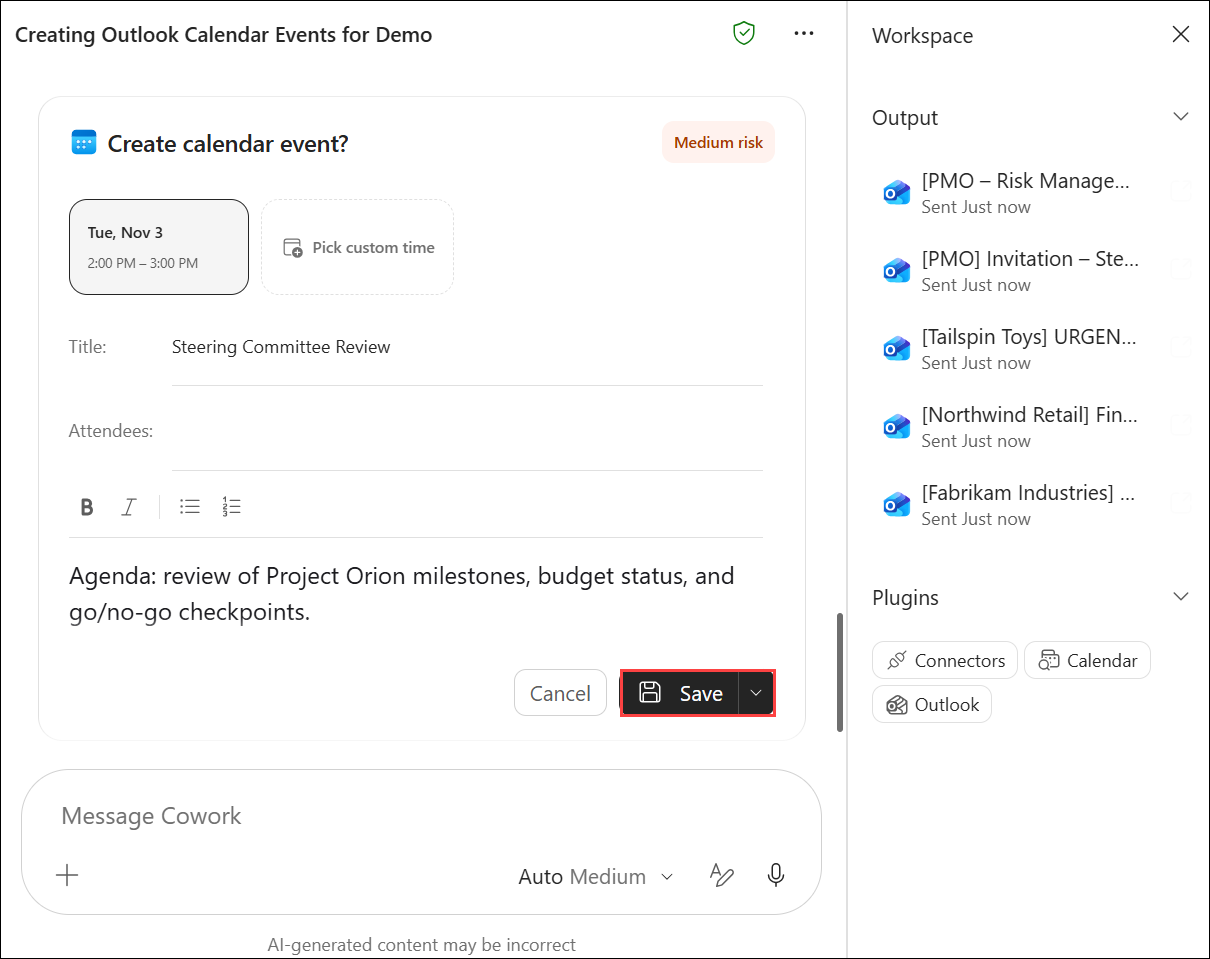
- Only if approval cards appear: review each Create calendar event? card (marked Medium risk) and click Save. Repeat for the remaining 2 events.
- Review the summary table with the 3 events, their dates and times.
Note
Known issue: In some lab tenants Cowork reports that it could not add a Teams meeting link. The events are still created correctly, so this is an environment limitation, not an error on your part. If you need a link, open the event in Outlook and switch on Teams meeting.
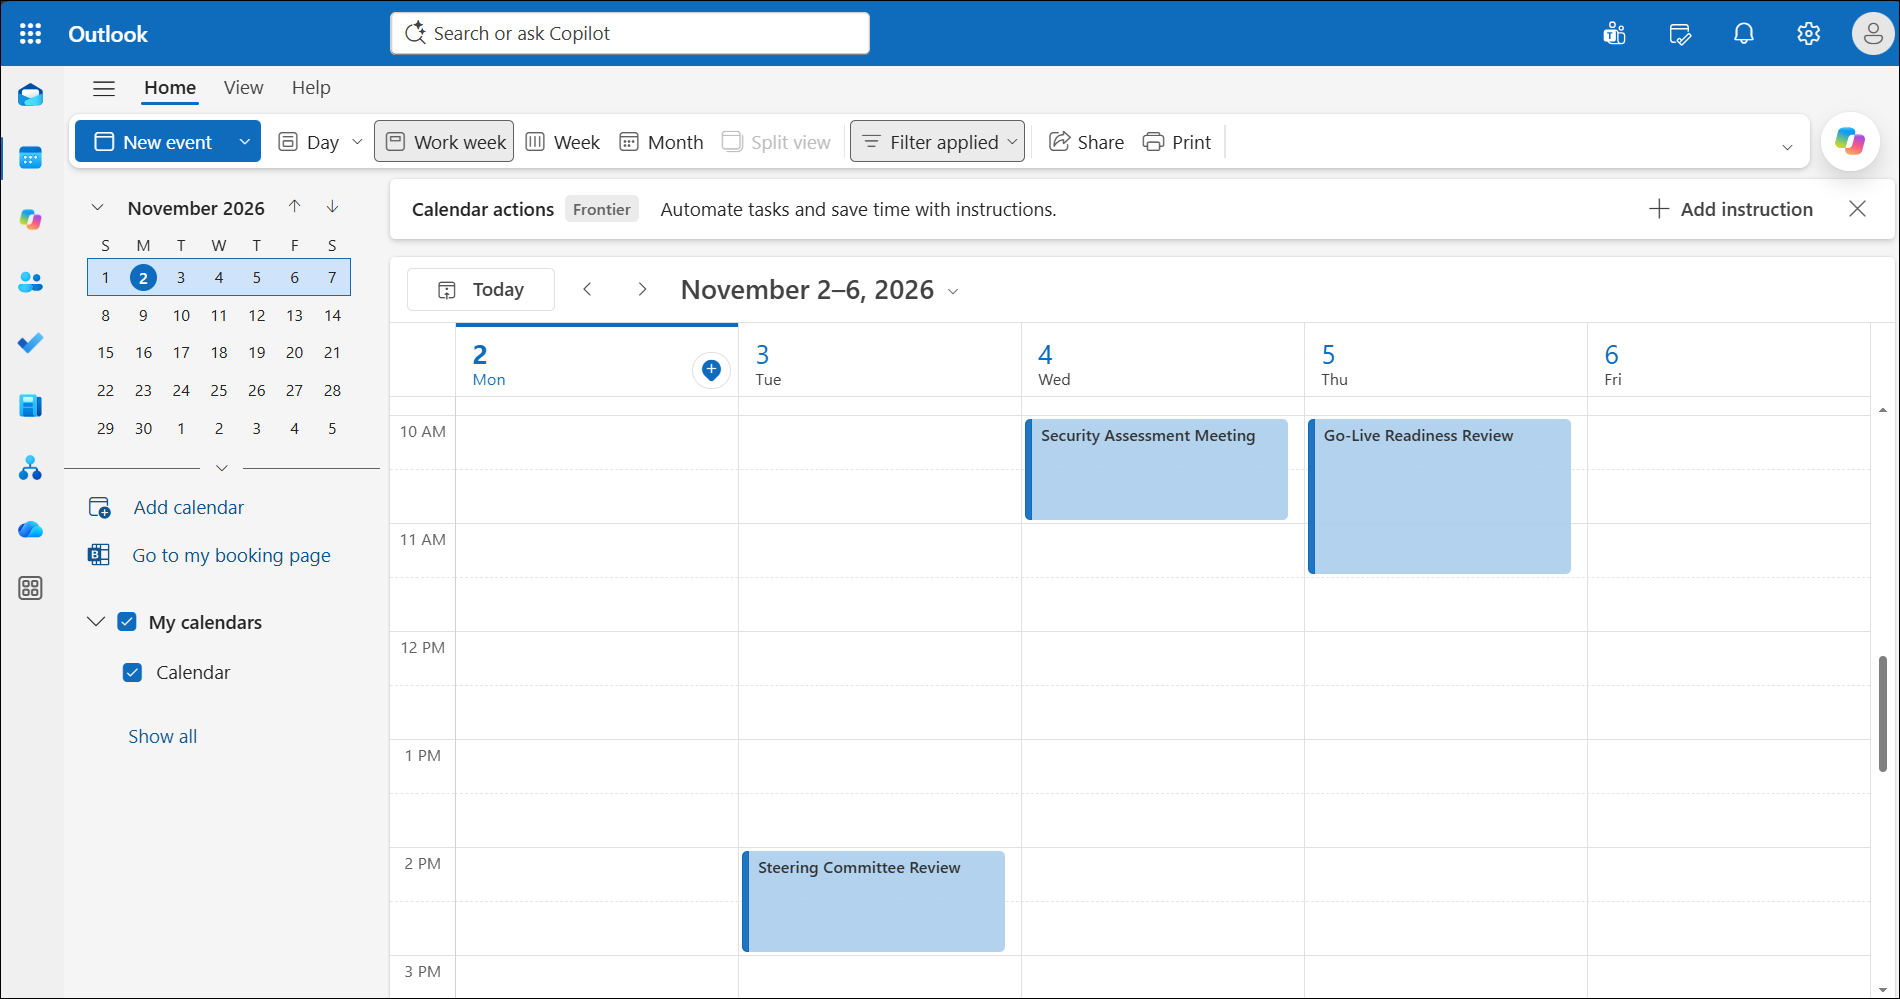
- Go back to Outlook and select the Calendar (1) icon on the left.
- Select Work week and confirm that the 3 events appear on the next 3 business days: Steering Committee Review, Security Assessment Meeting and Go-Live Readiness Review. Your dates depend on the day you run the lab.
Task 4: Upload sample files to OneDrive and create a team in Microsoft Teams
In this task, you upload sample folders and files to OneDrive, then create a team and channel in Microsoft Teams for use in later labs.
Note
Not on the lab VM? The same files are in this repository under Allfiles/LabFiles/lab file. Download the repository as a ZIP from the home page, extract it, and browse to that folder wherever this lab says C:\LabFiles\lab file.
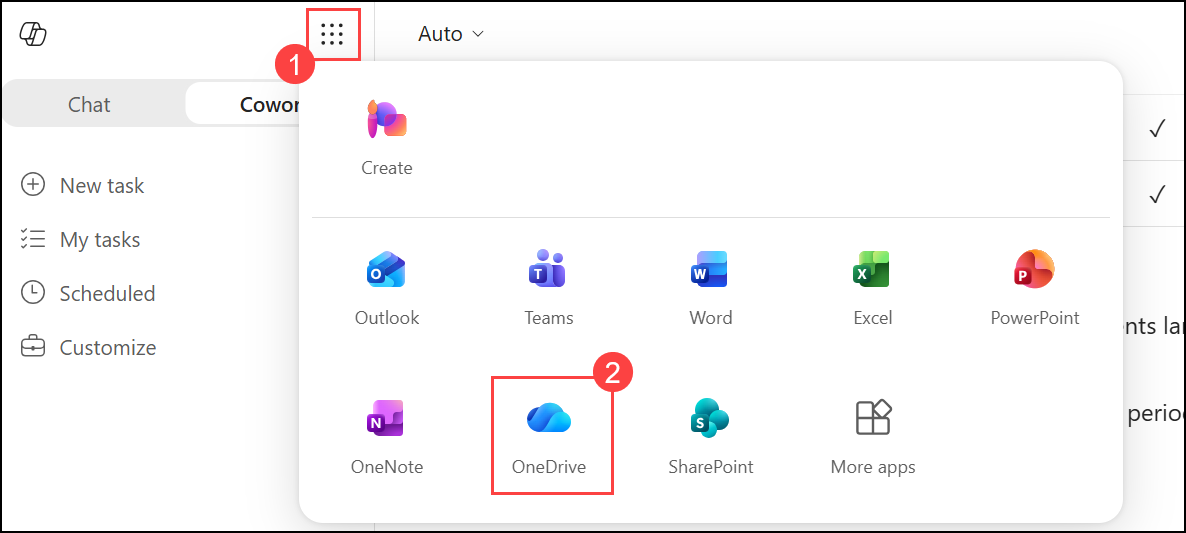
- In the Microsoft 365 Copilot portal, open the app launcher (1) and select OneDrive (2).
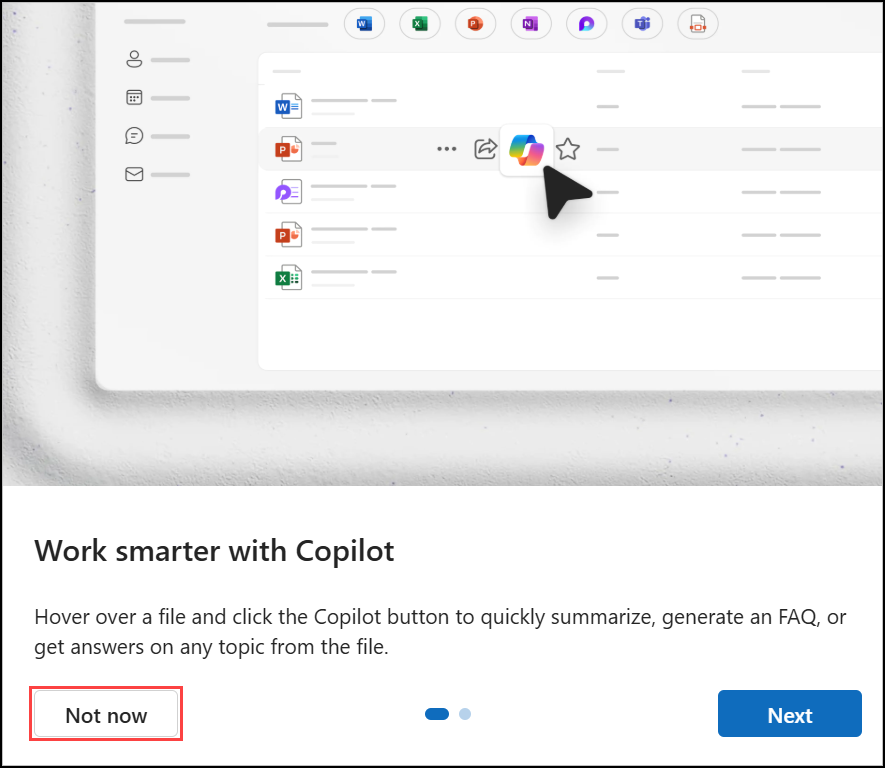
- If the Work smarter with Copilot dialog appears, click Not now.
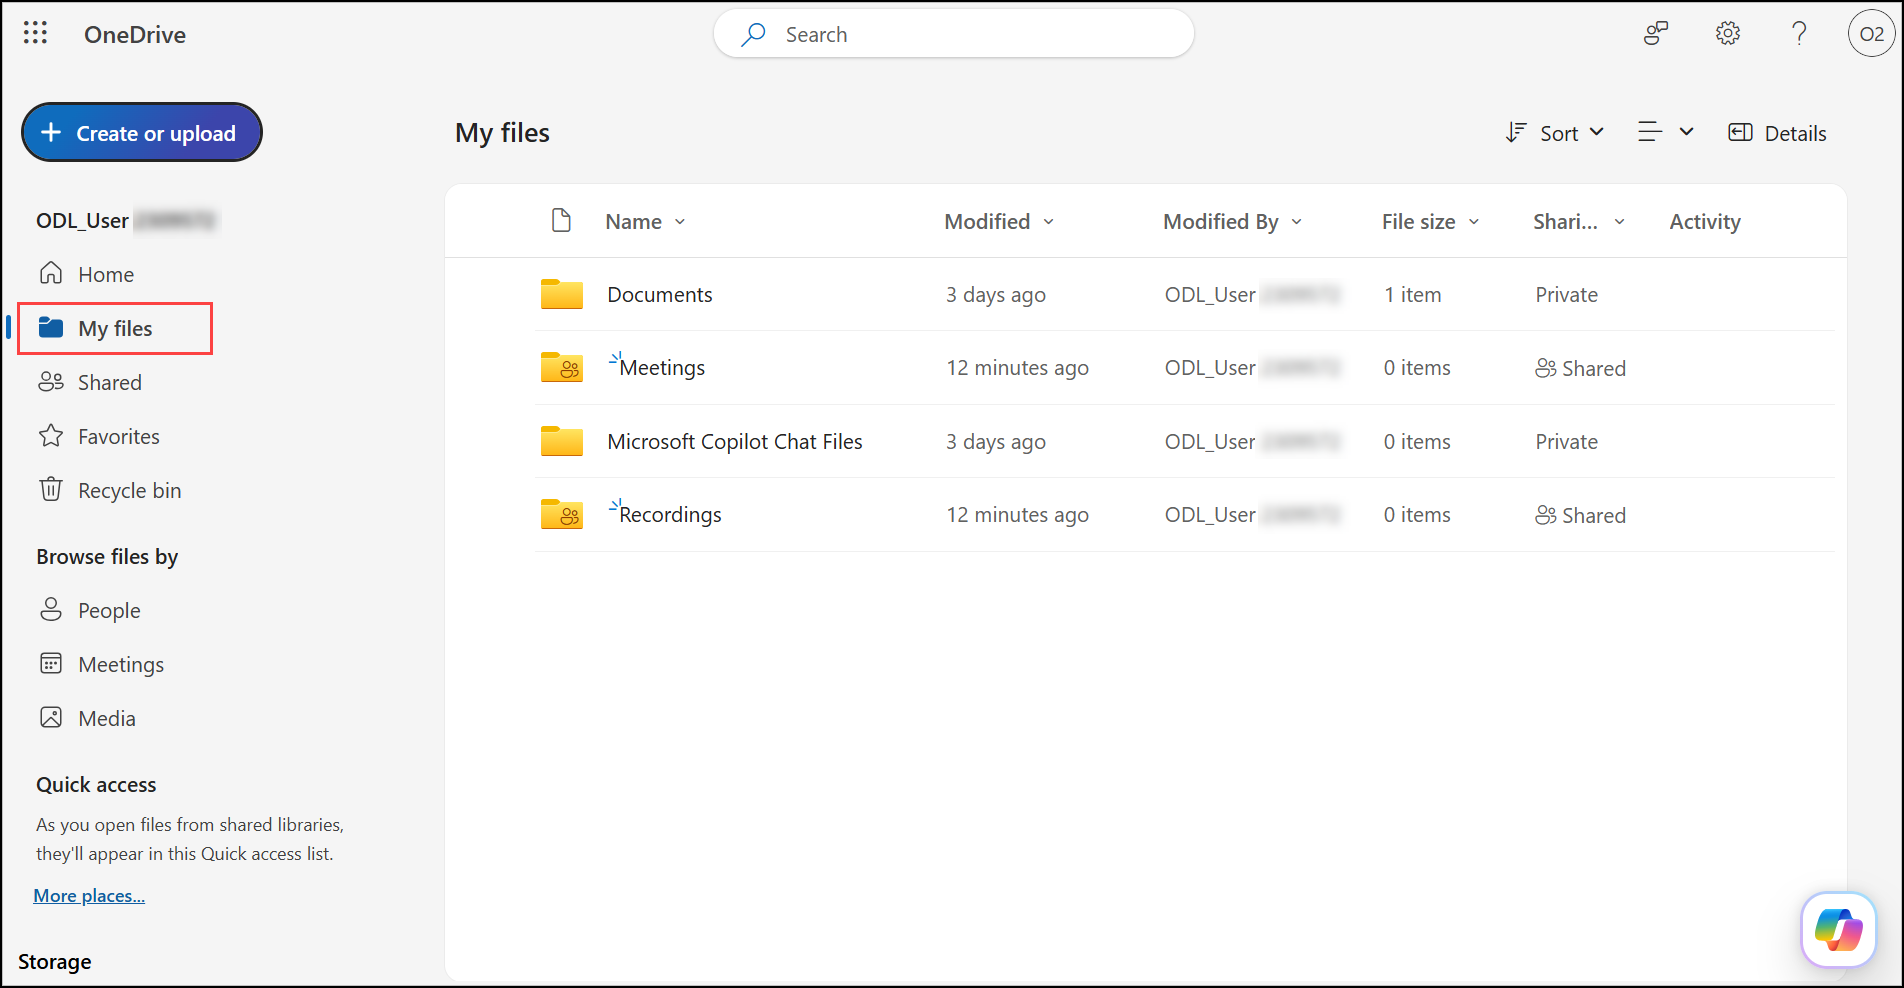
- Select My files.
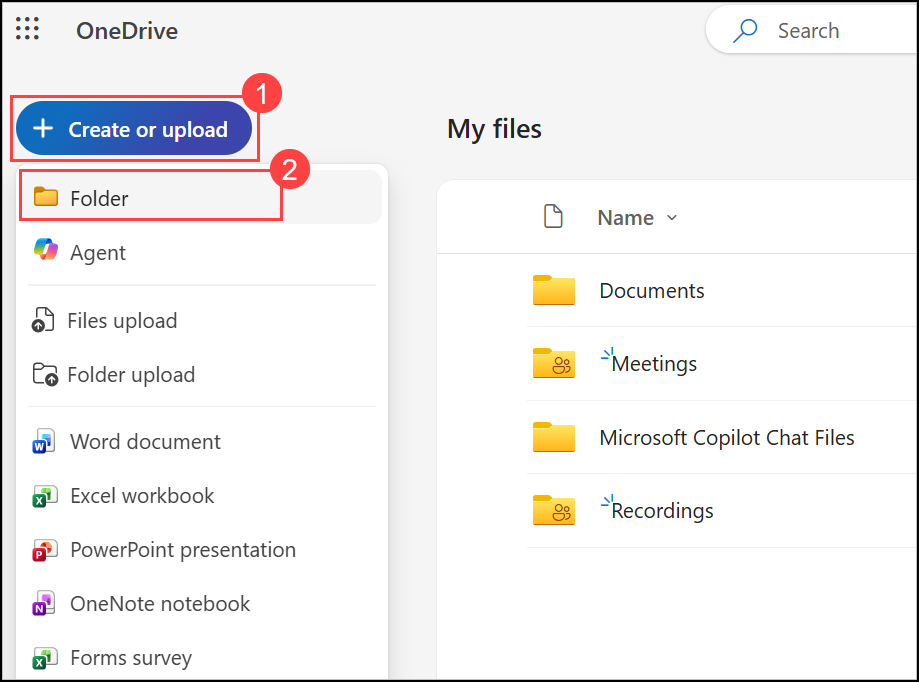
- Click Create or upload (1) and select Folder (2).
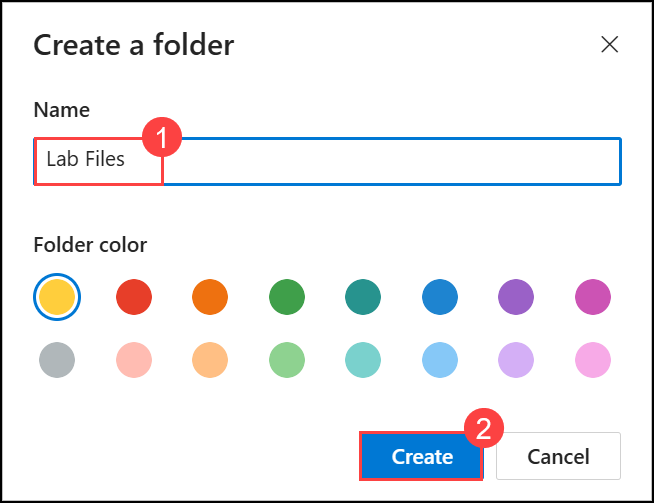
- Name the folder Lab Files (1) and click Create (2).
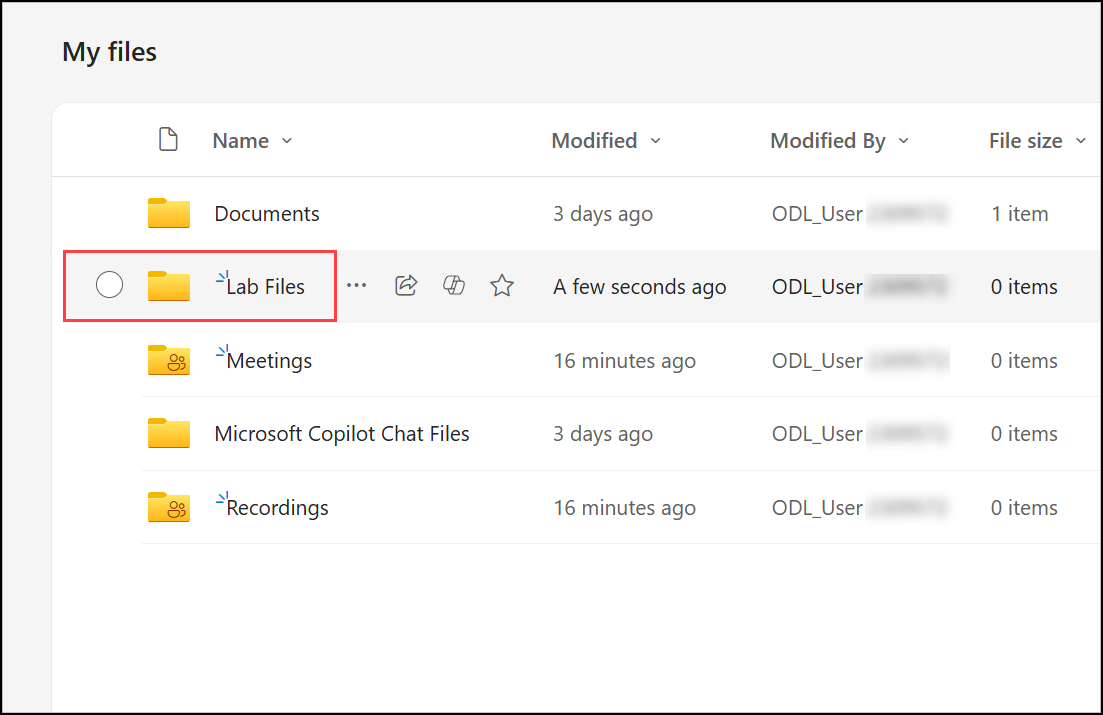
- Verify that the Lab Files folder is created, then open it.
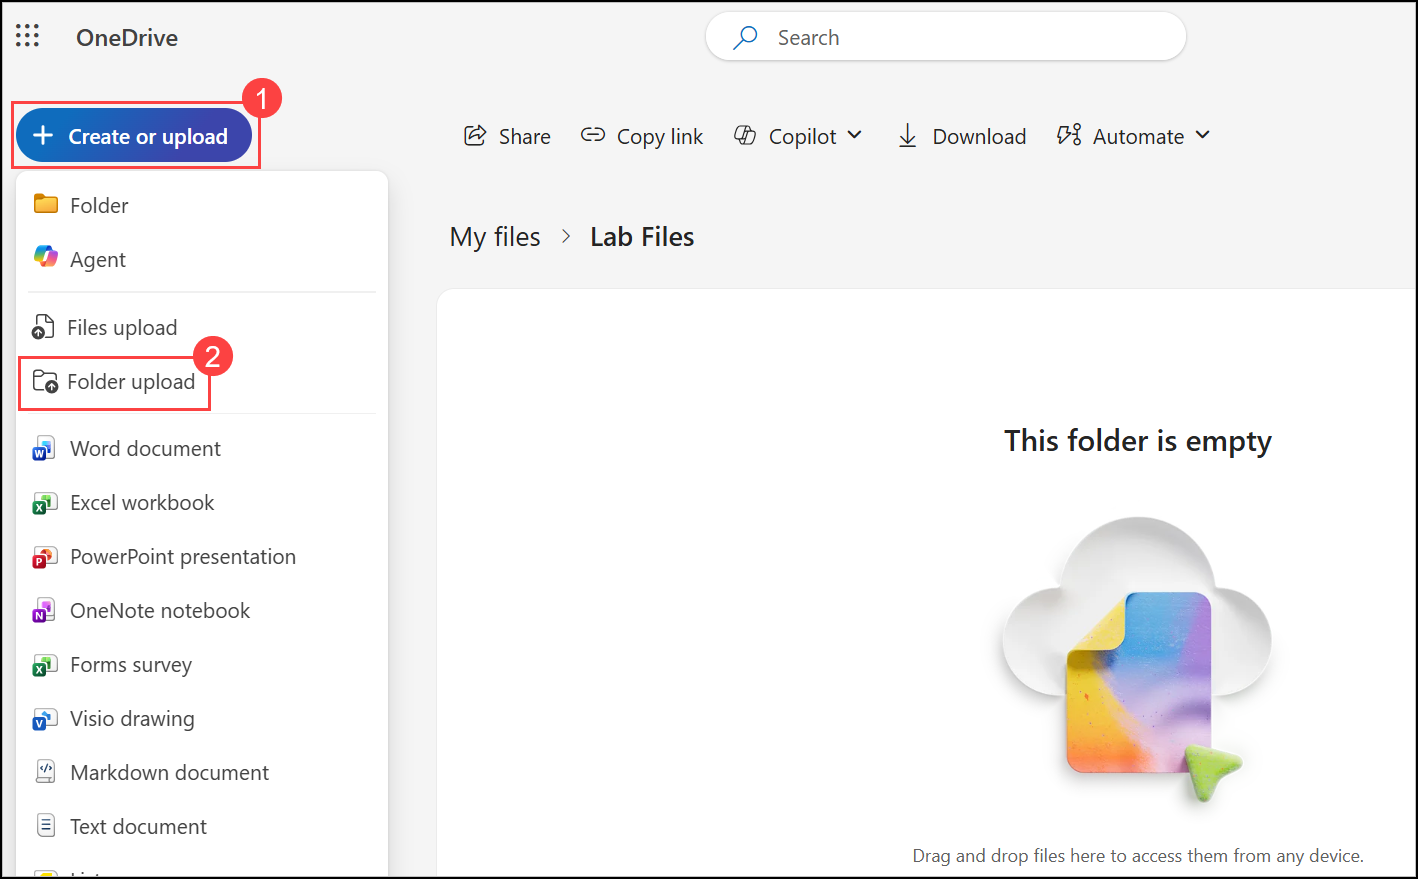
- Inside Lab Files, click Create or upload (1) and select Folder upload (2).
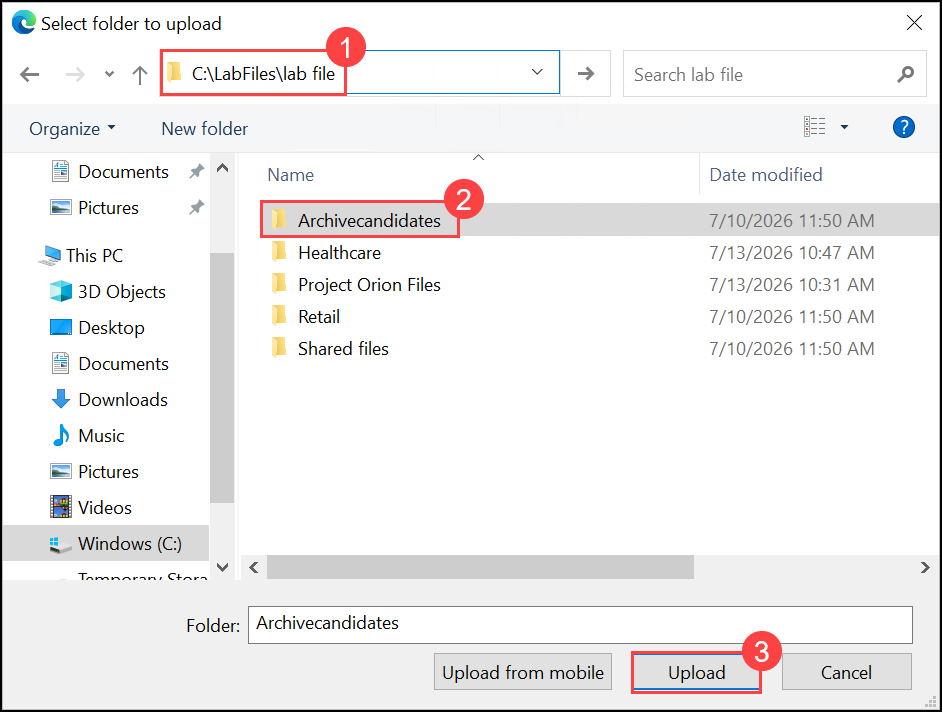
- Browse to
C:\LabFiles\lab file(1), select Archivecandidates (2) and click Upload (3).
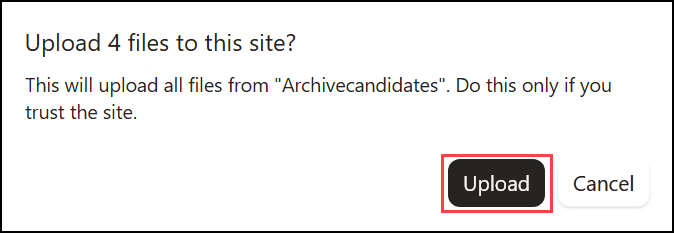
- When the browser asks Upload 4 files to this site?, click Upload.
- Repeat steps 7–9 for the Healthcare, Retail and Shared files folders.
Important
Note: Do not upload Project Orion Files here. It goes in My files (step 14).
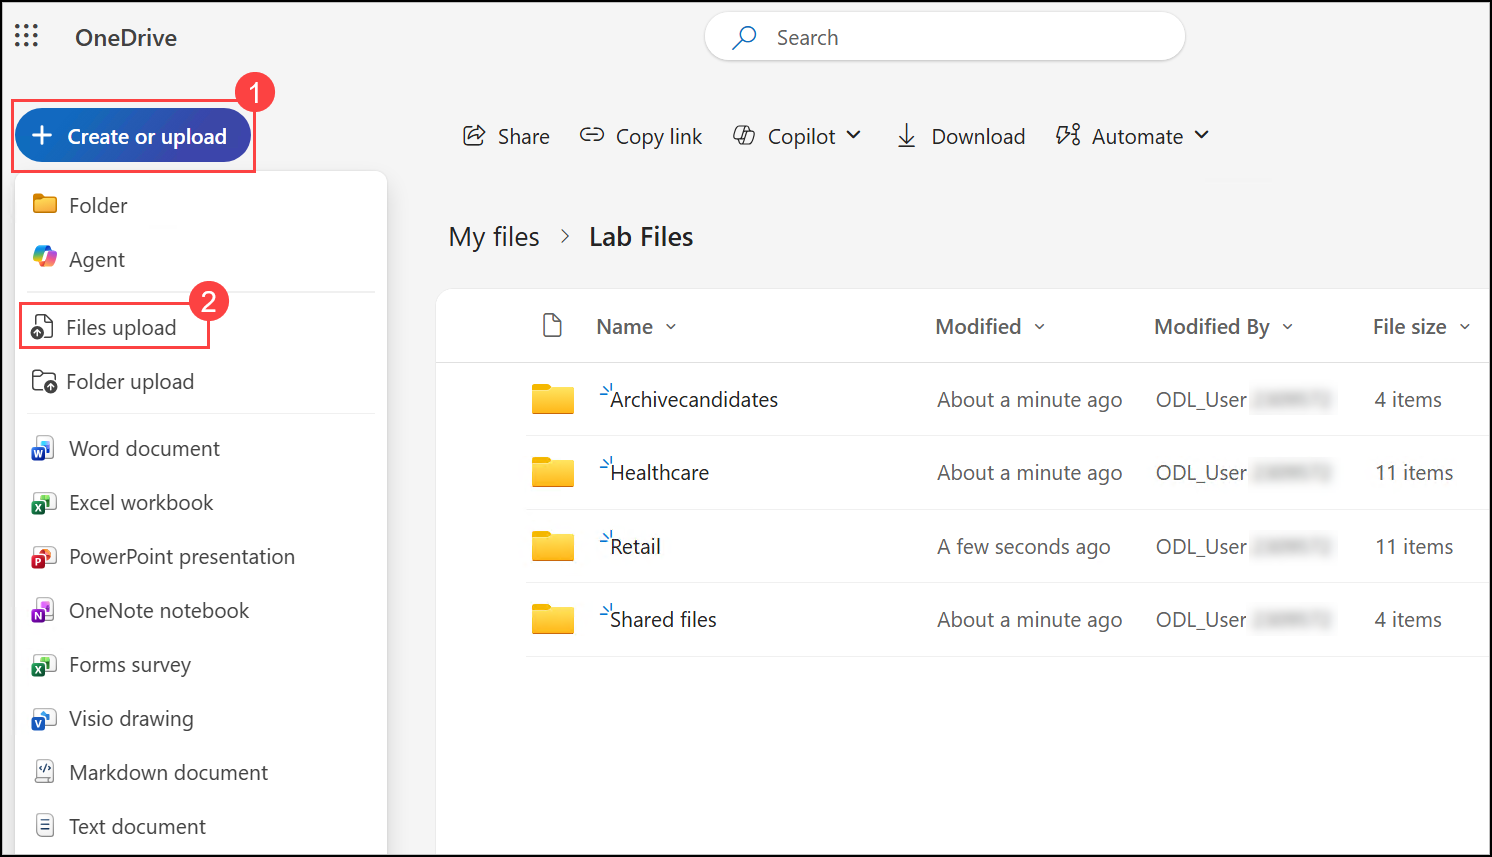
- Verify that the 4 folders Archivecandidates, Healthcare, Retail and Shared files are visible. Then click Create or upload (1) and select Files upload (2).
- Browse to
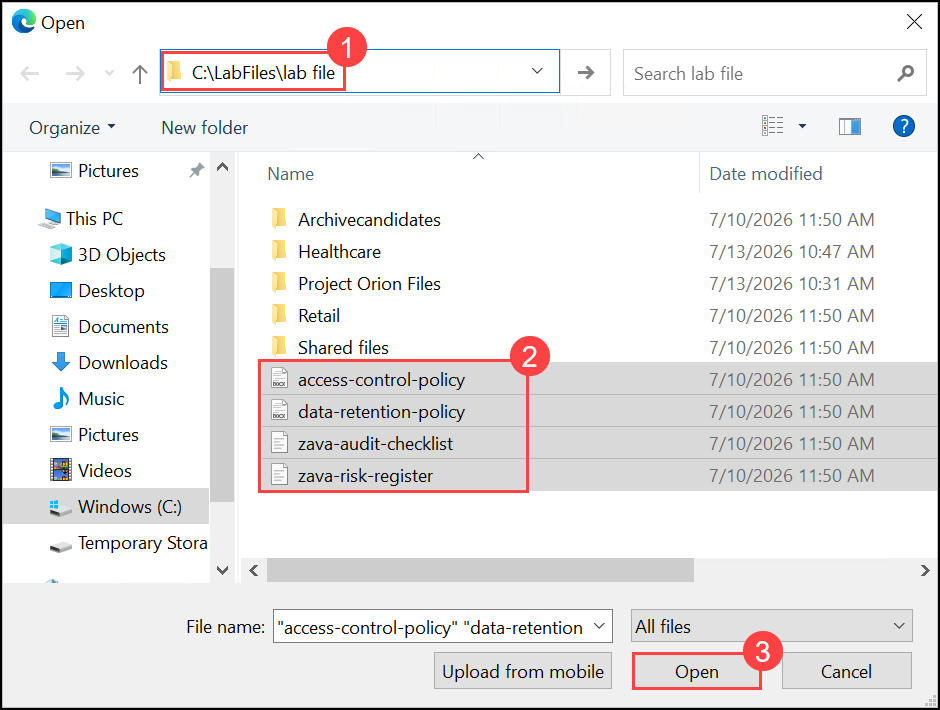
C:\LabFiles\lab file(1), select the 4 files (2) (access-control-policy,data-retention-policy,zava-audit-checklist,zava-risk-register) and click Open (3).
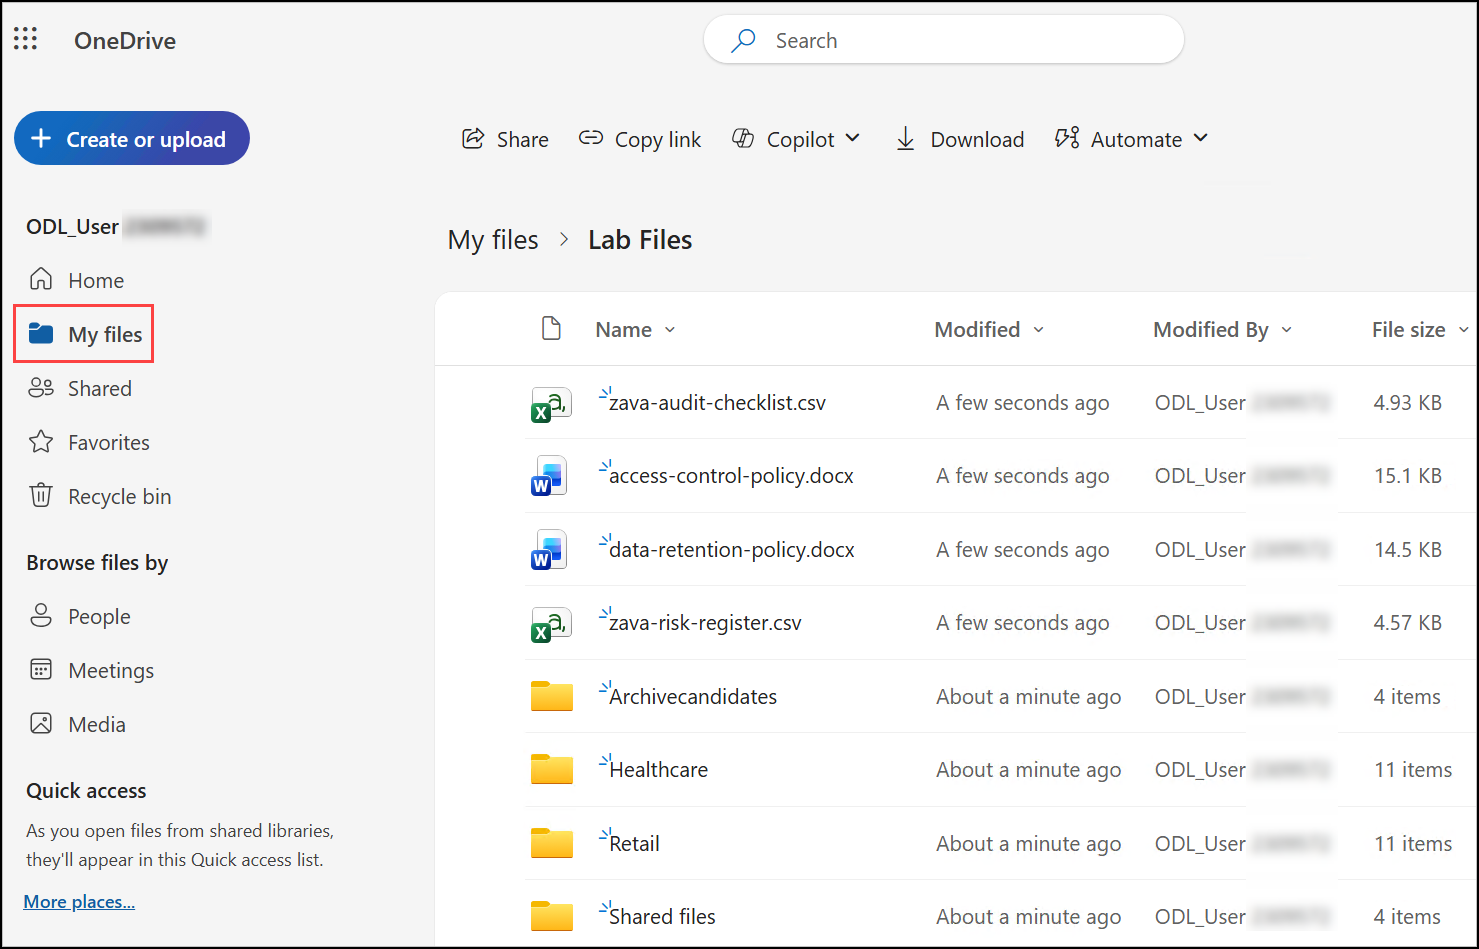
- Verify that Lab Files contains 4 folders and 4 files, then select My files to go back.
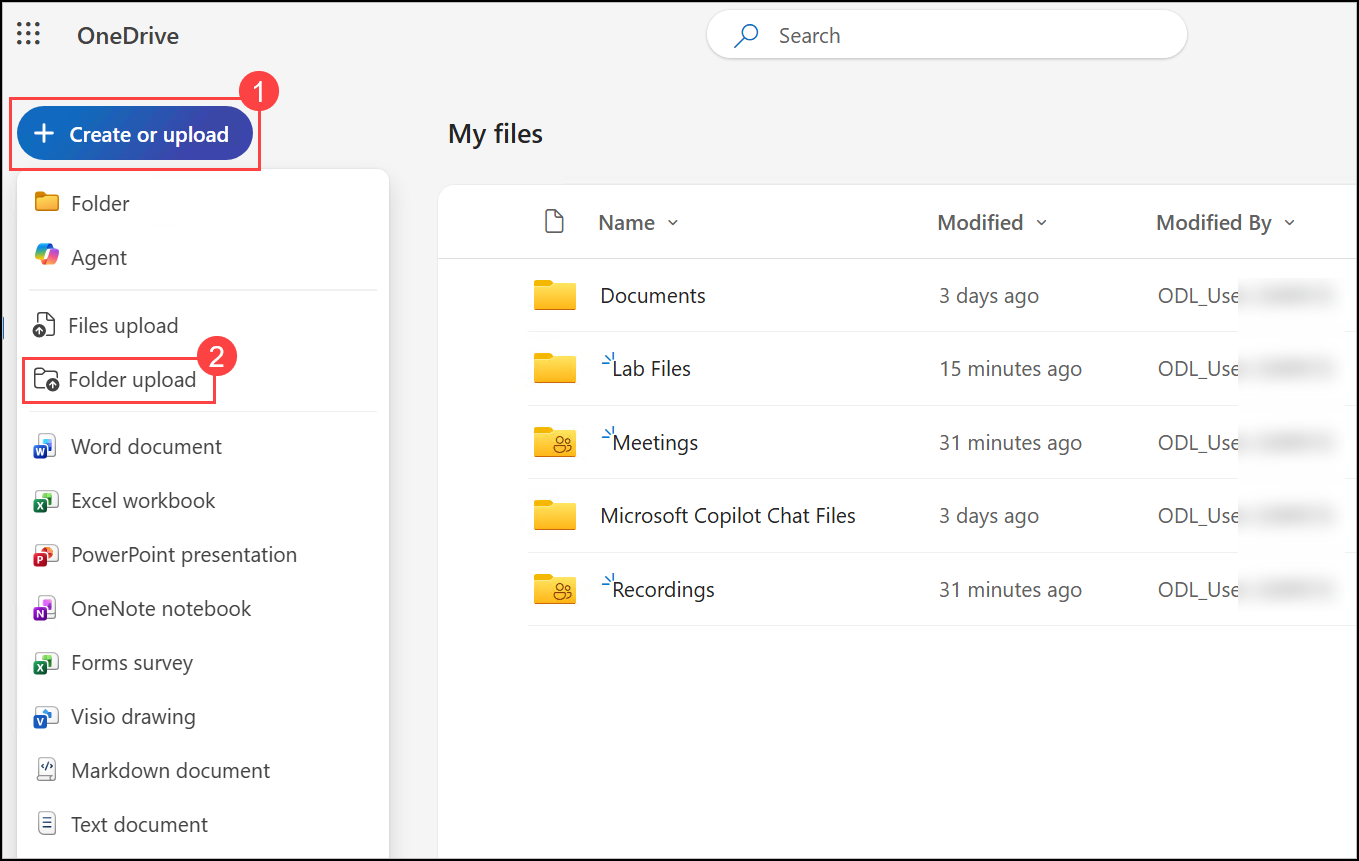
- In My files, click Create or upload (1) and select Folder upload (2).
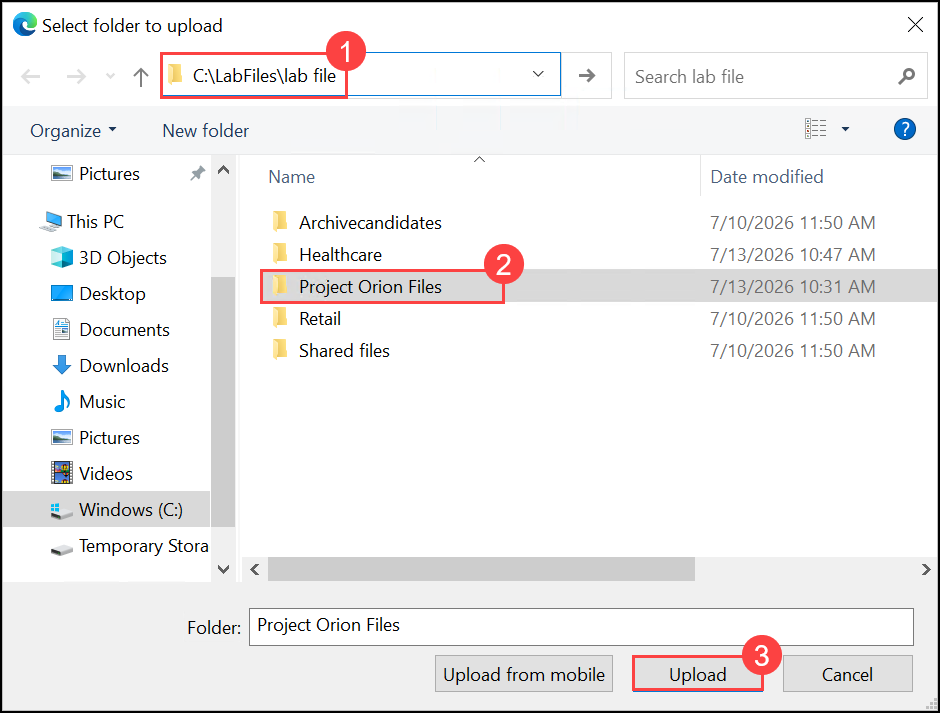
- Browse to
C:\LabFiles\lab file(1), select Project Orion Files (2) and click Upload (3). Confirm the upload prompt if it appears.
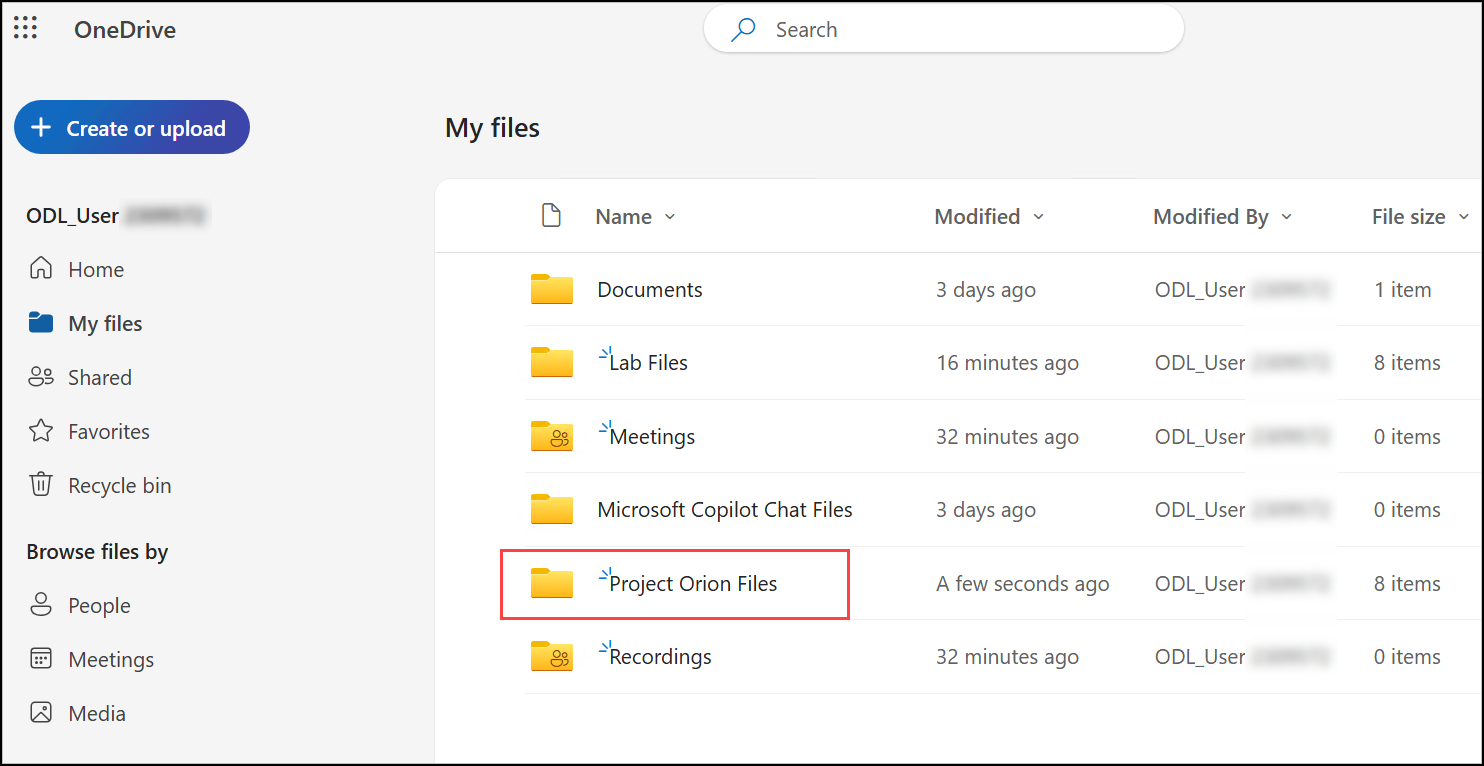
- Verify that Project Orion Files appears in My files with 8 items, and that Lab Files also shows 8 items.
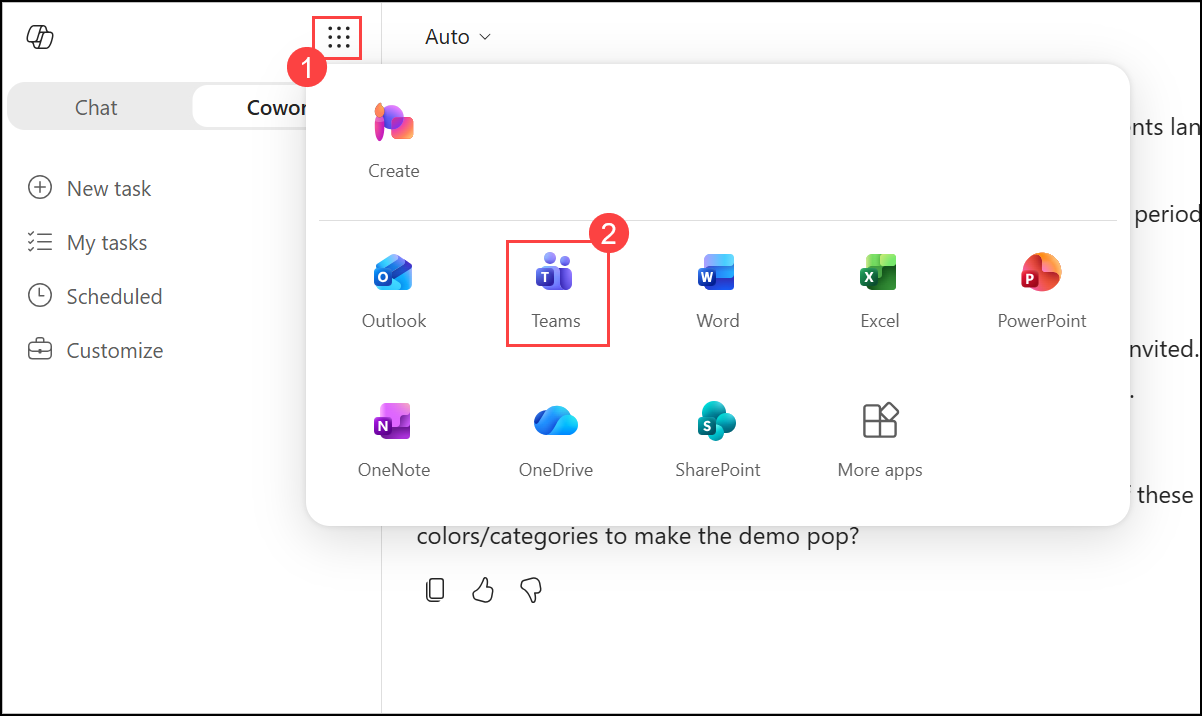
- Go back to the Microsoft 365 Copilot portal, open the app launcher (1) and select Teams (2).
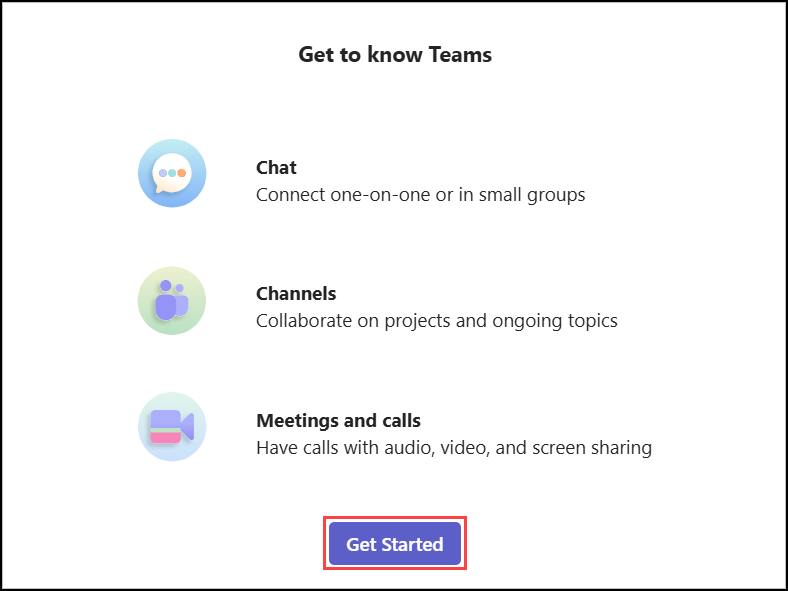
- On the Get to know Teams dialog, click Get Started. If a tab with a QR code opens, close it.
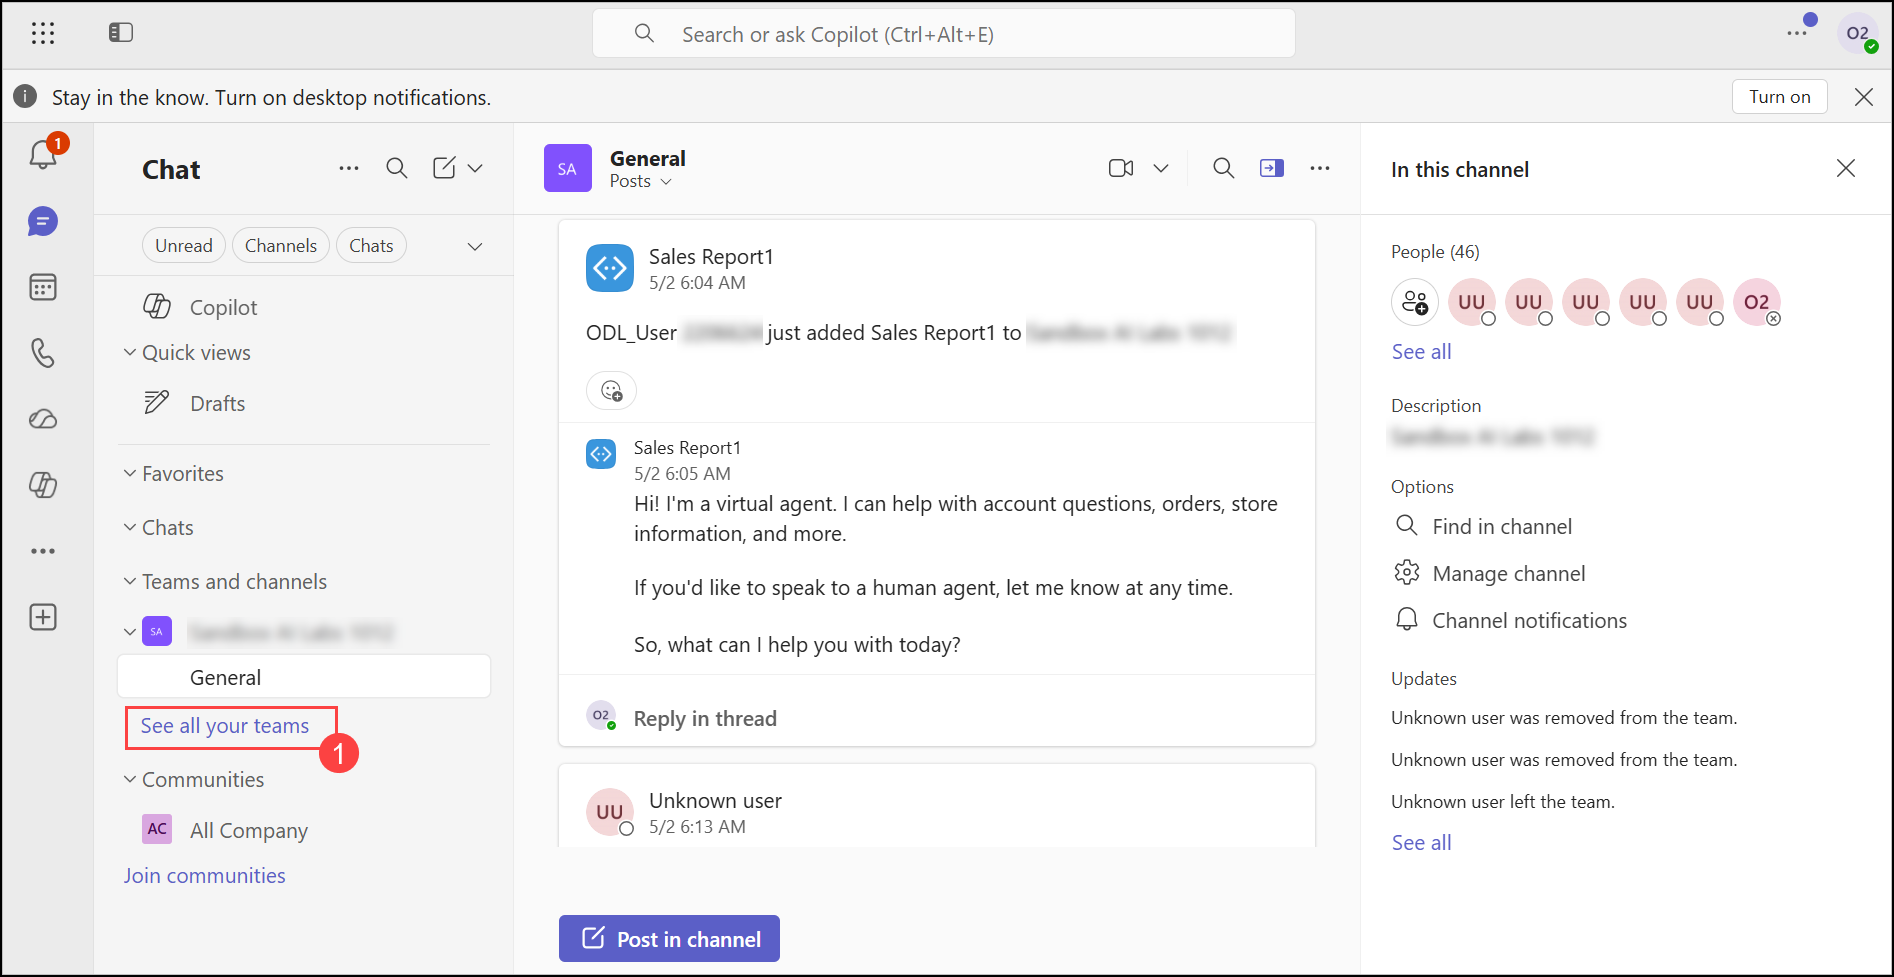
- In Teams, under Teams and channels, click See all your teams (1), then select Create team.
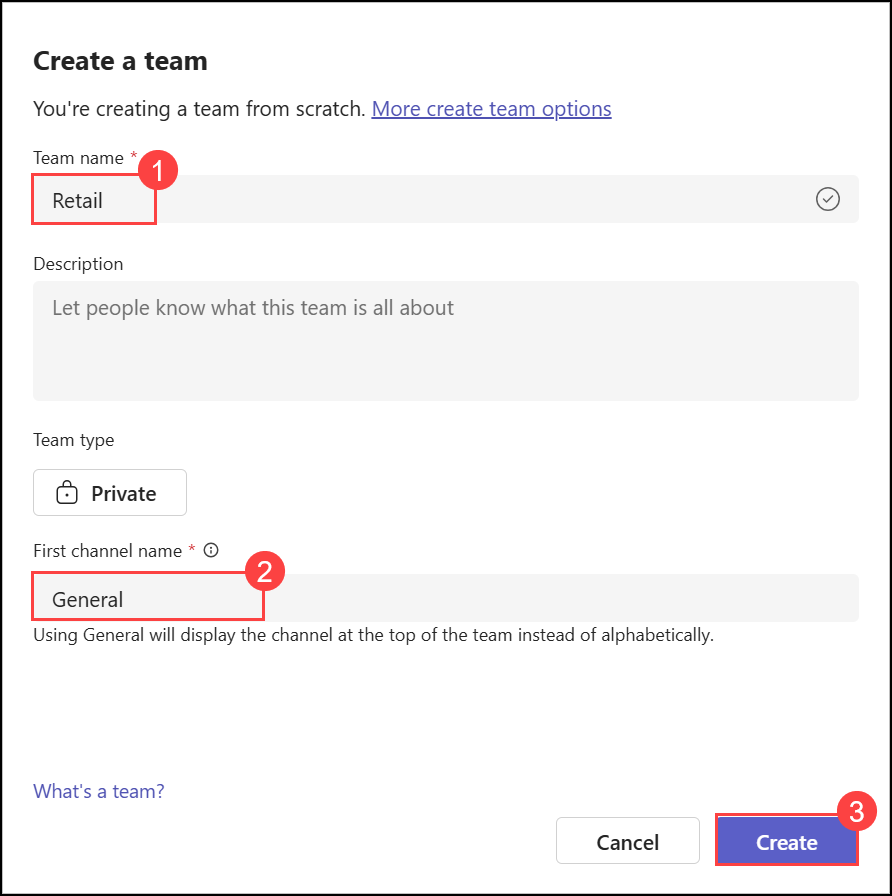
- Enter Retail (1) as the team name, keep General (2) as the first channel name and click Create (3).
- On the Add members to Retail page, click Skip.
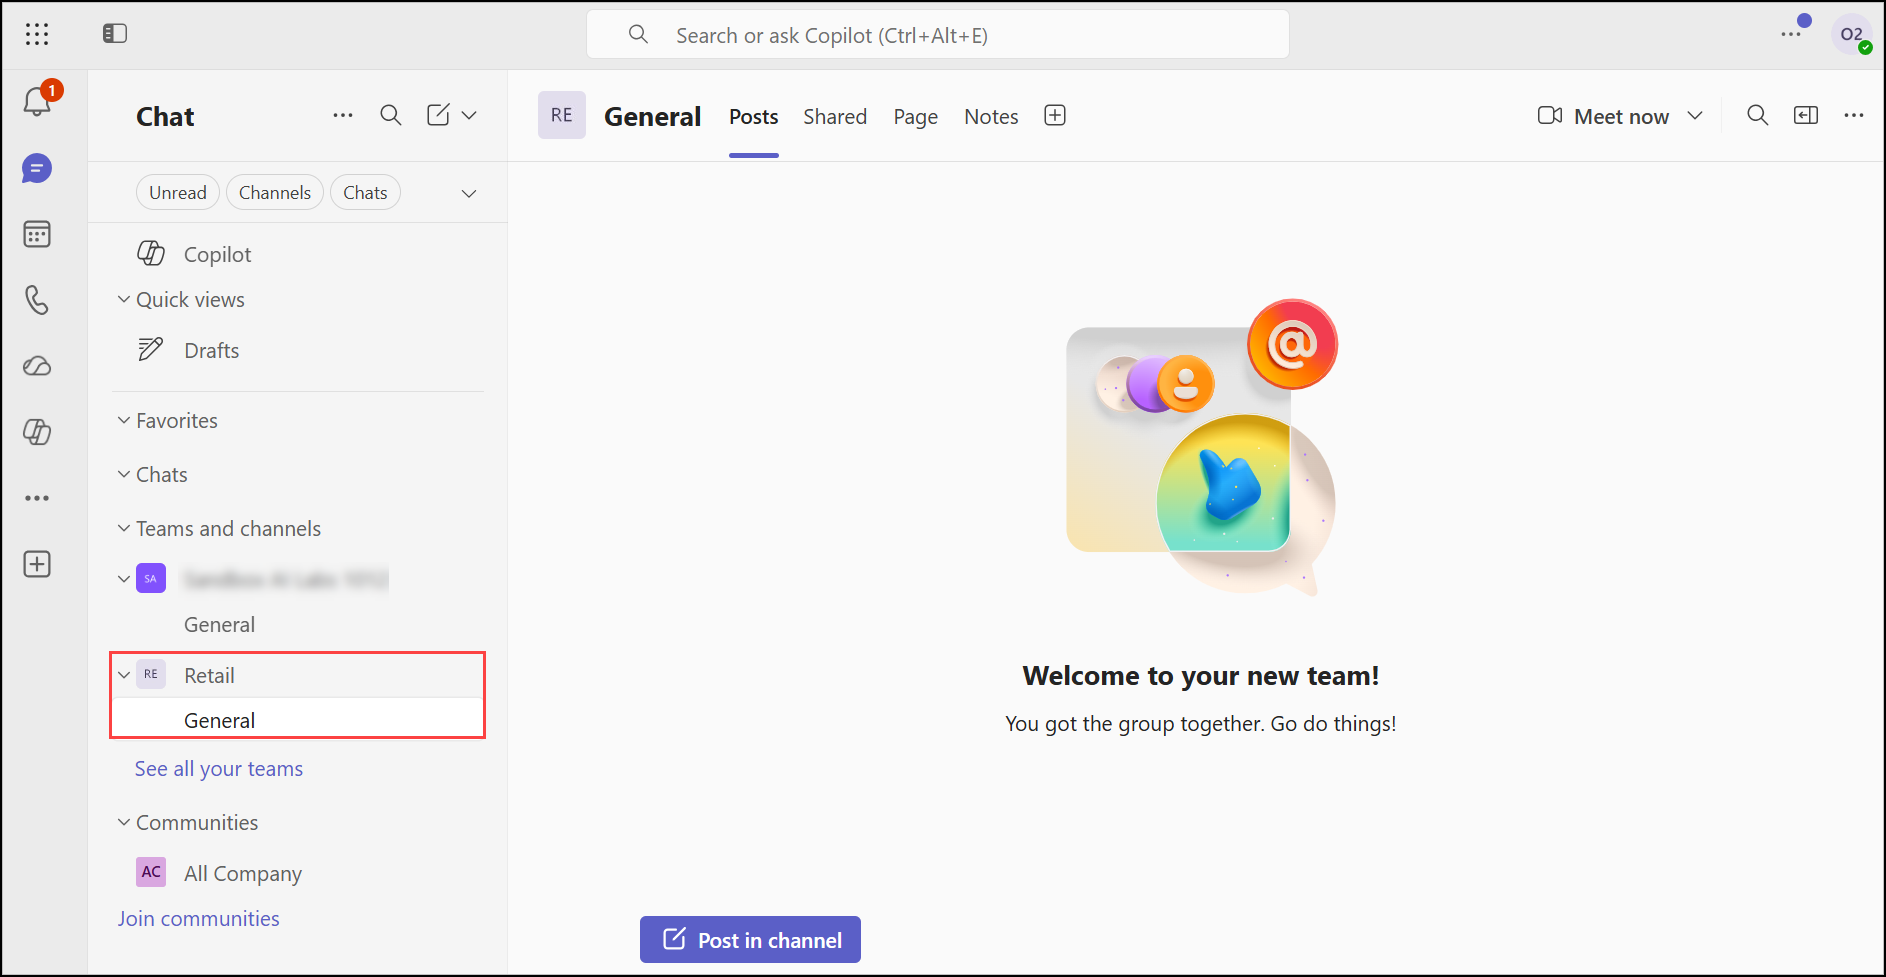
- Verify that the Retail team and its General channel appear in the left pane.
Task 5: Explore work context, task history and scheduled tasks
In this task, you see how Cowork surfaces your seeded data as work context, find a past task in your history, schedule a recurring task and browse task ideas.
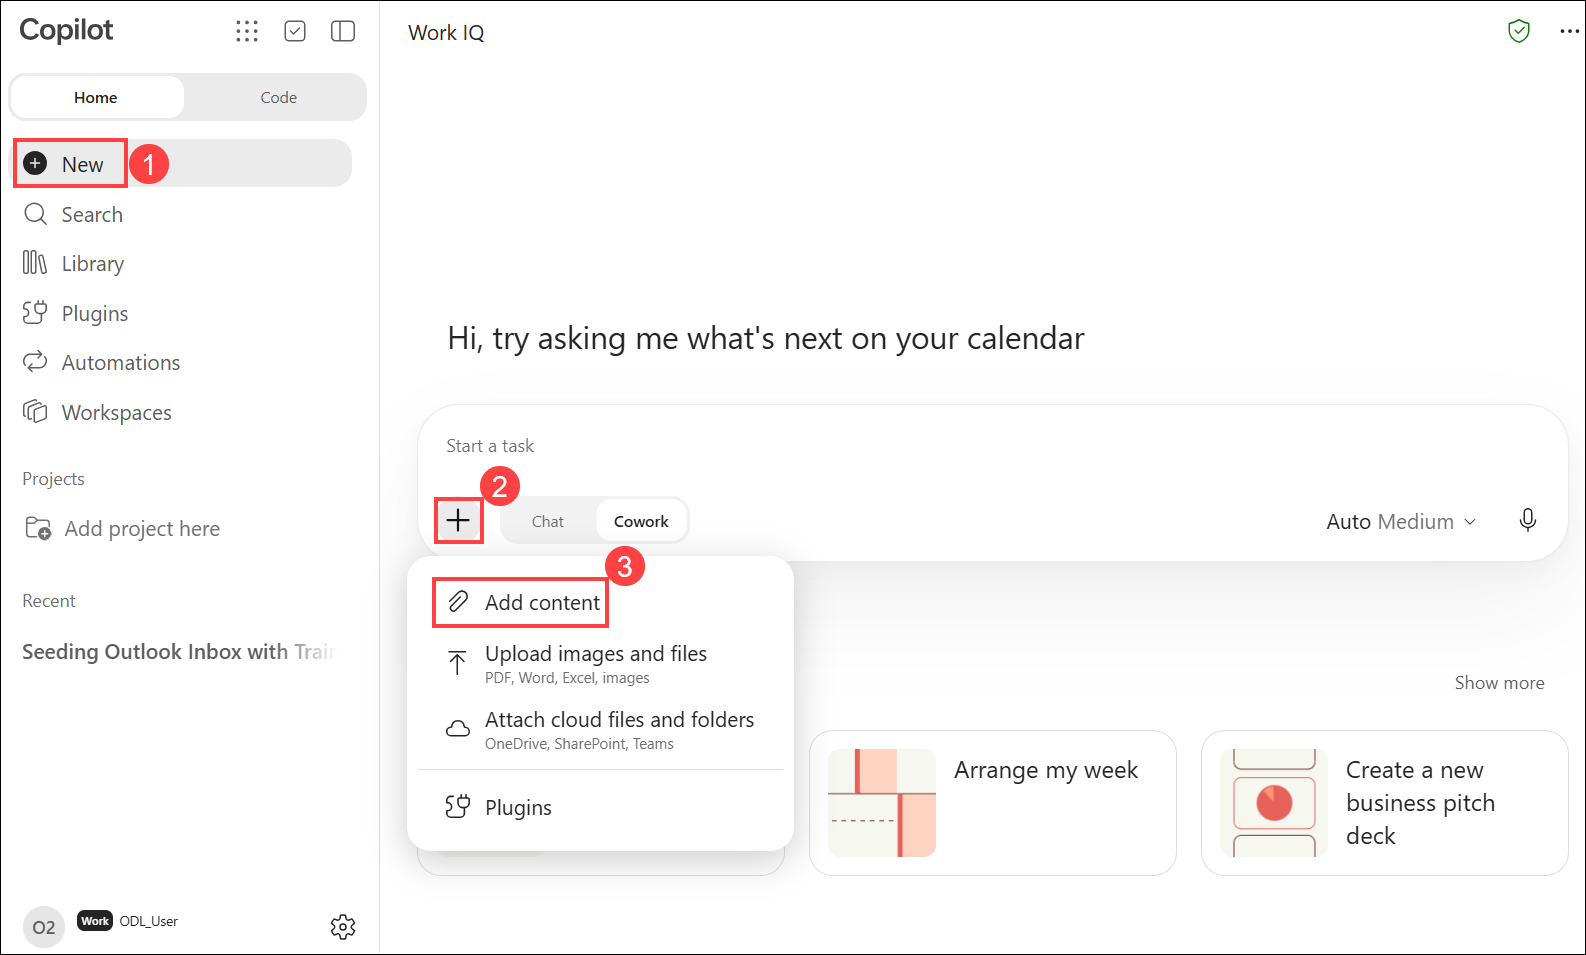
- To add content to a task, select New (1), then select the + (2) icon in the task box and choose Add content (3).
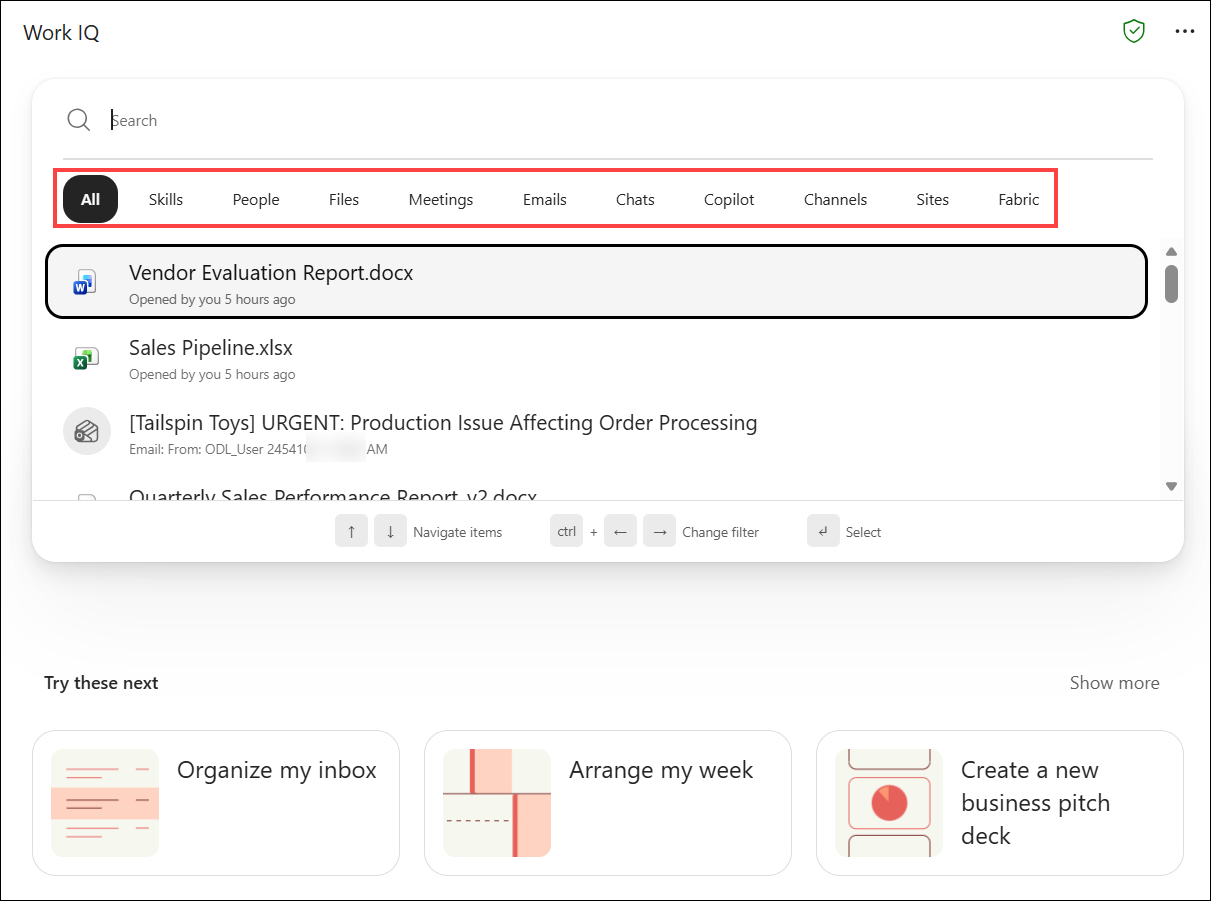
- Click through each tab (All, Skills, People, Files, Meetings, Emails, Chats, Copilot, Channels, Sites, Fabric) and review what it shows. You should recognize the emails and files you seeded in Tasks 2–4. Press Esc to close the picker.
- To search your task history, select Search in the left pane, type Seeding, and open the Seeding Outlook Inbox with Training Emails task. Confirm that the conversation, its steps and its output are all saved.
Note
Screenshot needed: Search pane showing the Seeding task result.
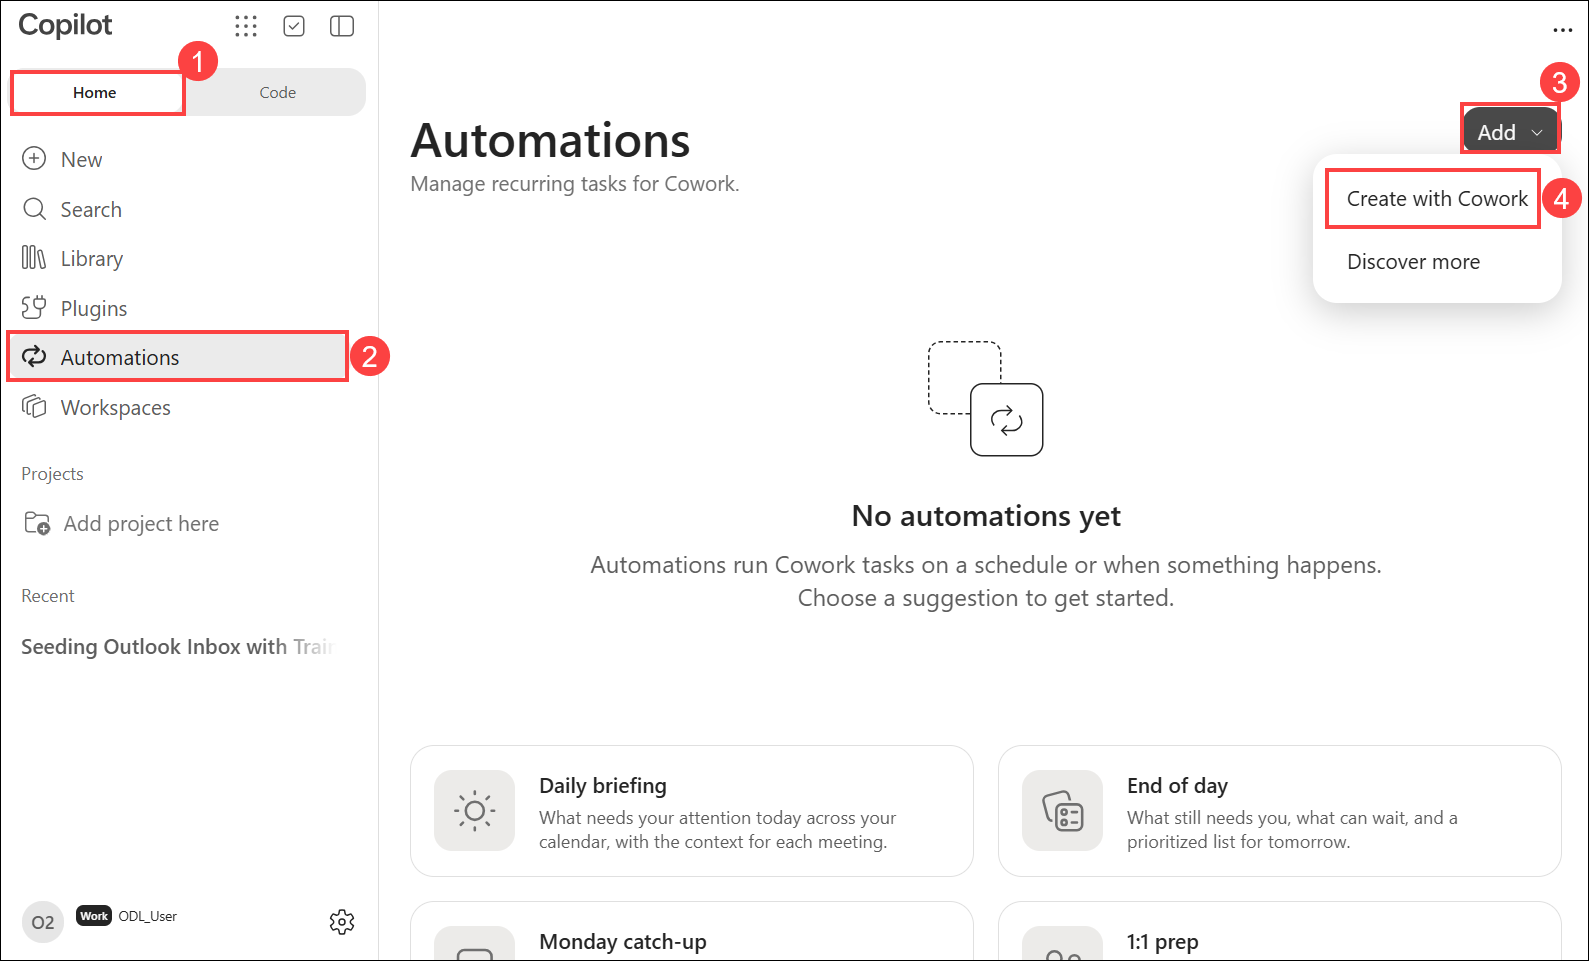
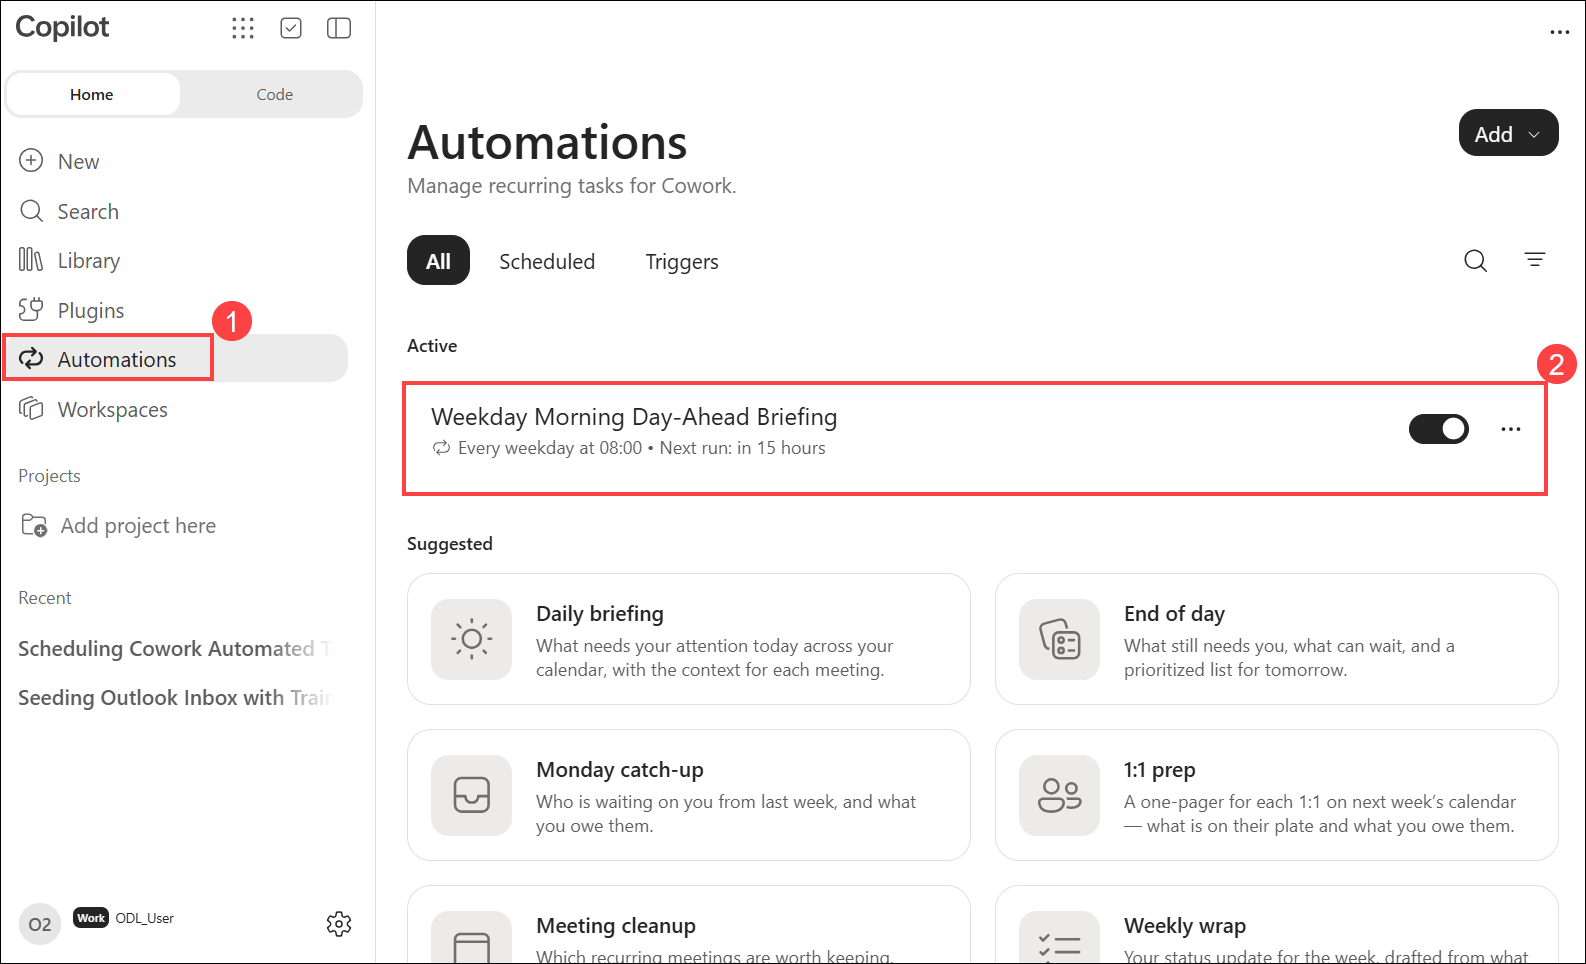
- To create an automation, select Home (1) > Automations (2), then select Add (3) > Create with Cowork (4).
- In the task box, enter the following prompt and click Send:
I want to set up a scheduled task. Briefly explain how scheduled tasks work in Cowork, then ask me a few questions to figure out what I'd like Cowork to do and when it should run.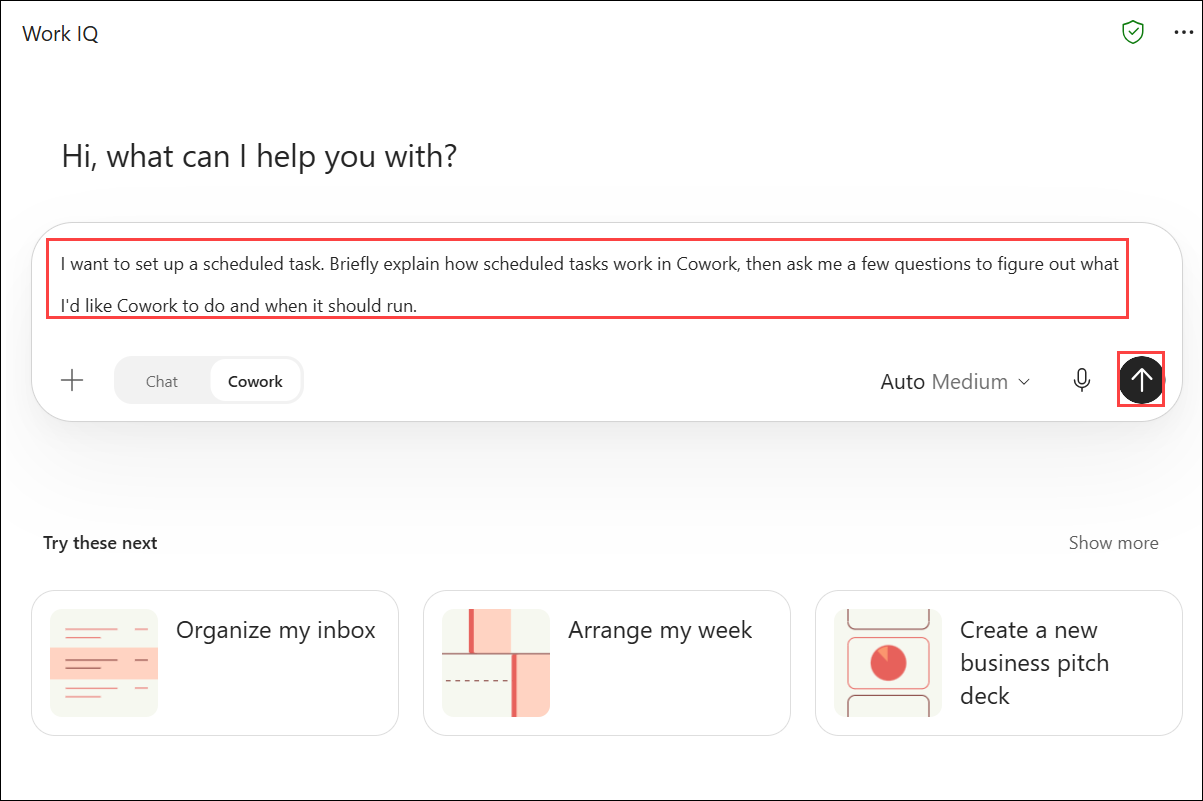
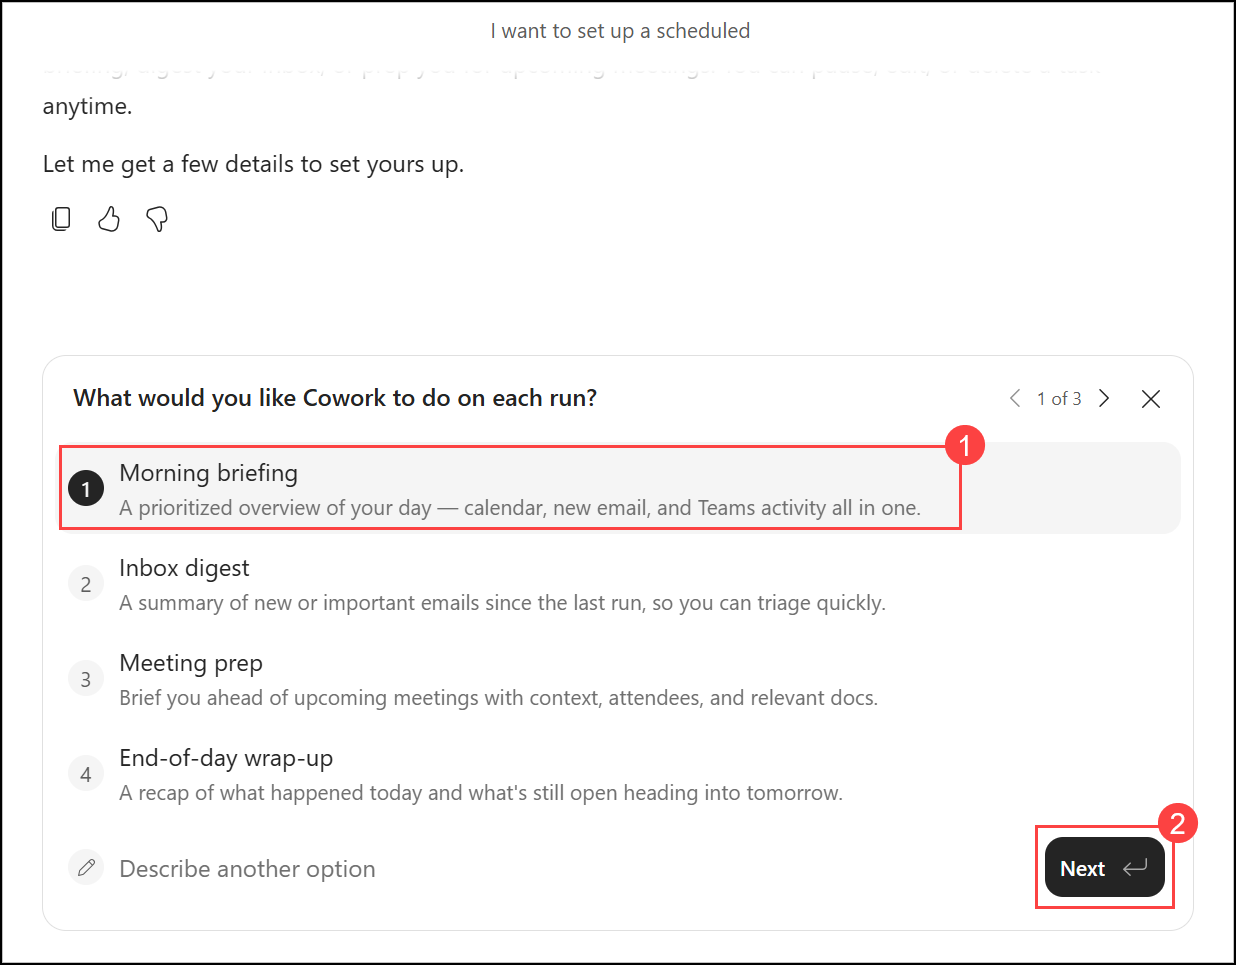
- Cowork explains scheduled tasks and asks questions. For What would you like Cowork to do on each run?, select Morning briefing (1) and click Next (2).
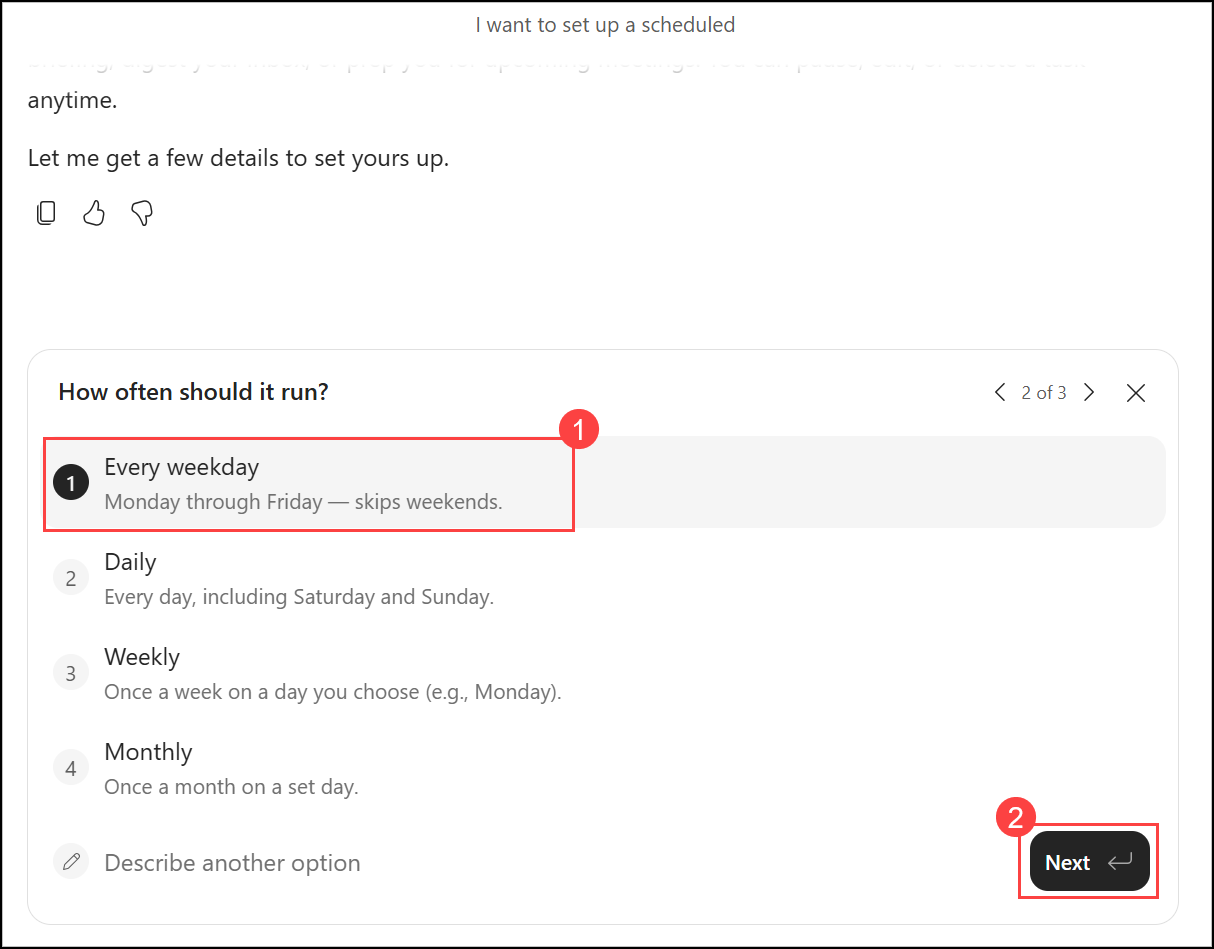
- For How often should it run?, select Every weekday (1) and click Next (2).
- Choose a run time and click Next.
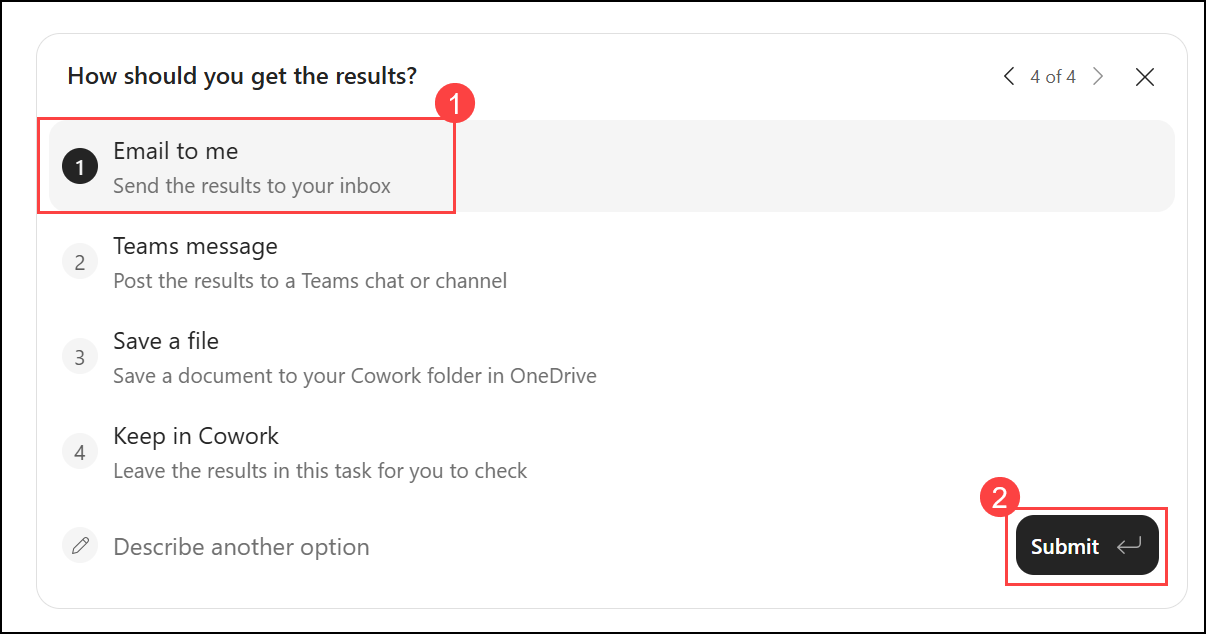
- For How should you get the results?, select Email to me (1) and click Submit (2).
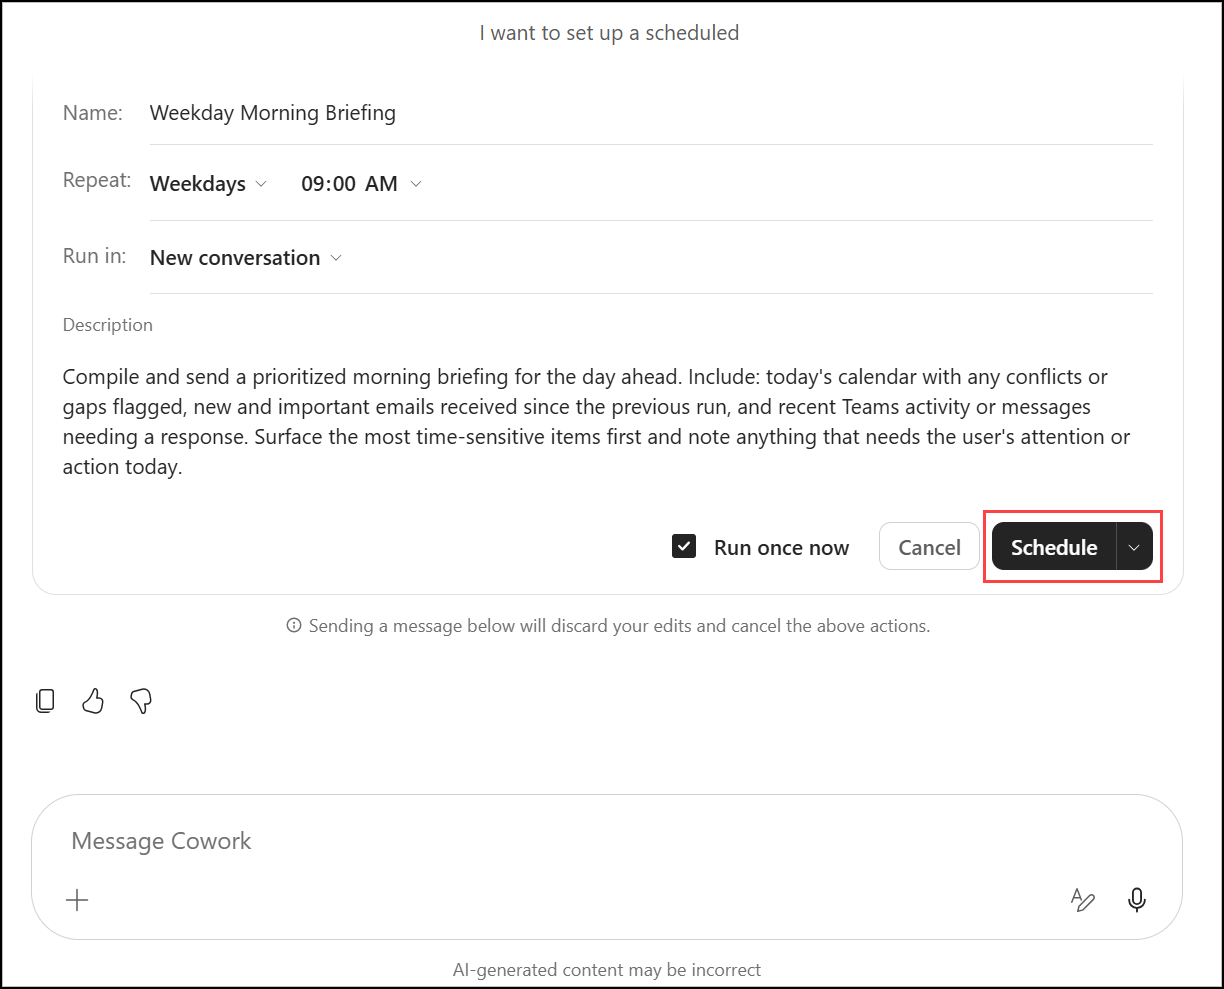
- Review the scheduled task card (name, schedule, description). Leave Run once now selected and click Schedule.
- Because Run once now is selected, Cowork prepares the first briefing email. On the Send email? card, click Always allow: Only to \<your address>. This lets the automation email you, and only you, without asking each time.
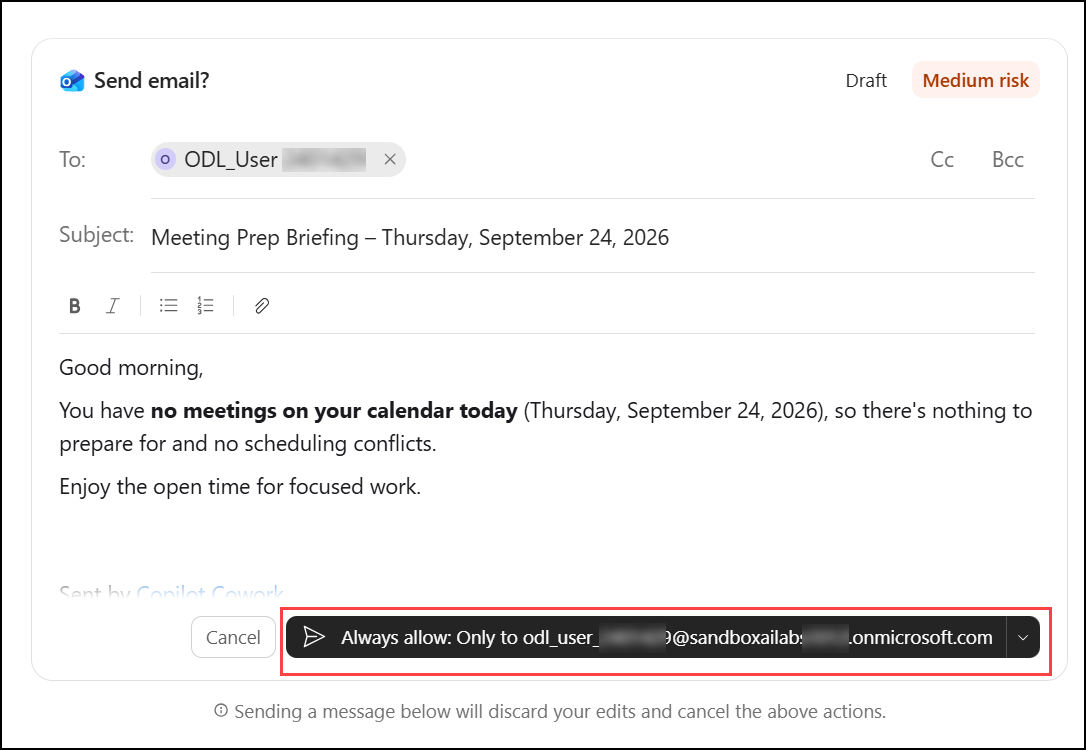
- Verify that Cowork processed the request and generated the briefing.
- Select Automations (1). Under All > Active, verify that your weekday briefing task (2) is scheduled and enabled.
Note
Note: Cowork names the task itself, so you may see Weekday Morning Briefing, Weekday Morning Day-Ahead Briefing or something similar. Check the schedule (every weekday) rather than the exact name.
- Select New (1), then select Show more (2) next to Try these next.
- Browse the task ideas, such as OOO handover pack, Calendar audit and Unread email triage. Several of them preview what you will build in the next labs.
- Search for Meeting briefing (1) and select the Meeting briefing (2) task.
- Click Use this task, read the prompt, then clear the task box (or press Esc twice) without running it.
Review
In this lab, you:
- Signed in to Microsoft 365, explored the Copilot Cowork home screen and saw how task ideas pre-fill ready-to-run prompts
- Explored the Plugins page and the options for adding skills
- Generated sample emails and calendar events in Outlook using Cowork
- Uploaded sample files to OneDrive and created a team and channel in Microsoft Teams
- Explored the + menu and the work-context sources available to a task
- Searched your task history, created a recurring scheduled task and browsed task ideas